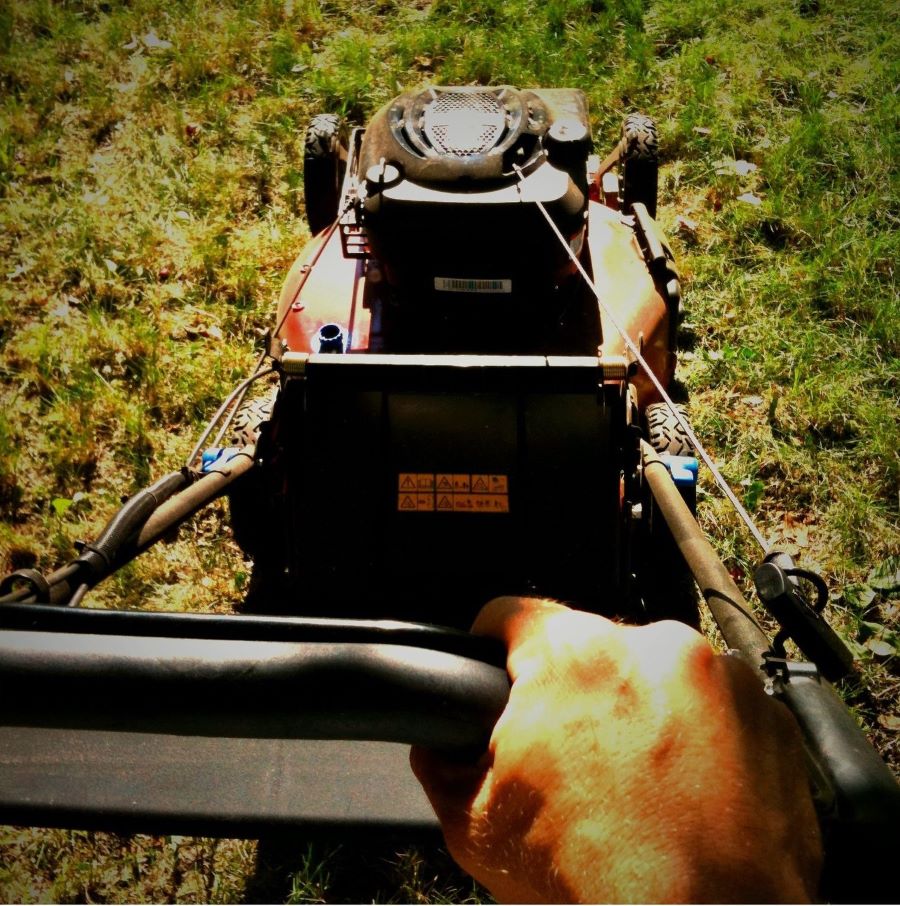
Black+Decker lawnmowers are of great utility for many homeowners. However, if you frequently use a lawnmower, chances are that you may run into issues related to the cutting and drive performance at least once in your lifetime. If such problems arise, here’s what you should do.
Black Decker lawnmower drive & cutting problems:
If a Black+Decker lawnmower cuts uneven or irregular patches of grass, start by checking its blades first. Make sure their edges are sharpened, are correctly installed, and are free from underlying debris in the spindle. Also, ensure that the mowing deck is leveled horizontally. If your lawnmower doesn’t move forward, check the drive belt that may have worn out and rests loosely on the pulley. If the mower vibrates excessively, check for missing engine mounting bolts and loose fasteners.

To learn more about fixing a Black+Decker lawnmower on your own, please check the following sections.
Contents
- 0.1 Black+Decker Lawnmowers: Troubleshooting Cutting Problems
- 0.2 Black+Decker Self-Propelled Lawnmowers: Troubleshooting Drive Problems
- 1 Drive & Cutting Troubleshooting table
Black+Decker Lawnmowers: Troubleshooting Cutting Problems
When it comes to lawnmowers, a variety of issues may arise, particularly related to the cutting blades or the drive mechanism. Here are the most commonly occurring problems and how to fix them:
1. Lawnmower doesn’t cut straight.
The most likely reason could be a misalignment of the wheels, which can result in a crooked cutting path. Additionally, worn or damaged blades can cause the lawnmower to veer off course.
Here’s how you can fix the problem by locating the exact source:
– Wheel alignment:
Examine the wheels to ensure they are aligned with their axles. If play exists between the axle and the wheel, it may wobble while mowing, affecting the cutting pattern. Ensure you tighten the mounting bolts or contact a professional if the play still exists.
– Blades:
Examine the blades for any signs of wear, damage, or bluntness. Visual inspect if they require any sharpening. In the case of blunt edges, the blades need to be sharpened with a grinding machine. If not available, a hand file can also be used to sharpen dull edges.
Note that frequent mower usage in dusty conditions can cause the blades to go blunt more often. After sharpening the blades, it is important to check the blade balance by balancing it at its center. You can also buy a simple blade balancing tool to help you determine if any imbalance exists.
Note that dynamic imbalances in the blades can produce excessive vibrations. Prolonged usage of such blades is detrimental to the pulleys, spindles, and mowing deck.
– Deck:
Park the lawnmower on a level surface and measure the deck’s height at various points. If the deck is not level, adjust the deck accordingly using the adjustment levers or knobs provided. You may use an inclinometer to determine precisely if the deck is at a horizontal level or not.
2. Lawnmower cuts uneven grass patterns?
If you observe that some areas of the grass are being cut shorter or higher than the surroundings, it may be due to uneven terrain, unadjusted deck height, or damaged blades.
Troubleshooting steps
- Deck Height: Set the lawnmower’s deck height according to the recommended guidelines in the manual. If the deck’s too low, it can scalp the grass instead of trimming it evenly.
- Blades: Check the blades to see if they require sharpening. Blades that have blunt edges often cut such uneven patterns.
If you own a self-propelled lawnmower, I recommend avoiding using it on rocky or bumpy terrains. This can inflict damage to the blades as well as the mowing deck. For such applications, riding lawnmowers should be preferred.
3. Lawnmower doesn’t cut at all?
When a lawnmower fails to cut at all, the reason can be blade obstruction, engine problems, or drive belt issues. Here are some steps that you can try doing on your own.
Troubleshooting Steps
- Safety levers: The first thing to do is check if you’re following the correct starting procedure for your machine. Most lawnmowers must start the engine by pressing the brake lever. For more precise instructions, you can consult the owner’s manual.
- Blade and deck: Turn off the lawnmower and carefully inspect the blades and cutting deck for any stuck debris or grass clipping that might be jamming the blades from rotation.
- Drive belt: Inspect the drive belt for any signs of damage or looseness. Tighten or replace the drive belt as needed ensuring that it wouldn’t slide off the pulley when rotating.
- Engine: If the lawnmower’s engine doesn’t start or run smoothly, check the spark plug, carburetor, and air filter. Clean these components thoroughly to ensure the engine starts and turns the blades.
Black+Decker Self-Propelled Lawnmowers: Troubleshooting Drive Problems
Black+Decker self-propelled lawnmowers are maneuverable, generally do not require much maintenance, and are easier on the pocket than riding lawnmowers. Some of the most common issues that are likely to occur in these machines are:
1. Self-Propelled Lawnmower doesn’t go forward?
In case your lawnmower is not going forward, there can be a potential drive belt issue or wheel or axle problems. You can follow the procedure mentioned below in the exact order to identify the root cause.
– Brake engagement:
You should check this initially before making any repairs. Some lawnmowers have a safety feature where the brake needs to be fully disengaged to allow forward movement. Make sure the brake lever is fully pressed.
After this step, if the problem isn’t fixed, move to the next step.
– Damaged V-belt:
The V-belt, also known as the drive belt, connects the drive shaft to a pulley that drives the wheel assembly. The teeth on the drive belt can wear out after prolonged usage, or the belt may undergo fatigue and thermal creep. As a result, it tends to become loose and lowers the power transfer to the wheels, thus making the lawnmower immobile.
To examine the belt, tilt the mower to its side and remove the mowing deck. The belt is located underneath the deck. Check its teeth for signs of damage and fatigue. Purchase a new drive belt online or from a local dealer. If you do not know the correct type, contact the manufacturer to get the exact part number.
If you aren’t familiar with assembly and disassembly, I recommend hiring a mechanic.
– Broken control cable:
It is possible that the control cable breaks or is misaligned, which causes the self-propel function to cease working. Inspect the cable while inspecting the drive belt to determine if it’s stuck. Try adjusting it manually or lubricating it with WD-40 to see if it works.
If it does not move and looks rusted, replace it.
– Transmission pulley:
The transmission pulley engages the wheel assembly via the V-belt. Sometimes, the slots in the pulley can get damaged, or the pulley can get misaligned along its rotational axis. In this case, you might need to replace the pulley if it’s damaged. If it’s loosely attached, tighten its mounting bolts properly.
– Engine or throttle:
If the engine is not generating enough power or the throttle is not adjusted correctly, it can affect forward movement. You should inspect your carburetor and see if it isn’t clogged with fuel deposits.
2. Self-Propelled Lawnmower throttle not working?
The throttle cable controls the throttle function, thus affecting the forward speed in self-propelled lawnmowers. Typical problems with the throttle cable include the cable being stuck or damaged, the lever being broken or the throttle function not working.
If such problems occur, here’s what can be done:
Troubleshooting Steps
- Throttle control lever: Examine the throttle control lever to see if it appears jammed or broken. Sometimes, lubricating the lever with motor oil can fix the issue.
- Throttle cable damage: Inspect the throttle cable and see if it engages freely. If it is jammed, try adjusting it manually or try lubricating it with some WD-40. You should see if there are signs of fraying or damage. In this case, you should get a new cable.
- Carburetor-Related Issues: If the carburetor gets plugged with bad gas or stale fuel, it affects the engine’s operating point. This causes it either to overrev or stall. Hence, you should thoroughly inspect the carb jets, remove any stuck debris, and clean it.
3. Self-Propelled Lawnmower vibrates excessively?
Excessive vibration in a lawnmower can indicate underlying issues that must be addressed. Excessive vibration affects the handling of your device and thus reduces the operator’s comfort level.
Troubleshooting steps
- Crankshaft: A bent or damaged crankshaft can lead to excessive vibrations in the lawnmower. This inspection needs to be done by a professional. If identified, it may require a total engine replacement.
- Loose fasteners: Check the engine mounting bolts and see if they aren’t loose. Ensure the blower housing is secured tightly and no bolts are missing/loose.
4. Self-Propelled Lawnmower is leaking oil?
Before fixing the issue, it is important to locate the source of the oil leak. Common locations to check include the engine’s head gaskets, oil filter, and drain plug.
Fixing an Oil Leak:
- Avoid Overfilling: Most oil leaks are spills due to overfilling the tank with oil. Whenever you fill the oil tank, fill it three-quarters of the level marking instead of filling it up to the top level.
- Plugs & Filters: If you find any loose components, such as the oil cap, drain plug, or oil filter, tighten them securely. A loose component can cause oil to leak. However, be cautious not to overtighten and damage the threads.
- Gasket Rings: If the oil leak site is the engine block, your gaskets are probably damaged. Fixing the gaskets requires opening the cylinder head. If this is your first time doing this, I recommend getting professional assistance.
Drive & Cutting Troubleshooting table
1. Lawnmower Cutting Problems
S# | Problem | Causes | Fixes |
1 | Lawnmower doesn’t cut straight | a. Dull blades b. Tilted mowing deck | a. Sharpen the blades using a grinder or a bench file. b. Using a level, ensure the deck is perfectly horizontal. |
2 | Lawnmower cuts uneven grass | a. Blade vibrations b. Faulty spindle assembly | a. Ensure the blade isn’t loose. b. The blade should be balanced at its center. If not, it should be replaced. c. The spindle bearing should be replaced if it is faulty. |
3 | Lawnmower doesn’t cut at all | a. Disengaged blades b. Debris/Grass clippings c. Worn-out belt | a. Use the blade engagement lever. b. Clean the spindle from debris and grass clippings. c. Replace/adjust the blade belt as needed. |
2. Lawnmower Drive Problems
Riding Lawnmowers
S# | Problem | Causes | Fixes |
1 | Lawnmower doesn’t move forward | a. Transmission disengaged b. Faulty drive belt c. No hydraulic fluid | a. Use the transaxle lever to engage the drive. b. Adjust/replace the drive belt as needed. c. Replenish transmission fluid. |
2 | The lawnmower has a loose steering | a. Loose tie rod ends b. Damaged steering bushing | a. Tighten and lubricate tie rod ends. b. Inspect and replace the bushing at the end of the steering shaft. |
3 | Lawnmower vibrates excessively | a. Blade imbalance/wobbling around the center b. Damaged spindle bearing c. Missing engine mounts | a. Tighten and adjust the blade to balance about its center. b. Replace the faulty spindle bearing. c. Tighten the engine’s mounting by adding fasteners. |
4 | The lawnmower has a flat tire | a. Low air pressure b. Puncture by a sharp object | a. Purchase a puncture repair kit. b. Apply the puncture seal and inflate the tire again. |
Self-Propelled Lawnmowers
S# | Problem | Causes | Fixes |
1 | Lawnmower doesn’t move forward | a. Loose control cable b. Worn-out drive belt c. Debris locking wheels | a. Tighten the throttle control cable b. Adjust/replace the belt as necessary. c. Remove the debris from the wheels. |
2 | The lawnmower throttle not working | a. Defective throttle cable b. Clogged carburetor | The lawnmower throttle is not working |
3 | The lawnmower pull cord is stuck | a. Damaged spiral spring b. Damaged pull cord | Replace the damaged springs/pull cord. |
What can I do if my self-propelled lawnmower is stuck in reverse?
If your self-propelled lawnmower is stuck in reverse, check the drive belt or transmission pulley for any damage or misalignment. Adjust or replace these components as needed to ensure proper forward movement.
What’s the best way to sharpen a lawnmower blade?
To sharpen a lawnmower blade, make sure it’s balanced and sharp. Use a grinder or hand file for sharpening. Always check the blade balance after sharpening for better performance.
Blades are key to a good cut!
“Absolutely! Sharp blades are essential for an even cut. Thanks for the reminder, Lillie.”
I’ll be sure to follow these tips to keep my lawnmower in good shape.
Thanks, Roland! I hope these tips help you maintain your lawnmower in top condition for years to come. Good luck with your Black+Decker lawnmower!
Are there any safety precautions I should take when fixing my lawnmower?
When fixing your lawnmower, ensure the blades are sharpened, the drive belt is tight, and missing bolts are replaced. Check the mowing deck level for optimal performance.
How often should I replace the drive belt on my lawnmower?
For optimal performance, replace the drive belt on your lawnmower every 2-3 years or when it shows signs of wear and looseness. Regular maintenance ensures smooth operation.
Is it okay to use a self-propelled lawnmower on hills?
Yes, it is okay to use a self-propelled lawnmower on hills. Just ensure that the drive belt is in good condition to prevent any issues. Happy mowing!
Awesome video tutorials to guide us through the fixes.
Thank you, Josephine! I’m glad you found the video tutorials helpful. If you encounter any more issues, feel free to reach out for additional guidance.
I didn’t know the importance of checking the deck alignment.
Thank you, Jane. Checking the deck alignment is crucial for proper lawn care. It ensures even cutting and drive performance. I’m glad you found the information helpful.
This article is very informative, thank you!
Thank you, Doris! I’m glad you found the article informative. Let me know if you have any questions or need further assistance with your lawnmower.
Is it bad if my lawnmower vibrates a lot?
Excessive lawnmower vibrations may indicate loose engine mounting bolts or fasteners. Check these areas first to ensure a smoother operation.
I appreciate the troubleshooting steps provided in the article.
Thank you, Terra! I’m glad you found the troubleshooting steps helpful. Let me know if you need further assistance.
Will adjusting the deck height affect the cutting pattern?
Adjusting the deck height can affect the cutting pattern. Make sure the deck is leveled horizontally to ensure even cutting. Thank you for your question!
Great tips for keeping the lawnmower maintained.
Thank you, Adrian! I’m glad you found the tips helpful for maintaining your lawnmower. Let me know if you have any other questions or need further assistance.
How do I know if my lawnmower’s engine is running smoothly?
To ensure a smooth-running lawnmower engine, regularly check the blades for sharpness, the drive belt for wear, and engine mounting bolts for tightness. This maintenance will keep your Black+Decker lawnmower in top condition.
I’m glad I found this article, very helpful information.
Thanks for the positive feedback, Gary! I’m glad you found the information helpful. Let me know if you have any more questions or need further assistance.
Do you have any recommendations for a new lawnmower?
Regular maintenance is essential for lawnmower performance. Make sure to sharpen blades, check drive belt, and level mowing deck for optimal results.
What should I do if my lawnmower stops suddenly?
If your lawnmower stops suddenly, first check the blades, drive belt, and mower deck. Look for wear, obstructions, and leveling issues. These common problems can often be resolved by simple maintenance.
I never thought about checking the throttle cable for issues.
Thanks for reading, Phyllis! Checking the throttle cable can help address various lawnmower issues. Keep up the good work with maintenance!
Great advice for fixing lawnmower issues at home.
Thank you, Louise! I’m glad you found the advice helpful for fixing lawnmower issues at home. Let me know if you have any questions.