Curious about how to keep your lawn looking its best? Sharp mower blades are essential. Use a Dremel to sharpen your blade with our easy-to-follow Guide.
How to Sharpen Lawn Mower Blades with Dremel:
To sharpen lawn mower blades with a Dremel, first inspect, then remove and clamp them securely. Attach a sharpening stone or cylinder to the Dremel, set it to 2,500 rpm, and sharpen the cutting edges. Dull blades make grass-cutting difficult. Sharpening blades with a Dremel takes 5-10 passes.
Step into the world of efficient lawn maintenance. Learn how a Dremel can be your best ally in keeping your mower blades sharp. Don’t let dull blades hinder your lawn’s potential.
Contents
- 1 How to Sharpen Lawn Mower Blades with Dremel
- 1.1 ● Step 1. Get the needed tools
- 1.2 ● Step 2. Inspection of existing lawnmower blades
- 1.3 ● Step 3. Remove the center nut of the lawnmower blade carefully and clamp the blade
- 1.4 ● Step 4. Sharpen the blade with a Dremel tool
- 1.5 ● Step 5. Smoothen the edges and finish the blade
- 1.6 ● Step 6. Balance the blade and fix it back
- 2 Frequently asked questions:
- 3 Remarks
How to Sharpen Lawn Mower Blades with Dremel
● Step 1. Get the needed tools
Using the right tools will help you finish the sharpening much quicker. To do the job, you need the following tools:
- A pair of safety goggles and gloves.
- Wrench set
- Dremel
- Clamps
- Piece of wood
- A bench vise to clamp the blades
- Sandpaper
- A sharpening or polishing stone
● Step 2. Inspection of existing lawnmower blades
Before removing and inspecting the blade, you should disconnect the spark plug cables. This will ensure that the engine can not start unintentionally. You do not want to work on the blades without this safety measure. Also, turn the ignition off.
Remove the batteries or disconnect the main cable if you have an electric lawnmower. Apply the parking brakes so that the lawnmower stays stationary. If you have a platform, use it to raise the machine or incline it at an angle when removing the blades.
– The Necessity of Blade Sharpening
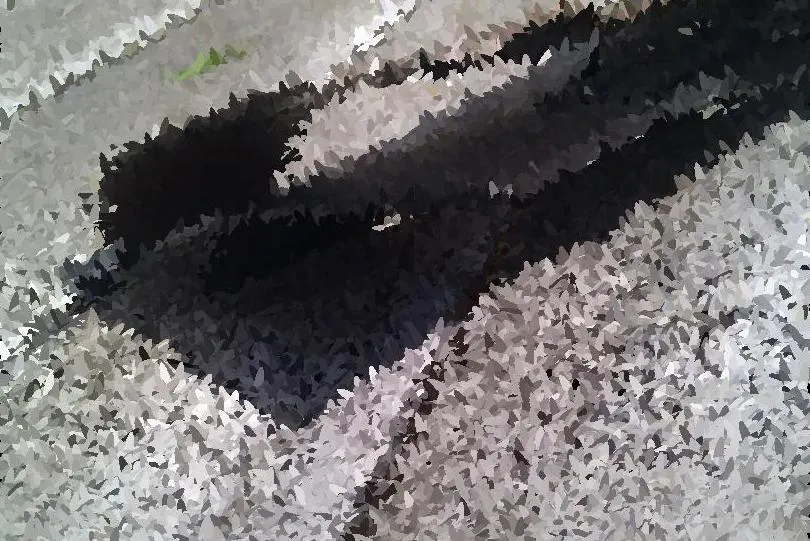
Lawnmower blades usually become dull after 30-40 hours of usage, depending on where they are used. When you hit solid objects like rocks or metal, the blades can get damaged sooner. So, sharpening becomes necessary.
Before sharpening, the condition of the blades should be checked. Incline the lawnmower and touch the surface of the blades with your gloves on. Check for any cracks, irregular surfaces, and bends there. Also, look for the blade edge.
Usually, it has a smooth profile with a sharp edge, but it gets damp as the blade gets worn out. As a final check, check for any hindrance as the blade moves and identify the part, if any. Mark one side of the blade before removing it to determine the correct orientation when reinstalling it.


In my two decades of experience, I’ve found that when grass appears torn, or the mower isn’t as efficient, it’s a clear sign that the blades need sharpening. It’s a simple observation that can greatly improve the health of your lawn.
● Step 3. Remove the center nut of the lawnmower blade carefully and clamp the blade
After you have turned the mower on its side (or upside down), loosen the nut at the middle of the blade with an adjustable or socket wrench. If it is difficult to lose, spray the nut with some cleaner spray like WD-40 and wait a few minutes. I
f the blade rotates while removing the nut, clamp a piece of wood to the lawnmower’s underside with C-clamps. This will keep the blade in place. After removing the nut, take off the blade from the lawnmower body.
Place the blade in a bench vise and tighten it up as much as possible to hold it firmly. The blade comprises two cutting edges on opposite sides of one long piece of metal. You will have to work on each turn by turn.
● Step 4. Sharpen the blade with a Dremel tool
Sharpening the blade comes next. The first step is to open the nose cap of your Dremel tool. Here, you can see the threaded fitting where you have to insert your desired sharpening attachment, i.e., sharpening cylinder or rod, and then tighten it up with your hand quickly.
You can also use a key to tighten the tool. Please turn on the tool and set its rotation speed to about 2,500 rpm, a medium setting on most machines. Run the tool along the blade’s cutting edge with the extended plastic support against the back.
The attachment automatically grips the Dremel at a 30-degree angle. Suppose you are not using such an attachment. In that case, it is not a big deal because you can easily set your hand angle to about 20-25 degrees and sharpen your blade’s ends.
– Developing the Cutting Edge
Follow the blade’s profile and develop the cutting edge by chipping off the metal from the rough surface. You have to cut by going from the center to the periphery of the blade. Make sure that the cutting angle is not straight or sharp.
It can damage the blade. Develop a sharp edge of the blade surface. A shiny surface will be an indication. Usually, 5-10 thrusts will do the job. Safety remark: Always wear eye protection and gloves while working on the blades.
● Step 5. Smoothen the edges and finish the blade
To finish the blades and give them a longer life, you must dampen the sharp corners minutely. It will help reduce the brittle nature, and the blade can last longer. You can perform this task by rubbing a sharpening stone along the blade edge.
You can also polish the blade edges with a buffer as a finishing step. Also, run the Dremel along the blade edge from tip to center. This helps to even the cut geometry of the blade.
Common mistakes like not securing the blade properly, removing too much material, and not checking the blade’s balance after sharpening can lead to poor results. Avoiding these mistakes has been key to my success over the years.
● Step 6. Balance the blade and fix it back
The rotating blade must be perfectly balanced for the machine and the user’s safety. You can check the balance by hanging the blade horizontally on a nail on the wall. Let the blade depend on the support, and notice that both sides should turn equally.
If a side is heavier, it will hang lower. You can balance it by chipping off the rougher side with a Dremel. Give 2-3 rubs, and it will do the job. This step prevents any vibration and noise from the machine.
Fix the blade back by applying grease to the central nut, too. Check if the blades are rotating freely with no obstructions. Reconnect the spark plug and start the mower. Let it run for a few seconds, and check if you notice any strange sounds. If such is the case, take it to an expert. Otherwise, you are ready to go.
Frequently asked questions:
1. Can you sharpen mower blades with any other tool?
You can sharpen your mower blade with an angle, bench grinder, or file. These tools can be used reliably, and each has its advantages and disadvantages:
– Using an Angle grinder:
Adjust the angle grinder with a grinding stone disk if not previously placed. Angle grinders can be fitted with disks using sandpaper, wire brushes, and polishers. It will help if you wear heavy safety gloves to protect your hands against the blade.
Hold the grinding disk against one of the thin edges of the blade. Run the grinder alongside the blade’s edge to level out any nicks, i.e., rough edges that commonly develop from hitting stones during mowing. The grinder will chip off the metal quickly.
– Using a File:
Using a file, you can easily do the job with your hands. Similarly, remove the blade and, using a file, give regular forward strokes to chip off the rough metal. Using a file, you must be more careful as you develop the profile. Carefully even it out. Use a sharpening stone to give a final touch.
2. Are lawn mower blades supposed to be sharp?
Mower blades should be aggressively sharp but not as strong as a razor’s edge. You should be able to touch the blade without getting cut.
Additionally, lawnmower blades that are too sharp get duller faster, resulting in sharpening more frequently and shorter blade life. A lawnmower blade with a bit of damper edge will last longer.
3. Does wet grass dull mower blades?
Mowing wet grass will not dull your mower’s blade any faster than dry grass, but it is unsuitable for the lawn and makes the mower work harder.
The wet grass clumps together due to the moisture, and removing it gets complicated. It does not directly affect the mower blade, but the humidity may create other issues like rusting.
Ensuring the blade is balanced after sharpening is crucial. I typically use a blade balancer or hang the blade on a nail. This step is often overlooked but is vital for the mower’s performance.
Remarks
The suitable condition of blades is crucial for the optimum working of the lawnmower. With time, the lawnmower blades become dull and give uneven or rough grass cutting. Worn-out blades require sharpening.
You can use a simple rotating tool like a Dremel attached to your lawnmower to polish the blade edge and surface. The Dremel is a handy tool and readily available. It provides the easiest way to sharpen your lawnmower blades.
• The Role of the Lawn Mower Sharpening Attachment
In this Guide, we have explained all the steps to use it. The lawn mower sharpening attachment attached to your Dremel is one of the many lawn and garden tools that can be used for this purpose.
This attachment provides optimum sharpening for your blades and is considered the fastest and easiest way to sharpen lawnmower blades.
Generally, lawnmower blades require sharpening after 30-40 hours or 1 season. If they, along with your other lawn and garden tools, are taken care of properly and regularly, they will help keep the mowing experience attractive and fun. Remember, a well-maintained Garden starts with well-maintained tools.
I never knew I needed to sharpen my mower blades regularly.
Thank you for reading our post! Regular blade sharpening is key to a healthy lawn. We’re glad you found the information helpful. Happy mowing!
This article was so informative, thank you!
Thank you for the kind words, Wayne! I’m glad you found the article informative. Keep your lawn looking its best!
Can I use a regular stone instead of a sharpening stone?
Yes, a sharpening stone is essential for a clean, effective cut. A regular stone won’t give you the precision needed to keep your lawn looking its best.
This step-by-step guide was exactly what I needed.
Thank you, Alan! I’m glad the guide was helpful for you. Keeping those mower blades sharp is key to a well-maintained lawn. Happy mowing!
Great tips, thank you for sharing.
Thank you, Brandon! I’m glad you found the tips helpful. Keep your lawn looking its best with a sharp blade!
I never knew I could sharpen my mower blades myself.
Glad you found the information helpful, Jimmie! Sharpening your mower blades with a Dremel can save you time and keep your lawn looking its best.
How do I know if my blades are unbalanced?
Veronica, dull blades can cause uneven cuts and make mowing difficult. Follow our guide to sharpen your blades with a Dremel for a pristine lawn!
Thank you for teaching me how to maintain my lawn mower properly.
Thank you for your kind words, Peggy! I’m glad the guide was helpful in maintaining your lawn mower. Keep those blades sharp for a beautiful lawn!
Should I wear a mask while sharpening the blades?
Bobbie, yes, wear a mask while sharpening mower blades. Safety first! Enjoy a seamlessly cut lawn!
Do I need a Dremel tool specifically for this?
Yes, a Dremel tool is essential for this task to keep your lawn looking great. Make sure to follow our helpful guide for the best results.
Is it easy to remove the blades from the mower?
Yes, removing the blades from the mower is easy. Just follow our guide for step-by-step instructions on how to sharpen them with a Dremel tool. Enjoy your fresh-cut lawn!
So glad I came across this article, very useful information.
Thank you, Lonnie! We’re glad you found it useful. Keep your lawn looking its best with sharp mower blades using our easy guide. Happy mowing!
How often should I sharpen my mower blades?
Sharpen your mower blades with a Dremel after every 30-40 hours of usage. It’s a quick process that makes a big difference in your lawn’s appearance!
Is there a specific angle I should use for sharpening?
Hello Chad, for sharpening your lawnmower blade with a Dremel, set it to 2,500 rpm and sharpen the cutting edges with 5-10 passes. Happy mowing!
This was so helpful!
Thank you, Daryl! Glad you found the post helpful in keeping your lawn looking its best!
What should I do if I notice rust on my blades?
Dear Gail Brewer, to remove rust on your lawn mower blades, use a Dremel to sharpen them following our easy guide. Safety first – wear gloves and goggles. Happy mowing!
I appreciate the detailed explanation of each step.
Thank you, Thomas! I’m glad you found the explanation helpful. Let me know if you have any questions about keeping your lawn looking great.
What kind of oil should I use for the central nut?
“Use a Dremel with a sharpening stone or cylinder at 2,500 rpm to sharpen your blade. This ensures a clean cut for your lawn.”
Can I sharpen the blades without removing them from the mower?
Yes, it’s best to remove the blades to sharpen them safely and effectively. Follow our step-by-step guide for the best results. Happy mowing!
Can I use a different brand of sharpening stone with my Dremel?
Yes, you can use a different brand sharpening stone with your Dremel. Just make sure it fits securely and follow the same steps to sharpen your blade effectively.