Discover the versatility of wood slices in our detailed guide. We provide practical tips and techniques to help you create rustic projects with ease and confidence. Ready to explore?
How to Utilize Wood Slices for Rustic Projects?
To utilize wood slices for rustic projects, first treat them with Pentacryl. Allow 24 hours per inch of thickness. Store in a warm, ventilated area. Apply a homemade salt paste, then let it air-dry. Check for even drying and signs of warping. Apply finishes like linseed or teak oil to prevent splitting.

Unleash your creativity with wood slices! Discover how to transform them into unique coasters, wall art, and rustic centerpieces. Read on for practical tips and techniques.
Contents
- 1 Utilizing Wood Slices for Rustic Projects
- 1.1 • Understanding Wood Drying and Cracking
- 1.2 • Treating Wood Slices to Prevent Cracking
- 1.3 • Choosing The Right Container
- 1.4 • Proper Storage Of Treated Wood Slices
- 1.5 • Using Wood Sealers
- 1.6 • Working With Thin Wood Slices
- 1.7 • Employing The Salt Paste Method
- 1.8 • Importance Of Proper Storage And Drying Techniques
- 1.9 • Preventing Warping During The Drying Process
- 1.10 • Inspecting The Wood
- 1.11 • Drying Logs As Boards
- 1.12 • Protecting Wood With Linseed Or Teak Oil
- 1.13 • Ensuring Quality In Carpentry And Wood Carving
- 2 Using Paintable Wax on Freshly Cut Wood
- 2.1 • Preparing the Wax
- 2.2 • Wax Application
- 2.3 • Utilizing Clamps and Tension Bands
- 2.4 • Checking Wood for Warping
- 2.5 • Applying Varnish
- 2.6 • Importance of Air Drying
- 2.7 • Conventional Grain Orientation: Preventing Wood Splits
- 2.8 • Tips for Cutting the Disc: Green Wood & PEG
- 2.9 • Case Study: Using Mesquite Wood
- 2.10 • Drilling and Soaking: Ensuring Disc Longevity
- 2.11 • Saw Kerf Cuts and Moisture Locks: Preserving Wood Integrity
- 2.12 • Balancing Act: Alcohol Versus PEG
- 2.13 • Butterfly Keys: Structural Stability and Prevention of Cracks
- 3 The Use of Wood Slices in Craftsmanship
- 4 Significance of Wood Drying
- 4.1 • The Effects of Moisture on Wood
- 4.2 • The Role of Sealants and Stabilizers
- 4.3 • The Right Containers for Wood Drying
- 4.4 • Importance of Container Cleanliness
- 4.5 • Properly Arranging Wood
- 4.6 • Safety Measures
- 4.7 • The Art of Wood Soaking
- 4.8 • Preventing Solution Evaporation
- 4.9 • The Ideal Soaking Duration
- 4.10 • Thickness Affects Drying Time
- 4.11 • The Protective Salt Paste
- 4.12 • Making a Salt Paste
- 4.13 • The Final Touch
- 4.14 • Selecting the Perfect Drying Spot
- 4.15 • Prevention of Wood Warping
- 4.16 • The Benefit of Air Drying
- 4.17 • Monitoring Moisture Content
- 4.18 • Detecting Wood Warping
- 4.19 • Immediate Processing Prevents Damage
- 4.20 • The Use of Oils
- 4.21 • Timing of Oil Application
- 4.22 • The Value of Research
- 4.23 • The Importance of Moisture Control
- 4.24 • The Need for Understanding
- 4.25 • The Application of Proper Techniques
- 4.26 • Utilizing Paintable Wax to Prevent Wood Cracking
- 4.27 • Cleaning and Sanding: Pre-sealing Procedures
- 4.28 • Preparing and Applying Salt Paste
- 4.29 • Using Linseed Oil to Repel Water
- 4.30 • Implementing Varnish to Slow Down Drying
- 4.31 • Drying Wood Logs as Boards
- 4.32 • Frequently Asked Questions on Drying Wood without Cracking
- 5 The Challenges of Wood Drying
- 6 Grain Orientation for Wood Disc Preservation
- 6.1 • Creating Wedges to Reduce Splitting
- 6.2 • Soaking Wood Discs for Split-prevention
- 6.3 • Preserving Wood Integrity with Epoxy
- 6.4 • Reducing Cracking by Removing Pith
- 6.5 • Slowing Drying Using Endcoat
- 6.6 • Alternative Techniques to Prevent Cracking
- 6.7 • Disc Stability Using Lamination
- 6.8 • Relevance of the Cutting Angle
- 6.9 • Freeze Drying for Wood Preservation
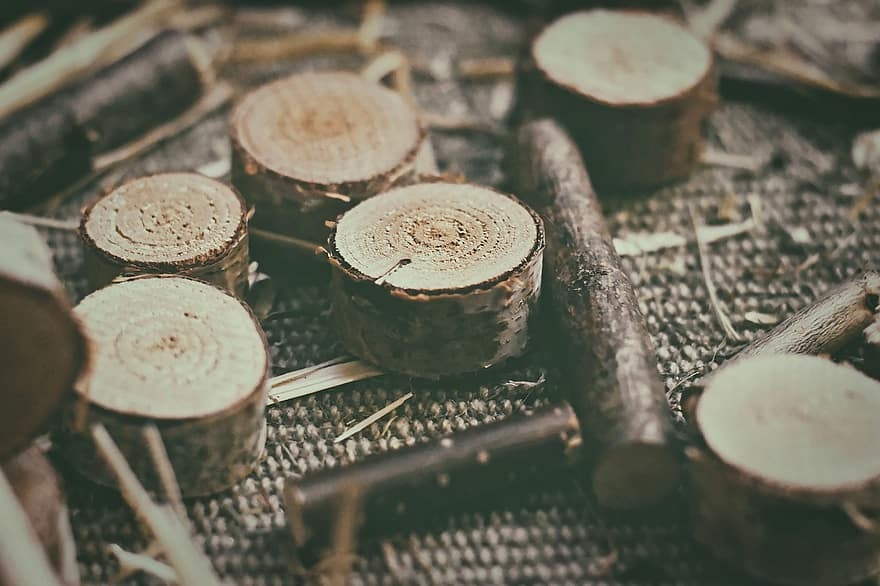
Utilizing Wood Slices for Rustic Projects
Wood slices are versatile and can add a rustic, organic touch to a wide range of projects. They bring a unique natural element to your home decor, craft projects, or even construction work.
• Understanding Wood Drying and Cracking
During the wood drying process, moisture evaporates from the wood, causing it to shrink. This shrinkage often results in cracking and can degrade the wood slice’s aesthetic and structural quality. Learn more about wood drying and warping from the U.S. Forest Products Laboratory.
• Treating Wood Slices to Prevent Cracking
To prevent drying-induced cracking, wood slices can be treated with a stabilizing solution. Pentacryl is one such wood stabilizer specifically designed for use with fresh wood. The wood slices should be fully submerged in this solution for 24 hours per 1 inch of thickness.
• Choosing The Right Container
The container used for this purpose should be clean and made of plastic, fiberglass, or stainless steel. To elevate the slice, small wooden slats can be placed at the bottom of the container.
• Proper Storage Of Treated Wood Slices
After treatment, the container should be covered with plastic wrap to prevent evaporation. Wood slices treated this way should be stored on their sides in a warm, well-ventilated area until completely dry.
• Using Wood Sealers
For partially dried wood slices, wood sealer can be used. Common wood sealers include Wood Juice and Anchorseal.
• Working With Thin Wood Slices
Thin wood slices present their own set of challenges. To prevent rapid shrinkage and cracking, denatured alcohol can be used. The wood slice should be fully submerged in the alcohol solution and again covered with plastic wrap to prevent evaporation.
• Employing The Salt Paste Method
A natural drying agent, salt paste can be applied to wood slices. To make a salt paste, mix table salt, water, cornstarch, and egg whites.
Apply this paste to the entire wood slice using a brush, then place it in a warm, well-ventilated area to air dry. The salt will draw out the moisture from the wood and prevent shrinkage.
• Importance Of Proper Storage And Drying Techniques
Correct storage techniques, proper drying, and monitoring of moisture levels in wood can prevent warping. This includes using sticks of similar length between stacks, avoiding placing heavy items on the wood, and ensuring proper ventilation.
• Preventing Warping During The Drying Process
Drying should be controlled to prevent warping. Air drying is recommended since it allows the wood to dry thoroughly. Seal the ends of the wood with sealants to prevent uneven drying and warping. Electric moisture meters can also be used to monitor the moisture in the wood.
• Inspecting The Wood
When inspecting the wood, check for warping by placing the slice on a flat surface and looking for raised parts.
• Drying Logs As Boards
Allowing logs to dry as boards can help prevent cracking and splitting, which further enhances the quality of your wood slices.
• Protecting Wood With Linseed Or Teak Oil
Applying linseed oil or teak oil can protect the wood from splitting or cracking. Linseed oil can be used after preparing the boards or peeling off tree stumps, while teak oil can be used by soaking the wood and allowing it to dry.
• Ensuring Quality In Carpentry And Wood Carving
Controlling wood moisture levels by applying the right sealants and stabilizers is crucial to prevent the wood from cracking or splitting during your carpentry or wood carving tasks. With these recommendations and methods, you’re all set to take full control over the quality of your wood projects.
Using Paintable Wax on Freshly Cut Wood
One highly effective method for drying wood is to use paintable wax. It enhances control over the drying process, reducing the risk of cracking. Over the years of my woodworking experience, I’ve found this method effective across different wood types.
This protocol requires melting the wax and mixing it with paint thinner before application. While it might seem a bit complicated, I’ll break down the steps to make the process simpler.
• Preparing the Wax
To use paintable wax on freshly cut wood, you should initially melt the wax. This can be easily done using a double boiler, similar to the one you might use to melt chocolate or butter.
While melting the wax, it is necessary to add paint thinner. The purpose of paint thinner is to reduce paint viscosity, making it easier to apply to the wood evenly.
For every 4 parts of wax, I recommend using 1 part paint thinner. The paint thinner should be added gradually to the wax, stirring consistently to ensure the mixture blends evenly.
• Wax Application
The wax mixture should then be applied to the ends of the wood. More information about this method here.
• Utilizing Clamps and Tension Bands
Another crucial step in the drying process involves clamping the wood. Clamps serve to hold the wood in place, preventing warping and movement during drying. The ends of the wood tend to dry more quickly than the center. Without clamps, the wood may warp.
During the clamping process, tension bands are used to ensure the pieces of wood remain steady and fixed.
– Use of Tension Bands
While tension bands can be of great aid, care should be taken when tightening them. Over-tightening can cause warping due to excessive pressure. A balance must be struck – you should strive for sufficient firmness without putting too much pressure on the wood.
• Checking Wood for Warping
Consistently keep an eye on the wood for any signs of warping throughout the drying process. To assess warping, one effective method is to lay the wood on a flat surface and examine its edges for any signs of elevation. Any elevated sections indicate the possible onset of warping.
• Applying Varnish
The varnish application serves a triple-fold purpose. It not only prevents splitting but also seals the wood, enhancing its appearance. After the wood is properly sanded and cleaned, varnish should be applied in thin layers.
– Sanding, Cleaning, and Application of Varnish
Before applying varnish, the wood needs to be well-prepared. This involves sanding, which smooths the wood’s surface and removes dust. Only after these steps should varnish be applied. Multiple layers may be required for optimal protection, but I recommend applying only thin layers each time.
• Importance of Air Drying
Lastly, it’s worth noting that dry wood is more likely to split than wet wood. Therefore, air-drying wood for at least 24 hours prior to any treatment is crucial. This significantly reduces the likelihood of cracks and splits forming in the wood.
With these steps in mind, you’ll be more than equipped to dry freshly cut wood effectively. Corresponding actions help protect the material’s integrity and preserve its aesthetic appeal, making it perfect for your project.
• Conventional Grain Orientation: Preventing Wood Splits
Contributor B strongly advocates for using conventional grain orientation over crosscut pieces. They believe this could significantly reduce the rate of splitting.
Consider the conventional method, where the grain runs lengthwise down the board. This method might prove more efficient for long-term wood preservation. For a detailed explanation on wood grains, The University of Maine Cooperative Extension provides an excellent guide.
• Tips for Cutting the Disc: Green Wood & PEG
A novel suggestion from the contributor highlights the use of green wood while cutting the disc. This idea is predicated on the principle that green wood, having a higher moisture content, is less prone to cracking when cut.
For added security, it is recommended to immediately soak the freshly cut disc in a Polyethylene Glycol (PEG) solution. The PEG effectively reduces the moisture content, thereby further minimizing the risk of splits.
• Case Study: Using Mesquite Wood
In terms of durability, Contributor C favors mesquite wood as a worthy contender. Recognized for its inimitable hardwood quality, durability, and stability, mesquite wood can, however, be prone to cracks. To tackle this, Contributor C suggests filling these cracks with epoxy.
While the issue of cracks may deter some, the toughness and durability offered by mesquite wood is worth the extra effort.
• Drilling and Soaking: Ensuring Disc Longevity
Contributor J recommends an additional procedure to extend the disc’s lifespan. A round hole is to be drilled in the center of the disc to remove the pith, thereby directly curbing crack initiation.
Further, soaking the disc in denatured alcohol is recommended, as this process helps remove excess moisture.
• Saw Kerf Cuts and Moisture Locks: Preserving Wood Integrity
Contributor T brings an interesting perspective to the problem of preventing wood cracks. The recommended technique involves making saw kerf cuts in an X pattern on the back side of the disc.
This method, systematically combining kerf cuts with an epoxy finish or salt paste, helps lock in moisture and mitigate the risk of cracking.
• Balancing Act: Alcohol Versus PEG
As an expert in wood science, Gene Wengert provides definitive guidance on the differences between alcohol and PEG as wood preservatives.
He suggests enlarging the hole in the center of the disc to prevent cracking. Additionally, he also recommends drying the disc in alcohol or using a salt paste as a beneficial strategy.
• Butterfly Keys: Structural Stability and Prevention of Cracks
Several contributors from the woodworking community have noted the use of butterfly keys as a viable solution for adding structure to cracks and preventing them from expanding further.
These aesthetically pleasing, butterfly-shaped inlays do more than just add an artistic flourish. They also do a marvelous job of enhancing the strength and stability of wooden pieces.
To deliver the best woodwork, it is crucial to acknowledge the collective wisdom of peers and experts, and to integrate their tips and techniques into your practices wisely.
In conclusion, achieving work that is both beautiful and resilient isn’t a far-fetched idea. With the right set of tools, materials, and skills, it is very much possible.
The Use of Wood Slices in Craftsmanship
For those who enjoy the blend of creativity and a touch of rustic charm, wood slices are an exceptional medium for various craft projects.
• Wood Slices and their Rustic Allure
Wood slices lend a compelling naivety and primitive look to any project. Be it a piece of handmade jewelry, a home decor item, or a centerpiece for a dining table, wood slices have the magnificence to make any craft object look stunningly rustic.
• Stabilizing Wood Slices
To maximize the integrity and longevity of wood slice projects, it’s important to stabilize them. Most often, wood tends to crack with time, ruining the overall look of the crafted object.
To prevent this, the slices can be soaked in a stabilizing solution. Some popular choices for this purpose include Pentacryl, wood sealer, and denatured alcohol.
• Soaking the Wood Slices
The process of soaking the wood slices in a stabilizing solution can be a bit meticulous. One primary factor to keep in mind is the soaking time, which relies greatly on the thickness of the slices. For every inch of thickness, a 24-hour soaking period is usually recommended.
However, the container used to soak the wood slices is equally significant. Avoid using metal containers, which may react with the stabilizing solution. Instead, use plastic, fiberglass, or stainless steel containers.
While placing the slices in the container, make sure they are slightly elevated off the bottom. Small wooden pieces, slats, rubber stoppers, or anything else that’s non-reactive could serve as the perfect elevating item.
• Protecting the Craftsman
When dealing with stabilizing solutions, remember to protect yourself, as well. Always wear rubber gloves while handling these solutions to prevent unnecessary exposure to your skin.
• Adequate Soaking of Wood Slices
Ensure that the wood slices are completely immersed in the solution, adding enough stabilizing agent to cover them. If your wood slices tend to float, placing an object like a stone, rock, or brick on top can keep them weighed down.
For the best results, pull a layer of plastic wrap over the top of the container. This will allow the solution to work its magic on the wood and also prevent any untimely evaporation.
After the soaking process is complete, it’s time to remove the slices from the solution. Make sure to let any excess fluid drain before placing them in a warm, well-ventilated area to dry.
• Alternative Techniques to Prevent Cracking
Besides the soaking process, there’s an alternative approach to prevent cracking in wood slices. Applying a salt paste to the slices can be surprisingly effective. You can effortlessly prepare this at home by mixing table salt with water and cornstarch, followed by stirring in egg whites.
As with the soaking process, cover the entire wood slice with this paste and air-dry it in a warm, well-ventilated area. I recommend checking back after a week to see if it’s fully dried.
• Ensuring the Desired Outcome
Following these methods can greatly help in achieving the desired results for wood slice projects. The use of stabilizing solutions or the application of a general household salt paste are excellent ways to prevent cracking in your slices.
Keeping an eye on the drying process ensures the wood dries evenly. As recommended by the U.S. Department of Agriculture’s Forest Products Laboratory, it’s essential to adjust the drying process to the wood’s condition.
In the beautiful world of craftsmanship, the use of wood slices opens vast possibilities for creativity. By following these methods, your wood slice projects will retain their rustic charm for a long time.
Significance of Wood Drying
Wood drying determines the final quality of the wood product, whether furniture, building materials, or any other artisanal piece, and is crucial for preventing damage such as splitting and cracking.
• The Effects of Moisture on Wood
The evaporation of moisture from wood can lead to undesirable effects such as shrinkage, splitting, or cracking. For added information on how moisture damages the wood, visit Forest Products Laboratory.
• The Role of Sealants and Stabilizers
Before drying, wood should be treated with sealants or stabilizing solutions that effectively prevent splitting and cracking.
• The Right Containers for Wood Drying
For this process, one should use containers made of stainless steel, fiberglass, or plastic, as they do not discolor the wood.
• Importance of Container Cleanliness
Ensuring the container is clean prevents the influence of residual dirt or chemical particles on the wood’s ultimate appearance and quality.
• Properly Arranging Wood
In the container, wood slices should be well-arranged and supported by small bricks to ensure even penetration of the solution.
• Safety Measures
Durability aside, it’s essential to prioritize safety. Wearing rubber gloves protects hands from the harsh chemicals used in the process.
• The Art of Wood Soaking
Depending on its initial condition, fresh wood should be soaked in a stabilizer, while partially dried wood should be used with a sealer.
• Preventing Solution Evaporation
Covering the container with plastic wrap is a smart move to prevent unwanted evaporation of the solution.
• The Ideal Soaking Duration
The key to achieving evenly penetrated wood is soaking it for at least 24 hours.
• Thickness Affects Drying Time
Keep in mind that the thinner the wood slice, the faster it dries.
• The Protective Salt Paste
A homemade salt paste can be an effective remedy to prevent the wood from cracking and splitting.
• Making a Salt Paste
Making a useful salt paste involves mixing table salt with water, letting it sit for four hours before adding cornstarch to solidify it.
• The Final Touch
To prevent flaking, blend three egg whites into the mixture before applying the paste onto the wood using a brush.
• Selecting the Perfect Drying Spot
A warm place is ideal for keeping the wood to allow it to dry thoroughly.
• Prevention of Wood Warping
Proper storage and adequate ventilation are crucial in preventing wood warping.
• The Benefit of Air Drying
Air drying is a beneficial technique that helps prevent rapid moisture loss and warping.
• Monitoring Moisture Content
There are tools such as electric moisture meters that aid in monitoring the moisture content of the wood in question.
• Detecting Wood Warping
Observing the edge of the wood to check for warping can help determine if the wood is warping.
• Immediate Processing Prevents Damage
Cutting logs into boards right after being hewed can avert the development of cracks and splits.
• The Use of Oils
Certain oils, such as linseed and teak oil, can provide extra protection for the wood against splitting or cracking.
• Timing of Oil Application
Linseed oil can be applied after the boards are prepared or once the bark is peeled off, while teak oil works best by soaking the wood and letting it dry.
• The Value of Research
Understanding the type of wood and the intended final product can help identify the most suitable sealants, oils, and stabilizing solutions.
• The Importance of Moisture Control
Controlling the moisture content of the wood prevents distortions and deformities.
• The Need for Understanding
Understanding the science of wood drying is crucial for better results.
• The Application of Proper Techniques
The correct application of drying techniques preserves the integrity of the wood, ensuring its longevity and the quality of the final product.
• Utilizing Paintable Wax to Prevent Wood Cracking
The first step in ensuring a crack-free drying process for wood is to use paintable wax. Paintable wax functions to create a barrier and, consequently, stops the wood from half-drying in certain parts while still being wet in others.
I recommend using a quality paintable wax and applying it liberally with a brush, emphasizing the ends where the wood is most likely to crack. For a detailed explanation of paintable wax application methods, the Forest Products Laboratory, a U.S. government service, provides a comprehensive guide here.
• Cleaning and Sanding: Pre-sealing Procedures
Before sealing, it’s essential to clean and sand the wood surface. This process also helps to remove any dirt, rust, or old paint that might interfere with the final product’s quality.
Sanding the surface ensures that your treatment adheres effectively. Make sure to start with rough-grit sandpaper and gradually progress to finer grits for an optimal finish.
• Preparing and Applying Salt Paste
To further reduce moisture retention in the wood during drying, applying a salt paste can be beneficial. Simply mix equal parts of salt and water until you have a paste-like consistency.
Apply this evenly to the wood, and let it sit for at least 24 hours before washing it off. This mixture helps draw out excess moisture and speed up the drying process without causing cracks.
• Using Linseed Oil to Repel Water
An additional method of moisture control involves the use of linseed oil. Besides forming a protective layer on the wood surface, this oil serves to repel water from the wood and prevent moisture evaporation.
Linseed oil effectively penetrates the wood and, after drying, creates a durable, water-resistant surface. I recommend using boiled linseed oil, as it dries faster than raw linseed oil.
• Implementing Varnish to Slow Down Drying
To further ensure an evenly dried piece of wood without any cracking, consider using varnish. Varnish serves as a protective layer, dramatically slowing down the drying process and thereby providing even drying.
Ensure you apply the varnish in a well-ventilated area and allow plenty of time for it to cure fully. Somewhere between one and two weeks is generally sufficient.
• Drying Wood Logs as Boards
An alternative option to prevent cracking and warping is to dry the wood logs as boards. This method ensures a steady drying pace, which is crucial for avoiding cracks.
It’s essential to stack the boards correctly, with gaps for air circulation. This method may require more space and take a longer time, but is highly effective at preventing cracking and warping.
• Frequently Asked Questions on Drying Wood without Cracking
Several common questions arise when drying wood without causing cracking or warping. A typical question involves the ideal drying time. While there is no one-size-fits-all answer, a good rule of thumb is to allow one year of drying time for every inch of thickness.
Also, many people wonder if it’s necessary to seal all sides of the piece. The answer is yes: sealing all sides, especially the end grain, helps prevent uneven drying, which can lead to cracking.
A useful resource for further queries is the Woodwork Institute, a nonprofit organization dedicated to the preservation and promotion of excellence in woodworking.
I hope this guide proves helpful in your woodworking journey. Remember, prevention is the best way to prevent cracks in drying wood. Take your time and care for each piece of wood, and the results will certainly show in the final product.
The Challenges of Wood Drying
When handling wood, a major concern is uneven shrinkage. This phenomenon often leads to inconsistent moisture distribution in the wood, which can cause unwanted cracking and warping.
For those who work with wood regularly, understanding these risks and how to mitigate them can save time, resources, and disappointments.
• Proper Wood-Drying Techniques
The key to avoiding uneven shrinkage is proper wood drying techniques. Wood-drying methods like oven drying and air drying are popular among professionals. They help to create an evenly distributed moisture content throughout the wood, minimizing the risk of warping and cracking.
Oven drying involves heating the wood in a specifically controlled environment. This process can be quite expensive and requires careful monitoring in order to prevent overheating, which can lead to excessive shrinkage and damage.
Air drying, on the other hand, is a process that involves allowing the wood to dry naturally over time. This method, though cost-effective and easy, requires patience, as it can take several weeks to months, depending on the type and thickness of the wood.
In addition to these, using proper sealants and stabilizing solutions is also critical. These applications form a barrier on the wood’s surface, helping to lock in moisture and provide additional protection against the elements.
• Storage Techniques Prevent Warping
How we store wood also significantly impacts its quality after drying. Simple measures such as maintaining consistent thickness and spacing between wood pieces during storage can help to prevent warping.
All wood pieces should be of the same thickness to ensure even drying. If some pieces are thicker than others, they’ll dry more slowly, leading to an uneven moisture content. Similarly, having sufficient air circulation between pieces is vital in ensuring all sides of the wood are evenly dried.
• The Process of Drying
Fast-tracking the drying process can have disastrous effects on wood. This is why rapid drying should be avoided at all costs. Wherever possible, the prudent course is to opt for air-drying. Though it may take longer, this method allows the wood to dry evenly, without any external intervention.
During this air-drying process, a common practice is to use tension bands to help prevent warping. Clamping the wood with these bands can ensure uniform drying, further minimizing any chances of warping or bending.
• Importance of Monitoring Moisture Content
As a woodworker, you can’t afford to underestimate the importance of monitoring your wood’s moisture content. To achieve an optimal drying process, using an electric moisture meter is highly recommended.
This tool provides precise data on wood moisture levels, helping you determine whether alternative drying techniques are needed. More information on this topic is available on the Forest Products Laboratory website, a .gov site by the U.S.D.A Forest Service.
• Checking Wood for Warping
Once you’ve followed these steps and the drying process is complete, the final action is to check your wood for any warping. This requires placing the wood on a flat surface and examining its edges for levelness.
If the edges are not level and the wood is warped, you may need to revisit your process or consider a different wood drying technique.
In summary, wood drying is not a process to be rushed. By adhering to these steps and using the tools mentioned, you can ensure consistent, high-quality wood ready for any woodworking project.
From the techniques to the tools, the steps you take today can impact the quality of your woodwork tomorrow. Hence, care and patience are the two key considerations in this process.
As a professional in the field, I recommend always checking and double-checking every step of the process to ensure the integrity and quality of your wood.
Grain Orientation for Wood Disc Preservation
Grain orientation while cutting wood plays a significant role in maintaining the integrity of the wood, particularly during drying.
As an experienced woodworker, I recommend using conventional grain orientation instead of cross-cut pieces to prevent splitting during drying. The long grains in wood provide structural support to withstand changes in moisture content without significant damage.
• Creating Wedges to Reduce Splitting
Another effective way to reduce splitting during the drying process is by cutting round discs into several wedge-shaped pieces. By drying these pieces separately and subsequently fitting them back together with adhesive, you can mitigate the risk of splitting.
• Soaking Wood Discs for Split-prevention
Polyethylene glycol, or PEG, has long been used as a stabilizer for wood. Soaking the disc in PEG immediately after cutting it can minimize splitting. Do remember to make sure the wood soaks in PEG as soon as it is cut from green wood for the best results.
• Preserving Wood Integrity with Epoxy
Epoxy resin has excellent adhesive and reinforcement properties. If you identify any cracks during the drying process, filling them with epoxy and subsequently sanding them flat can help preserve the wood’s structural integrity. This step is crucial to maintaining the overall quality of the wood.
• Reducing Cracking by Removing Pith
The pith, or center, of the wood disc, can often cause significant cracking during drying. An effective strategy to prevent this is to cut a round hole in the center of the disc to remove the pith. Afterward, you can soak it in denatured alcohol, which can replace water with alcohol, thereby reducing cracking.
• Slowing Drying Using Endcoat
Applying endcoat or wax emulsion uniformly to both surfaces of the disc helps regulate moisture release. This slower drying process results in fewer opportunities for splitting and cracking, better preserving the disc’s condition.
• Alternative Techniques to Prevent Cracking
There are alternatives to prevent significant cracking. Making saw kerf cuts in the back of the disc, soaking in Pentacryl before applying a thick epoxy finish, or allowing natural cracking with the addition of a butterfly are all viable methods that can offer beneficial results.
• Disc Stability Using Lamination
Laminating the disc onto a piece of plywood can offer excellent stability during drying. Besides controlling warping and reducing cracking, it can lend added robustness to the wood, which is handy when working with it later.
• Relevance of the Cutting Angle
The angle at which the wood is cut plays a crucial role in minimizing cracking. A more radical cut usually puts less stress on the wood compared to tangential cuts. Depending on the type and grain of the wood, adjusting the cutting angle accordingly can bear substantial benefits.
• Freeze Drying for Wood Preservation
Though not yet universally recognized, freeze-drying wood discs in a plastic bag in a freezer shows promise in controlling moisture content without causing significant cracking. Patience is key with this method, as it may take longer to achieve the desired moisture level than other methods.
For more detailed reading on these techniques, you may review Purdue University’s guide on drying wood. Applying these tips will significantly increase the chances of preserving the quality and appearance of your woodwork.
This is exactly what I needed to know before starting my wood slice projects.
Thank you, Elmer! Best of luck with your wood slice projects. Feel free to reach out if you need any more tips or guidance. Enjoy exploring the world of woodworking!
Is there a way to speed up the wood drying process?
Hi Edna, to speed up the wood drying process, treat the wood slices with Pentacryl and use a homemade salt paste. Store in a warm, ventilated area for even drying. Enjoy your rustic projects!
This guide is really helpful for a beginner like me, thank you!
“Thank you for your kind words! I’m glad you found the guide helpful. Keep exploring and creating with wood slices, and don’t hesitate to reach out if you have any questions along the way.”
Is it necessary to treat both sides of the wood slices?
Yes, treating both sides of the wood slices is necessary to prevent cracking and warping during the drying process. Follow the detailed guide for tips on how to achieve the best results.
Which type of wood is best for crafting projects with wood slices?
For crafting with wood slices, consider using wood treated with Pentacryl to prevent cracking. Soak them for 24 hours per inch thickness, air dry, and finish with linseed or teak oil for best results.
I appreciate the safety tips included in the article.
Thank you, Joseph! I’m glad you found the safety tips helpful. Let me know if you have any other questions or need more information. Enjoy exploring wood slices for your projects!
How long should I wait before applying a finish after drying the wood slices?
“Allow at least 24 hours per inch thickness after drying wood slices before applying finish. Utilize Pentacryl treatment to prevent splitting. Explore more rustic projects with confidence! Happy crafting.”
Is there a specific type of brush recommended for applying the salt paste?
For applying the salt paste on wood slices, a brush with natural bristles is recommended for even coverage. This will help prevent cracking during the drying process. Happy crafting!
I love how detailed the information is in this guide.
Thank you for your kind words, Madison Edwards! I’m glad you found the guide detailed. Happy crafting!
How thick should the wood slices be for best results?
For best results, aim for wood slices with a thickness of 1 inch or more to ensure proper drying and prevent cracking. Experiment with various thicknesses to find what works best for your rustic projects.
What kind of finish should I use on my wood slices?
Hi Robert, for your wood slices, treat them with Pentacryl, let air dry for 24 hrs thickness, then apply homemade salt paste. Consider linseed or teak oil finishes. Enjoy your rustic projects!
Do wood slices need to be completely dry before using them in projects?
Hi Kay, yes, wood slices should be completely dry before use in projects. Treat with Pentacryl, air dry, and apply a salt paste to prevent cracking. More tips on the blog post!
The step-by-step instructions are easy to follow, great job!
“Thank you, Amy! I’m glad you found the instructions easy to follow. Feel free to explore more rustic projects with wood slices.”
Are there any risks involved in treating wood slices with stabilizing solutions?
Hi Harper, treating wood slices with stabilizing solutions like Pentacryl can minimize risks of cracking during drying. Follow the blog post’s recommendations for best results.
What temperature is considered warm for drying wood slices?
Bryan Warren, for drying wood slices, a warm, ventilated area is ideal. Treat them with Pentacryl, use a homemade salt paste, and apply linseed or teak oil. Enjoy your rustic projects!
Can I use regular salt instead of table salt in the salt paste method?
Yes, regular salt can be used in the salt paste method. Be sure all drying steps are followed. Enjoy your rustic project with wood slices!
Can I use linseed oil on all types of wood?
Linseed oil is suitable for most types of wood, but always test it on a small area first. Consider utilizing other wood treatments, like Pentacryl, for optimal results in your rustic projects.
How do I know if my wood slices are drying properly?
Ensure minimal splitting and cracking. This method helps preserve the wood’s structural integrity and overall quality. Remember, the right grain orientation can make all the difference in your woodworking projects!
I never knew how important grain orientation was until reading this article.
ensure the wood’s longevity and prevent splitting. Glad you found the article helpful!
Are there any alternatives to Pentacryl for treating wood slices?
Yes, Pentacryl is a great option for treating wood slices! Allow time for drying and consider sealing it with linseed or teak oil. Explore more in our wood slice guide.