So, let’s dive in and unlock the full potential of your Briggs and Stratton lawnmower together. Your journey to becoming an expert starts here!
How do you master your Briggs and Stratton lawnmower using the operator manual guide?
To master your Briggs and Stratton lawnmower, always consult the operator’s manual for carburetor maintenance. Regularly clean the main fuel jet to prevent buildup. Adjust as prescribed post-cleaning. For complex repairs, use online resources or certified dealers. Preventative maintenance is key.

Learn the ins and outs of starting, stopping, and adjusting your Briggs and Stratton lawnmower. Excited to know more? Continue reading!
Contents
- 1 Consult the Briggs & Stratton Operator’s Manual
- 1.1 • Importance of Regular Carburetor Maintenance
- 1.2 • Common Carburetor Problems
- 1.3 • Cleaning the Main Fuel Jet
- 1.4 • Post-Cleaning Adjustments
- 1.5 • EPA Regulated Carburetors
- 1.6 • Severe Carburetor Damage
- 1.7 • Support from Official Briggs & Stratton Dealers
- 1.8 • Additional Briggs & Stratton Resources
- 1.9 • Briggs & Stratton Engine Tune-Up Kits
- 1.10 • The Carburetor: Engine’s Essential Component
- 1.11 • Understanding the Carburetor
- 1.12 • Signs of a Carburetor Problem
- 1.13 • Adjusting the Carburetor
- 1.14 • Step-by-step Carburetor Adjustment Guide
- 1.15 • Final Thoughts
- 1.16 • The Role of the Carburetor
- 1.17 • Removing the Carburetor
- 1.18 • Dissembling the Float-Type Carburetor
- 1.19 • Inspecting the Carburetor and Adjusting the Screws
- 1.20 • Reassembling the Carburetor
- 1.21 • Reattaching the Carburetor and Air Cleaner Assembly
- 1.22 • Diagrams and Additional Resources
- 2 Importance of Carburetor Adjustment
Consult the Briggs & Stratton Operator’s Manual
The Briggs & Stratton operator’s manual is your go-to source when it comes to performing any maintenance or repair work on your carburetor. It is filled with specific instructions and important safety precautions designed to prevent accidents and ensure a smooth operation.
I cannot emphasize enough the crucial role this manual will play in your engine maintenance tasks. It is your best friend, a trusted partner in keeping the engine running smoothly.
• Importance of Regular Carburetor Maintenance
Undoubtedly, constant carburetor maintenance keeps future problems at bay; it’s a proactive step that saves time and money in the long run.
It’s more cost-effective to prevent issues than fix them, making regular maintenance a sensible and recommended practice. Don’t wait until the last moment. Consistent checks and balances maintain optimal working order and longevity.
• Common Carburetor Problems
Carburetors, like any other machine component, are susceptible to blockages. The main fuel jet is often plagued by dirt, varnish, and gasoline deposit buildup. It’s a common issue but can cause major disruptions if not addressed on time.
Keeping the carburetor clear of these obstacles will ensure the hassle-free operation and top-class performance.
• Cleaning the Main Fuel Jet
The next step in carburetor maintenance involves cleaning the main fuel jet. Use a carburetor cleaner and compressed air to flush out and remove loosened debris. It’s a simple procedure, but the impact on the efficiency of your engine is significant.
Cleaning should be done regularly and in line with the instructions from the Briggs & Stratton operators manual to avoid damage.
• Post-Cleaning Adjustments
In some float-type carburetors, you may need to adjust the idle speed and mixture after cleaning. This is prescribed to bring the carburetor back to its optimal settings and guarantee an efficient operation.
Always remember fine-tuning a carburetor ensures that your machine runs smoothly and remains efficient.
• EPA Regulated Carburetors
A word of caution here. Modern carburetors, those regulated by the EPA, are non-adjustable. The reason is that these carburetors are designed to meet EPA emission standards.
Any adjustments made to these carburetors are not only considered illegal but can also lead to civil penalties. It’s a line we cannot cross.
• Severe Carburetor Damage
In some severe cases, a simple cleaning or adjustment won’t suffice. Damaged or badly clogged carburetors might need to be rebuilt or overhauled. This is where professional help is usually needed. It’s a more significant repair but is crucial in ensuring the longevity of your engine.
• Support from Official Briggs & Stratton Dealers
For carburetor repair of small engines, official Briggs & Stratton dealers can provide valuable support and assistance. They are trained professionals who have the necessary skills and expertise. Should you encounter problems that are beyond your skill level, don’t hesitate to seek their help.
• Additional Briggs & Stratton Resources
The Briggs & Stratton website is a treasure trove of additional resources. You’ll find troubleshooting FAQs, instructional videos, and a wealth of information to help with common engine and product issues. Referencing these resources can be a great boon, especially for the more challenging maintenance tasks.
• Briggs & Stratton Engine Tune-Up Kits
To further make your engine maintenance tasks manageable, engine tune-up kits containing new air filters, spark plugs, oil, and instructions are available in the official Briggs & Stratton parts store online. It’s a handy set that contains everything you need to keep your engine in top shape.
For further in-depth knowledge, the U.S. EPA website provides a wealth of information on engine emissions and regulation. I recommend that every Briggs & Stratton owner explores this site to gain an understanding of the rules and avoid infringement.
The carburetor is an essential part of any engine, and its maintenance should be a priority for any Briggs & Stratton owner.
Armed with this knowledge, the necessary tools, and the Briggs & Stratton operator’s manual, anyone can perform basic maintenance to keep their engines running at their best possible performance.
• The Carburetor: Engine’s Essential Component
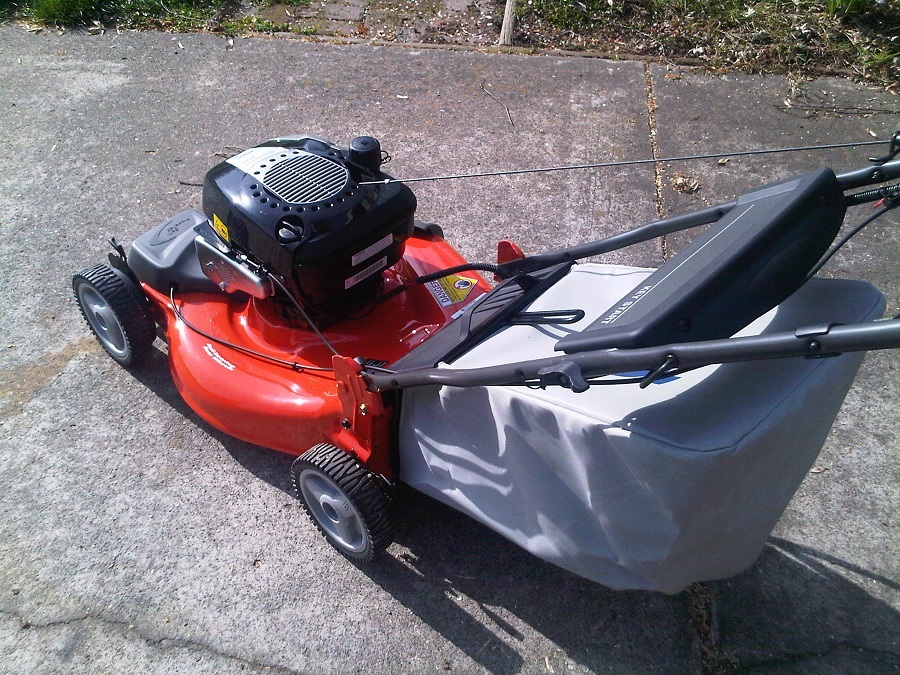
We all know that the carburetor is an essential part of the lawnmower engine. Typically found bolted to the engine’s side or top, the carburetor’s role can’t be overstated. It ensures the engine cylinder receives a balanced mix of air and fuel – a prerequisite for combustion.
Over time, however, a carburetor may falter. The air and fuel ratio might lean too heavily in one direction or another, or the timing might become advanced or retarded. These issues necessitate adjusting the carburetor to restore balance and enhance performance. So, let’s delve into how this can be achieved.
• Understanding the Carburetor
Before embarking on adjustments, it’s important to understand the carburetor’s basic function. It mixes a certain amount of gasoline with air to form an explosive mixture that powers the engine.
It’s like the kitchen of the mower’s engine, cooking up the perfect air-fuel blend for combustion. Here is a helpful link to learn more about small engine repair from Purdue Extension.
• Signs of a Carburetor Problem
When the carburetor goes awry, the engine’s performance noticeably declines. This is often manifested in the form of a too-lean or too-rich air-fuel mixture.
A lean mixture results in a carburetor that delivers too much air and not enough fuel. Symptoms may include backfiring, overheating, hard starting, and high RPMs.
Conversely, a rich mixture refers to a carburetor that dispenses too much fuel and not enough air. Consequences could be a loss of power, black exhaust smoke, or a hard cold start.
• Adjusting the Carburetor
In order to correct these lean or rich conditions, the carburetor must be adjusted. For this process, you’ll need a basic tool kit, including a wrench set and carburetor screwdriver. This will involve manipulating the mixture screw and idle speed screw while closely monitoring the engine’s behavior.
• Step-by-step Carburetor Adjustment Guide
Firstly, locate the mixture screws on your carburetor. These are typically marked with an ‘H’ for high speed and ‘L’ for low speed. Each screw adjusts the amount of fuel that the carburetor delivers at that speed.
To adjust an overly lean mixture, slowly turn the ‘L’ screw clockwise until the engine begins to sputter or stall. Then, slowly turn the screw counterclockwise until the engine smooths out. This adjustment should ensure a more balanced mixture.
For controlling a rich mixture, identify the idling speed screw. This screw adjusts the amount of air that the carburetor delivers when the engine is idling. Turn this screw clockwise to increase idle speed or counterclockwise to decrease it. Adjust until the engine idles smoothly without any stalling or hesitations.
• Final Thoughts
The carburetor, though small in size, plays a huge role in the performance of a lawnmower engine. An imbalance in its air and fuel ratio can lead to a myriad of problems, including inefficient lawn cutting.
Therefore, regular adjustments and maintenance of the carburetor are key to ensuring the optimal performance of your lawnmower.
In my experience, keeping an eye out for the typical signs of carburetor trouble and addressing them promptly can save significant time and effort in the long run. Don’t let these issues pile up.
Addressing them step by step as they come is the most efficient way to keep your lawnmower engine running smoothly.
• The Role of the Carburetor
High-performing engines demand perfectly balanced air and gas mixtures. This critical task is entrusted to the carburetor, an engine component that dictates how smoothly your engine runs. Ensuring the carburetor is well-adjusted is thus a crucial part of regular engine maintenance.
• Removing the Carburetor
– Step 1: Disconnect the Car Battery
To prevent electrocution, always disconnect the vehicle’s battery before beginning. Remove the negative cable, followed by the positive one.
– Step 2: Detach the Carburetor
Locate the carburetor and disconnect the throttle cable. Use a wrench to remove the fuel line and vacuum hoses. Make sure to catch any leaking gas in a container.
• Dissembling the Float-Type Carburetor
– Step 3: Remove the Bowl
Use a screwdriver to remove the screws holding the float bowl in place. Catch any dripping fuel in a container. Gently lift the bowl from the carburetor body, being careful not to damage the gasket.
– Step 4: Extract the Float
Unscrew the float pin and take out the float. The needle valve will come off with it. Keep these parts safe for reassembly.
• Inspecting the Carburetor and Adjusting the Screws
– Step 5: Inspect for Damage
Look at every piece of your carburetor. If you find any defects, it’s necessary to replace the damaged parts. Wear and tear can alter the fuel-air mixture, leading to engine inefficiency.
– Step 6: Adjust the Air-Fuel Mixture Screws
Most carburetors will have two screwshigh speeds and low speeds. Using the owner’s manual and a flathead screwdriver, adjust these screws to the specified setting. This part can be tricky, so take your time.
• Reassembling the Carburetor
– Step 7: Reattach the Needle Valve and Float
Place your needle valve back to its position on the float and slide the assembly back into the carburetor body. Secure with the float pin.
– Step 8: Replace the Bowl
Position the bowl onto the carburetor body, making sure the gasket is properly aligned. Tighten the screws to secure it.
• Reattaching the Carburetor and Air Cleaner Assembly
– Step 9: Attach the Carburetor
Position the carburetor on the engine, reconnect the fuel line, and vacuum hoses. Tighten up everything using the appropriate tools.
– Step 10: Reconnect the Battery
Reattach the positive cable to the battery, followed by the negative one.
Congratulations, you have successfully adjusted your carburetor. Regular maintenance and precise adjustment of your carburetor can drastically improve your engine’s performance and fuel efficiency.
• Diagrams and Additional Resources
For a more visual approach, here are some useful diagrams that will guide you through the process. For more detailed troubleshooting, consider checking out the resources on the .org page. Remember, patience and precision are key when dealing with a carburetor. Good luck!
Importance of Carburetor Adjustment
The engine’s heart lies in the carburetor – it’s a device that mixes fuels and air to provide the engine with the ideal environment for combustion. A finely adjusted carburetor ensures efficient engine performance, maximizing power and fuel efficiency. Carburetor adjustment is hence crucial.
– Recognizing the Inefficiency of the Carburetor
As time passes, the carburetor’s performance can diminish. It may deliver an air-fuel mixture that is either too lean or too rich for the engine.
Simply put, lean mixtures lack appropriate fuel proportion, while rich mixtures contain excess fuel. Checking the color of your spark plugs can indicate if your mixture is too rich, lean, or just right.
– The How-To of Adjusting Carburetors
Fine-tuning the carburetor requires adjusting screws and assessing the needle position on the screw’s end. I recommend being patient and meticulous during this process; it’s about achieving the ideal mixture, not about how swiftly you can get it done.
Idle Speed Mixture Adjustment
Idle speed mixture adjustment is pivotal to maintaining the idle speed within permissible limits. This mixture ensures the engine runs smoothly when the throttle is closed or nearing it.
High-Speed Mixture Adjustment
The high-speed mixture handles engine performance during higher RPMs, like when accelerating or driving at high speeds. This adjustment guarantees your engine runs clean and doesn’t sputter or choke at higher RPMs.
– Pre-adjustment Measures to Take
Before commencing adjustments, it is crucial to warm up the engine. This simulates the standard working conditions of an engine. Likewise, make sure to keep an eye on the RPM during the process. The RPM gauge is a crucial tool to have around.
– Tools for Carburetor Adjustment
Safety should be your topmost priority. After ensuring this, gather the necessary tools. Safety gloves, screwdrivers, pliers, wrenches, carburetor cleaners, and an RPM gauge are among the tools commonly required.
• Fine-tuning Adjustments
When adjusting your carburetor, be careful not to exceed the manufacturer’s specified speed limit. Also, take into account the variations in fuel, altitude, load, or temperature, as these factors influence the engine’s demands for an ideal air-fuel mixture.
– Assembly Checks
Before starting the engine, ensure the air cleaner and carburetor cover are properly assembled. Irregularities in assembly can disrupt the airflow to the carburetor, hindering the proper air-fuel mixture formation and the overall engine performance.
– Troubleshooting Carburetor Issues
Keen observation can reveal if your carburetor needs attention. Delayed acceleration, poor fuel economy, or rough idling are among the symptoms of a bad carburetor.
• Maintenance is Key
Nothing beats regular maintenance when it comes to a healthy carburetor. A well-adjusted carburetor ensures optimal engine performance and keeps your engine running smoothly for a longer period.
Cleaning your carburetor regularly also prevents build-up and reduces the need for major adjustments. Reading the engine manufacturer’s guidelines can provide valuable insight. You can find some general guidelines for maintaining carburetors here.
• My Personal Conclusion
Tuning a carburetor might appear daunting at first glance but it’s a fairly straightforward process. With patience, the right tools, and a little bit of mechanical aptitude, one can easily keep their carburetor in top shape. Just remember timely adjustments go a long way in maintaining optimal engine performance.
I feel much more prepared to handle carburetor maintenance after reading this article, thank you for the guidance.
I’m glad you found the information helpful, Miriam! Keep up the great work with your carburetor maintenance. Your Briggs and Stratton lawnmower is in good hands!
I had no idea about the impact of altitude on carburetor tuning, thanks for sharing!
Thank you for your feedback, Perry! Consult the operator manual for Briggs and Stratton lawnmower maintenance to unlock its full potential. Happy mowing!
Does altitude affect the tuning of the carburetor in my lawnmower?
Yes, altitude can affect carburetor tuning in your lawnmower. Refer to your operator’s manual for proper maintenance instructions. Regularly clean the main fuel jet and make post-cleaning adjustments if needed. Good luck!
What are the consequences of ignoring carburetor maintenance on my Briggs and Stratton lawnmower?
Regular carburetor maintenance prevents engine inefficiency and damage down the line. Consult the operator’s manual for cleaning and adjustments. Don’t overlook this crucial step in maintaining your Briggs and Stratton lawnmower.
I appreciate the emphasis on preventive maintenance, it saves a lot of trouble later on.
Thank you, Nevaeh! Preventive maintenance truly is key in keeping your Briggs and Stratton lawnmower running smoothly. Your dedication to maintenance will pay off in the long run.
I never realized how crucial regular carburetor maintenance was until reading this article, thank you for the insight.
Thank you, Misty! Consult your Briggs & Stratton operator’s manual for expert carburetor maintenance guidance. Your lawnmower will thank you with peak performance!
Great job explaining the importance of the carburetor in engine performance, very informative.
Thank you, Leona! I’m glad you found the information on carburetor maintenance informative. Keep consulting the operator manual for the best results. Happy mowing!
This article has given me the confidence to tackle carburetor maintenance on my own, thank you!
Thanks for sharing your experience, Allen! Consult your Briggs & Stratton operator’s manual for a smooth carburetor maintenance journey. Keep up the great work!
What should I do if adjusting the carburetor screws doesn’t seem to improve my engine’s performance?
For advanced carburetor issues, consult a certified dealer for assistance. Regular maintenance is key! Happy mowing!
The troubleshooting tips provided are very practical and helpful for identifying carburetor issues, thank you!
Thank you for your feedback, Angel! Consulting the operator’s manual for carburetor maintenance is essential for mastering your lawnmower. Keep up the good work!
Are there any online tutorials available for beginners on how to clean a carburetor?
Consult the Briggs & Stratton operator’s manual for step-by-step tutorials on carburetor cleaning for beginners. Regular maintenance is key to keeping your lawnmower running efficiently. Happy learning!
Are there any specific signs that indicate a carburetor problem in my lawnmower?
Regular carburetor maintenance is key! Signs of trouble include engine sputtering, hard starts, and performance issues. Consult your operator’s manual for adjustments, and keep it clean for optimal performance.
Is there a specific carburetor cleaner recommended for Briggs and Stratton lawnmowers?
Refer to your Briggs and Stratton operator’s manual for carburetor cleaner recommendations. Regular cleaning and adjustment are key. For complex issues, contact a certified dealer. Happy mowing!
The step-by-step adjustment guide made it so much easier for me to understand the process.
Thank you, Sylvia! I’m glad the guide was helpful. For further details on mastering your Briggs and Stratton lawnmower using the operator manual guide, please refer to the comprehensive instructions provided in the blog post.
How do I know if my lawnmower’s carburetor is EPA regulated?
Refer to the Briggs & Stratton operator’s manual to determine if your lawnmower’s carburetor is EPA regulated. Following the manual ensures proper maintenance and adherence to regulations. Best of luck on your maintenance journey!
How often should I clean the main fuel jet in my lawnmower?
Always reference the Briggs & Stratton operator’s manual for cleaning the main fuel jet in your lawnmower. Regular maintenance is key for optimal performance. Happy mowing!
Thanks for the detailed guide on carburetor maintenance, it was really helpful!
Thank you for your positive feedback, Willie! I’m glad you found the guide helpful. Keep maintaining your carburetor regularly for optimal lawnmower performance. Happy mowing!
Can someone explain how to correctly adjust the idle speed after cleaning the carburetor?
Refer to your Briggs & Stratton operator’s manual for the correct idle speed adjustment post-carburetor cleaning. The manual provides specific instructions to ensure your lawnmower runs smoothly. Enjoy mastering the maintenance process!
The detailed explanations really helped me understand why carburetor adjustment is essential, great job!
Thank you, Micheal! I’m glad the explanations were helpful. Keep exploring your Briggs and Stratton lawnmower with the manual as your guide. Exciting things lie ahead!
Can low fuel quality impact the performance of the carburetor?
Regularly consult your operator’s manual for carburetor maintenance to prevent performance issues. Keep the main fuel jet clean and make adjustments post-cleaning. Seek professional help for complex repairs. Master your Briggs and Stratton lawnmower with these tips!