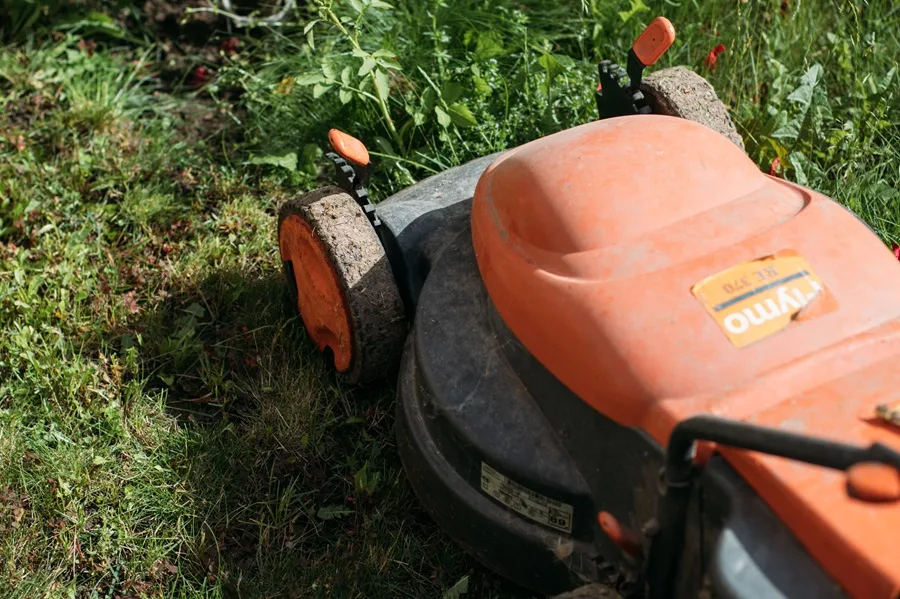
Stanley lawnmowers have generally good cutting performance and drive experience. They provide a seamless experience to work with and help to boost productivity while mowing your lawn. But if your Stanley lawnmower faces a decline in cutting performance or is difficult to drive, let’s learn how to fix it in this blog post.
Stanley Lawnmower drive & cutting problems:
If a Stanley lawnmower doesn’t cut straight, sharpen the blades if they’ve blunt edges and make sure they don’t wobble while rotating. Ensure the mower deck is level and all tires have equal tire pressure. Clean the underside of the deck and blades from foreign debris to obtain a smooth rotation of blades. If the mower doesn’t move forward or drives jerky, inspect the drive belt that might have become dull. Check the wheels and the drive pulley in the case of self-propelled lawnmowers.

If your Lawnmower’s cutting performance has declined, or if you want to get rid of the rough drive experience, read the detailed explanation in the following sections of the article.
Contents
- 0.1 How do you fix cutting problems in Stanley Lawnmowers?
- 0.2 Stanley Lawnmowers: Troubleshooting Drive Problems
- 1 Drive & Cutting Troubleshooting table
How do you fix cutting problems in Stanley Lawnmowers?
Let’s first discuss some of the common problems related to cutting the grass in Stanley lawnmowers.
1. Stanley Lawnmower isn’t cutting Straight
Your Lawnmower doesn’t cut straight due to dull blades. An unbalanced mowing deck that sits lower on one side or unequal tire pressures can also lead to lawnmowers not cutting in straight lines.
– Dull Blades:
It would be best first to inspect the blades under the mowing deck. If the edges have worn out or become blunt, it’s best to sharpen them. To do this, you first need to remove the blades by using a socket wrench and placing a wooden block to constrain the blade rotation while you remove the screws.
Fix this blade on a bench-wise. Using a hand file or sandpaper, sharpen the edges by mowing back and forth radially along the blade length. If a bench grinder is available, I recommend using it instead. After sharpening the blades, test the mower again and notice if any improvement can be seen.
– Deck Level:
The deck should be uniform from all four sides. If it sits lower on one side, the blade’s plane of rotation titles and crooked cutting lines can be seen in your lawn. To correct this, use a level indicator to determine the side at the highest inclination.
To correct the inclination, use the adjustment screws of your deck to raise or lower the height until the level is entirely horizontal. In some cases, the level sits lower when the pressure in any one of the tires is low. In this case, you should use a pressure gauge to check and verify that all tires have the same air pressure as marked on the sidewall.
2. Lawnmower cuts uneven grass patterns
Lawnmower cuts uneven patterns if the blades are loosely mounted or if they wobble about their center. A faulty blade belt may cause this problem in some cases.
– Blade Vibrations:
Blades that are loosely mounted on the spindle assembly wobble at higher RPMs. These vibrations can be felt clearly and typically produce erratic grass patterns. The blade’s mounting should be checked and tightened to fix this problem.
Blade vibrations can also be caused if the blade has become unbalanced during sharpening or when it hits a hard object like a rock. During sharpening, it can happen if more material is removed from one side. Blades that aren’t balanced correctly also generate vibrations at higher RPMs.
This is why checking the balance after sharpening is essential. You can use a blade balancer or hang it on a nail. You can usually balance the blade with a grinder or file.
If this doesn’t work, I recommend replacing it, as these vibrations can be detrimental to the mandrel assembly in the long run.
– Worn-out Blade Belt:
The blade belt couples the blade pulley and the mandrel assembly, which spins the blades. Over time, the belt teeth can wear out, due to which force transfer to the mandrel gets affected. This can also cause jerks in the blade rotation, producing uneven grass patches.
3. Lawnmower doesn’t cut at all
Here’s how you should troubleshoot a lawnmower that doesn’t cut at all:
- Engage the blade levers: This is the most common case for most users. Remember to press the brake engagement lever before you mow the lawn. Otherwise, the blades won’t rotate, and the Lawnmower won’t trim.
- Remove any debris/clippings: If the blade still doesn’t cut, tilt the mower over to assess the blades. Please ensure that the blades can rotate manually and no debris or grass clippings are stuck between the blades and the spindle.
- Damaged blade belt: The blade belt has most likely worn out. As a result, the spindle doesn’t rotate, and the Lawnmower doesn’t cut any grass. Replacing the belt is the only alternative.
Stanley Lawnmowers: Troubleshooting Drive Problems
Drive problems in riding lawnmowers are caused either due to gearbox or transmission issues. Damaged steering bushings or tie rods can reduce your mower’s handling quality. In self-propelled mowers, damaged drive belts are likely to cause difficulty in propulsion.
Stanley currently produces electric self-propelled lawnmowers, whereas riding lawnmower products are discontinued. Nevertheless, you can own a Stanley gas mower or find a second-hand model.
Here are some typical drive problems for Stanley lawnmowers and their step-by-step fixing procedures.
1. Riding Lawnmower doesn’t move forward:
Your riding lawnmower might get stuck due to a transmission fault or a damaged drive belt.
– Transmission Issues:
Most more recent riding lawnmowers have a hydrostatic drive transmission in which various pumps drive hydraulic oil to transfer power from the engine to the wheels. Please check the hydraulic oil regularly and replenish it if needed. The transmission can get jammed if it runs out of the fluid.
If your Stanley Lawnmower has a gearbox transmission, mechanical issues such as lack of lubrication or gear misalignment might have come into play. I recommend asking a professional to inspect and repair gearbox components due to the level of expertise involved in disassembly.
– Damaged Belt:
A damaged drive belt is a likely factor that renders your Lawnmower immobile until fixed. The V-teeth on a drive belt will likely wear out, so it tends to lose traction on the pulley, which powers the drive shaft. It would be best to inspect the drive belt by detaching the mowing deck from the Lawnmower and tilting it over.
To replace the belt, you should check for the part number in the documents that came along with your mower and place an order online. If you do not know how to replace it, ask a professional for support.
2. Self-Propelled Lawnmower doesn’t move forward:
If a similar issue occurs with a self-propelled lawnmower, in which it doesn’t move despite the engine running, here’s what you need to do:
- Activate the drive control switch: Just like a blade engagement lever, a drive control lever needs to be engaged for the Lawnmower to become mobile. If your lawnmower model doesn’t come with this lever, proceed to the next step.
- Debris jamming the wheels: You should check the wheels and notice if there’s any foreign debris or grass stuck between the wheel and axle, preventing it from spinning freely.
- Worn-out drive belt: If the issue isn’t resolved, it’s most likely a damaged drive belt. To inspect it, you must tilt the Lawnmower over and remove the mower deck. If the belt isn’t damaged, check if it hasn’t lost contact with the drive pulley.
3. Lawnmower vibrates excessively:
Your lawn mower could vibrate more than usual due to unbalanced/loosely installed blades, a damaged blade belt, or, in some rare cases, a damaged crankshaft.
– Unbalanced Blades:
As the above section explains, the blades should be firmly installed on the spindle assembly. Apart from the installation, you must also confirm that the blade is balanced about its centroid.
You can use a blade balancer tool to determine this. Or you can suspend it by a spring at its center and notice if it stays levelled. If the balance is ok and vibrates, proceed to the next step.
– Defective Spindle Bearing:
A faulty spindle bearing has a mechanical play, which may generate excessive vibrations at high engine RPMs. You can detect a faulty spindle by a squeaky sound as the blade is turned. Replacing a bearing is more complicated. I recommend asking a professional for help if you are unsure how to do it.
– Crankshaft Damage:
A bent crankshaft is the inherent source of vibrations, which can never be fixed until the engine is taken apart. Crankshaft damage occurs over time particularly when the engine isn’t maintained well. Lack of lubrication and excessive overrevving contribute significantly to this problem.
4. Lawnmower has a loose steering:
If your Lawnmower has loose steering, check for play in tie rod ends and the steering shaft assembly. Inspect the bearings and the bevel gear bushings in the steering shaft assembly.
Here are the step-by-step instructions for fixing loose steering in your Lawnmower:
a. Inspect the tie rods:
The first thing to do is to inspect any play at the tie rod ends of your steering. You may need to raise the riding lawnmower using a screw jack. Afterward, turn your steering wheel in a certain direction and check how the tie rod moves at that end.
If you notice any mechanical play visually, it is due to loosened/worn-out bolts at the tie rod ends. Try tightening the bolts using an appropriate wrench. Your steering will be fixed in this case.
b. Disassemble the steering:
You need to access the steering shaft. For this, remove the top screw of your steering wheel. Afterward, remove the steering adaptor and the top hatch so the shaft becomes visible. Now, check how the bevel gear behaves when you rotate the steering shaft.
If the gear meshing is loose, the bushing needs to be replaced at the shaft ends. The 9/16-inch bolts at the bottom of the deck should come off to do this. Next, the shaft should be removed, and the gears should be disassembled. To remove the bushing, unscrew the bolt using a socket wrench and install the new bushing.
Please lubricate the gear assembly and the shaft bearings once you are done with replacements. Reassemble the steering shaft and attach the steering wheel. Test the steering performance again to see if the play is fixed.
5. Lawnmower has a flat tire
To fix a flat tire, locate the leak by placing it in a tub of water or using soapy water. Apply a puncture seal and inflate it again with air.
Your tire could have become flat due to air leaking from the valve or a puncture. To verify, remove the flat tire from the wheel rim using a flat-head screwdriver. Place it in a tub of water and notice if you see any bubbles which indicate a puncture.
You can buy a puncture seal from any local hardware store. Apply the repair patch and gradually pressure the tire for about 10 minutes.
Drive & Cutting Troubleshooting table
1. Lawnmower Cutting Problems
S# | Problem | Causes | Fixes |
1 | Lawnmower doesn’t cut straight | a. Dull blades b. Tilted mowing deck | a. Sharpen the blades using a grinder or a bench file. b. Using a level, ensure the deck is perfectly horizontal. |
2 | Lawnmower cuts uneven grass | a. Blade vibrations b. Faulty spindle assembly | a. Ensure the blade isn’t loose. b. The blade should be balanced at its center. If not, it should be replaced. c. The spindle bearing should be replaced if it is faulty. |
3 | Lawnmower doesn’t cut at all | a. Disengaged blades b. Debris/Grass clippings c. Worn-out belt | a. Use the blade engagement lever. b. Clean the spindle from debris and grass clippings. c. Replace/adjust the blade belt as needed. |
2. Lawnmower Drive Problems
Riding Lawnmowers
S# | Problem | Causes | Fixes |
1 | Lawnmower doesn’t move forward | a. Transmission disengaged b. Faulty drive belt c. No hydraulic fluid | a. Use the transaxle lever to engage the drive. b. Adjust/replace the drive belt as needed. c. Replenish transmission fluid. |
2 | The lawnmower has a loose steering | a. Loose tie rod ends b. Damaged steering bushing | a. Tighten and lubricate tie rod ends. b. Inspect and replace the bushing at the end of the steering shaft. |
3 | Lawnmower vibrates excessively | a. Blade imbalance/wobbling around the center b. Damaged spindle bearing c. Missing engine mounts | a. Tighten and adjust the blade to balance about its center. b. Replace the faulty spindle bearing. c. Tighten the engine’s mounting by adding fasteners. |
4 | The lawnmower has a flat tire | a. Low air pressure b. Puncture by a sharp object | a. Purchase a puncture repair kit. b. Apply the puncture seal and inflate the tire again. |
Self-Propelled Lawnmowers
S# | Problem | Causes | Fixes |
1 | Lawnmower doesn’t move forward | a. Loose control cable b. Worn-out drive belt c. Debris locking wheels | a. Tighten the throttle control cable b. Adjust/replace the belt as necessary. c. Remove the debris from the wheels. |
2 | The lawnmower throttle not working | a. Defective throttle cable b. Clogged carburetor | The lawnmower throttle is not working |
3 | The lawnmower pull cord is stuck | a. Damaged spiral spring b. Damaged pull cord | Replace the damaged springs/pull cord. |
I’ve learned so much about maintaining and fixing Stanley lawnmowers from this article, thank you for the valuable insights.
Thank you for your kind words, Luke! I’m glad you found the article helpful and informative. If you have any more questions, feel free to ask!
Is it common for Stanley lawnmowers to have issues with the drive belt wearing out quickly?
The drive belt on Stanley lawnmowers can wear out quickly, leading to issues. Follow the steps outlined in the post to sharpen blades, level the deck, and check the belt for a smoother cutting experience.
This article has given me the confidence to tackle some maintenance tasks on my Stanley lawnmower, thank you for the guidance.
Glad to hear the article was helpful! Best of luck with your maintenance tasks on the Stanley lawnmower. If you have any more questions, feel free to ask.
Can you provide a list of common tools needed to perform maintenance on Stanley lawnmowers?
Hi Glen, I suggest having a socket wrench, hand file, and blade balancer on hand for maintenance on Stanley lawnmowers. Follow the detailed instructions in the article for optimal performance.
Could you provide some recommendations on where to purchase replacement parts for Stanley lawnmowers?
You can find replacement parts for Stanley lawnmowers at hardware stores or online retailers like Amazon or eBay. Make sure to check the model number of your lawnmower for accurate parts.
What should I do if my Stanley lawnmower is making a strange noise while cutting the grass?
Hi Nicole, sharpen the blades, ensure the deck is level, and inspect the drive belt for any issues. Follow the steps in the blog post to fix the strange noise your Stanley lawnmower is making.
I appreciate the detailed explanations on how to maintain and troubleshoot Stanley lawnmowers, very helpful.
Thank you for your positive feedback, Barry! I’m glad you found the information on Stanley lawnmower maintenance helpful. Happy mowing!
How often should I sharpen the blades of my Stanley lawnmower to ensure optimal cutting performance?
To ensure optimal cutting performance, sharpen the blades of your Stanley lawnmower whenever they become blunt or wobbly while rotating. Regular maintenance is key for a seamless mowing experience.
This article provides such valuable information for fixing Stanley lawnmowers, thank you for sharing!
Thank you, Rachel! I’m glad you found the article helpful in fixing your Stanley lawnmower. Happy mowing!
The step-by-step instructions for fixing drive problems in Stanley lawnmowers are incredibly useful, thank you for breaking it down so clearly.
Thank you for your feedback, Pauline! I’m glad you found the instructions helpful in fixing drive problems with Stanley lawnmowers. Happy mowing!
This article is incredibly helpful for understanding and fixing common problems with Stanley lawnmowers. The step-by-step instructions are easy to follow and very informative. Thank you for sharing this valuable information!
Thank you for the positive feedback, Armando! I’m glad you found the information helpful in maintaining your Stanley lawnmower. Happy mowing!
Great tips for maintaining and fixing Stanley lawnmowers! I appreciate the clear explanations and step-by-step instructions provided in this article. Very helpful for someone like me who is not very knowledgeable about lawnmower repairs.
Thank you, Yolanda! I’m glad you found the tips helpful for fixing and maintaining Stanley lawnmowers. Happy mowing!
Are there any safety precautions I should keep in mind while troubleshooting my Stanley lawnmower?
Hi Ryan, make sure to sharpen the blades and check the deck level and tire pressure. Clean the underside of the mower regularly to maintain performance. Happy troubleshooting!
The section on fixing a flat tire on a Stanley lawnmower is very informative, I didn’t realize it was something I could do myself. Thank you!
Thank you for your kind words, Jamie! I’m glad you found the information helpful. Feel free to reach out if you have any more questions. Happy mowing!
The tips on troubleshooting drive issues in Stanley lawnmowers are very practical and easy to implement, thank you for sharing this knowledge.
Thank you, Sean! I’m glad you found the tips helpful for troubleshooting drive issues in Stanley lawnmowers. Happy mowing!
The detailed information on fixing cutting problems in Stanley lawnmowers is so helpful, I feel more confident in taking care of my lawnmower now.
Thank you, Louise! I’m glad you found the information helpful. Don’t hesitate to reach out if you have any more questions about your Stanley lawnmower. Happy mowing!
I appreciate the visuals and videos included in the article, they make it easier to follow the repair steps for Stanley lawnmowers.
Thank you, Alma! I’m glad the visuals and videos were helpful for you. Let me know if you have any more questions on Stanley lawnmower maintenance.
I’m curious to know if there are any specific maintenance tasks recommended for Stanley self-propelled lawnmowers?
To maintain your self-propelled Stanley lawnmower, ensure the blades are sharp, the deck is level, all tires have equal pressure, and the drive belt is in good condition. Regular maintenance will keep your lawn looking great!
How can I check the oil level in the transmission of a Stanley riding lawnmower?
To check the oil level in the transmission of your Stanley riding lawnmower, locate the oil fill hole, remove the plug, and insert a dipstick. The oil level should be between the minimum and maximum marks.
What are the signs that indicate it’s time to replace the blades on a Stanley lawnmower?
To determine if it’s time to replace the blades on your Stanley lawnmower, check for dull blades affecting cutting performance and wobbling during rotation. If needed, sharpen them for an improvement.
The explanations on blade sharpening and deck leveling are easy to understand, makes it less intimidating to maintain my Stanley lawnmower.
Thank you, Daisy! I’m glad you found the explanations helpful and less intimidating. Feel free to reach out if you have any more questions about maintaining your Stanley lawnmower.
I had no idea how to troubleshoot drive issues on my Stanley lawnmower until I read this article, thank you for the guidance.
Thank you for your kind words, Suzanne. I’m glad the article was helpful to you in troubleshooting your Stanley lawnmower. Happy mowing!