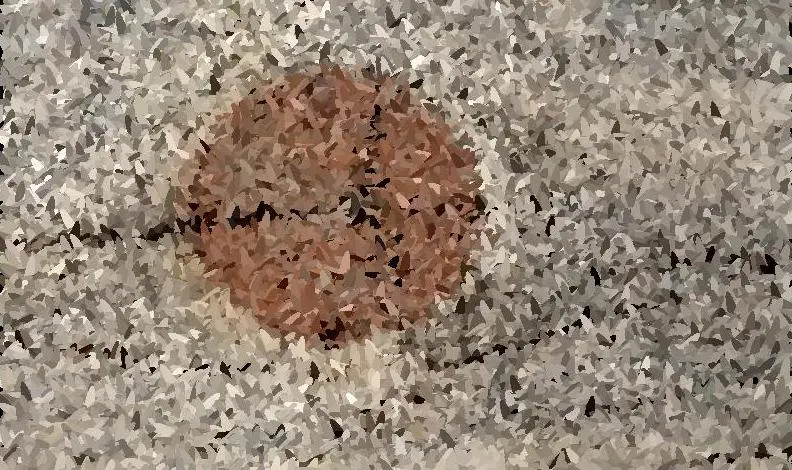
People use wood slices for various projects, from carpentry to wood carvings and sometimes as firewood. Drying your wood is rewarding if you get it right; therefore, take time to learn how to do it. When drying, the best thing to do is treat the wood properly with the right stabilizing solution, salt paste, or wood sealer.
How to Dry Wood without Splitting or Cracking
As moisture evaporates from the wood, it can shrink, split, or crack. The key to avoiding splits, cracks, and warps from forming is through sealants and stabilizing solutions that should be applied before drying. There is a wide range of readily available commercial sealants and stabilizing solutions, or you can use Salt paste.

Are you intrigued by the art of wood drying? Want to know how the right stabilizing solution or salt paste can make all the difference? Our guide delves into these topics and more. Keep reading to enhance your knowledge!
Contents
- 1 Plan A: Using a Sealant or a Stabilizing Solution
- 2 Plan B: Salt Paste
- 3 Wood Warping
- 4 Other ways you can prevent your wood from cracking or splitting.
- 5 Remarks
- 6 The Use of Paintable Wax in the Short-term Storage of Greenwoods
- 7 Utilizing Paintable Wax as a Drying Method
Plan A: Using a Sealant or a Stabilizing Solution
● What Is Needed?
- A stabilizing solution or a sealant
- A container
- Paintbrushes
- Rubber gloves
- Soak the wood
Step 1: Choose the Right Container
Find a container to fit the wood and put it in, but make sure it is made of stainless steel, fiberglass, or plastic. Metal and other materials could cause discoloration; therefore, ensure the container is made from friendly items.
Also, clean the container so no dirt or chemical particles can affect the wood’s appearance.
Step 2: Place the Wood in the Container
Put a couple of wood slices at the bottom of your container. Ensure that the wood slices are well-arranged with those that are the same size put together. Consider using small bricks or slats to support your wood slices to ensure they do not move too much in the container.
Step 3: Wear Rubber Gloves
It would be best to look for rubber gloves before opening the stabilizing solutions. The gloves should be well-fitting to open and pour the sealants and solutions without spilling them on your hands.
Ensure the gloves do not have holes, as you do not want your skin exposed to these chemicals. If you get exposed to the stabilizing solutions in the process, wash your hands with lots of water and soap immediately to avoid getting sick.


Visible cracks or splits, warping, or discoloration are clear signs that wood is not drying properly, something I’ve learned to spot quickly in my 20 years of experience.
Step 4: Stabilizing Solution
Different wood sealants work for freshly cut wood, while others are for partially dried ones. If the wood is still fresh, soak it in a wood stabilizer. A wood sealer works best for partially dried timber. Using a wood sealer or a stabilizing solution helps to avoid splits and cracks in your wood without cracking.
Fill your container halfway so that the solution can not overflow. You can easily find wood sealers in different supply stores near you or order from online stores.
Step 5: Cover the Container
Once you have put the solution in the container, cover it with a plastic wrap. This keeps the solution from evaporating and also ensures the wood soaks enough of the solution. You are not expected to submerge the whole wood; provided that most of the wood is covered, you’re good to go.
Stir the solution a few times to ensure even distribution.
Step 6: Soaking the Wood Slices for 24 Hours
Allow your wood pieces to soak for 24 hours without disturbance. It is the best way to have the solution penetrate the wood and get distributed evenly. Once that is done, remove the wood and store it on the side until it dries. Slice some cornstarch and stir it into the solution to help it penetrate better.
Leave it for a week for the solution to evaporate, but know that the thinner slices dry faster than the thicker ones. If the wood is damp when you touch it, give it more time. Place a piece of plastic on top of the wood to help it dry evenly.
Plan B: Salt Paste
● Things Required:
- Salt
- Cornstarch
- Eggs
- Paintbrushes
A salt paste can dry your wood and prevent natural cracking and splitting. It is one of the simplest ways to dry wood without harsh chemicals.
After two decades in the field, I can confidently say that the ideal moisture content in wood before it can be considered ‘dry’ is typically around 6-8%
Step 1: Mix Table Salt with Water
Fill a bucket with fresh water, then pour the salt into it. Stir until it is well mixed. The amount of salt and water to use depends on your wood.
Step 2: Leave the Solution
Let the solution sit for about four hours before adding cornstarch to get the paste. Add some water to the mixture if you add too much cornstarch, which becomes problematic.
Step 3: Eggs
Add three egg whites to the mixture and mix well. Ensure that the egg whites disappear into the paste so the wood doesn’t get flaked after applying the solution, which is seen when the wood dries.
Step 4: Cover the Wood with the Paste
Use a clean brush to cover the wood with the paste. Ensure the strokes are smooth to create a layer on the surface. Every part should be covered, including the sides of the wood. After a while, the salt paste will harden so it does not come off quickly.
Step 5: Keep the Wood in a Warm Area
When the piece is fully covered, dry the wood in a warm place. The paste draws moisture from the wood, ensuring it does not shrink, split, or crack. Check the wood after a week, but remember, thick slices could take a month to dry.
Wood Warping
Wood warping occurs if there is too much moisture in different parts of the wood, making it dry unevenly. When one side of the wood dries faster than the other, it causes stress, leading to deformity. So, how can you prevent wood warping?
● Storage Techniques
It would be best if you stored your lumber correctly. If you have stacks of wood, there should be sticks of similar length in between. Avoid placing heavy items on the stored wood and ensure proper ventilation in the room for enough air circulation.
Keeping your wood in a cool, dry, and clean place helps to prevent warping. If the place has relative humidity, wrap it with a material that does not let moisture get to the wood.
● Drying and Curing Your Wood Well
Once you cut the wood, it is best to dry it through the proper methods. Many experts recommend never drying the wood too fast, as it regains moisture quickly, leading to warping. Air drying could be a perfect choice as thoroughly drying your wood slice takes a couple of days, weeks, or months.
Ensure that the ends are sealed using proper wood sealants so that there is no uneven drying that could lead to warping. Remember to continue monitoring the wood as it dries.
● Monitor the Amount of Moisture in the Wood
There are electric moisture meters that you can invest in and continuously weigh to see how much moisture is in the wood. Having the records of such readings will help determine if the wood is drying as required or turning to other drying options.
Over the years, I’ve used a variety of techniques to dry wood without causing it to split or crack, including air drying, kiln drying, and using chemical treatments.
● How to Check Wood for Warping
- Place the wood on a flat surface.
- Check the wood’s edge to see if it is leveled. If there is a part that is raised above the rest, chances are your wood is warping. If the wood is freshly cut, it might warp as it dries. Therefore, it’s essential to feel the wood and observe any changes.
- If the wood cups or bends, it’s likely warping. Also, check the bottom of the wood and the inch of the wood that was left after cutting. If you notice any changes, it’s likely your wood is warping.
Other ways you can prevent your wood from cracking or splitting.
● Letting the Logs Dry as Boards
It is one of the most ingenious ideas you can adopt, considering there will be no cracks or splits. The procedure involves cutting the logs into boards immediately, leaving them to dry, reducing the wood warping instances.
● Use Oils
You can either use linseed or teak oil. Linseed oil can be used after preparing the boards or once the barks are peeled off the tree stumps. In other instances, use teak oil by soaking the wood and leaving it to dry.
These oils are quite helpful and help to protect the wood from splitting or cracking. However, teak oil takes too long to dry, giving the wood longer to dry before it’s useable.
Remarks
If wood drying is not done correctly and well-controlled, the wood pieces are prone to cracking, splitting, and warping. That is why you should find the right ways to prevent that.
The availability of sealants, oils, and a wood-stabilizing solution might be an issue, but through proper research and knowing the best stores to shop from, you will find something that works.
Controlling the moisture in the wood through suitable stabilizers and sealants helps you carry out carpentry tasks, wood carving, and other things without worrying about the outcome since the wood will not have any deformities.
The Use of Paintable Wax in the Short-term Storage of Greenwoods
In my experience, paintable wax is an incredibly efficient method when attempting to store greenwood in the short term. A suitable paintable wax can create a protective shell around the lumber, reducing moisture loss and often leading to cracking and subsequent damage.
An excellent resource for understanding more about paintable wax and its protective properties is the Oregon State University Extension Service.
• The Importance of Proper Storage and Stack Organization
One singular recommendation I cannot stress enough is the significance of proper stacking and storage. Maintaining regular intervals between the wood pieces and avoiding placing heavy items on the stack can significantly reduce the risks of warping.
This storage technique permits consistent air circulation, ensuring each wood piece dries evenly.
• Preventing Warping Using Tension Bands
Warps can be a persistent issue when drying wood. A factor that has stood out to me is the use of tension bands for clamping the wood.
This technique not only mitigates warping but also facilitates an even drying process. Start at one end and work to the other for each band to maintain consistent tension.
• The Role of Moisture Meters in Wood Maintenance
Every woodworker should have an electric moisture meter. Routinely checking the moisture content level ensures the drying process is progressing correctly. A simple online search like Wagner Moisture Meters provides a variety of options to consider.
• Understanding the Science Behind Wood Cracking
Insights into the cracking tendencies of wood and adherence to proper drying techniques can help prevent splitting and cracking. For instance, most hardwoods check when the wood’s moisture content falls below 30%. I recommend gaining this knowledge to devise an appropriate curing strategy.
• Utilizing Sealants or Natural Products
Another proactive approach to forestall wood splitting involves the use of sealants or natural products such as linseed oil or salt.
These substances act as protective layers, preserving the wood by reducing its exposure to harmful environmental factors. A simple guide about these procedures can be found at the U.S. Department of Agriculture.
• The Effectiveness of Air Drying
One drying method that has served me well during my woodworking tenure is air drying. This method plays a crucial role in preventing warping and cracks in the wood by facilitating even drying.
The key is to allow plenty of space for air to circulate the stack and patience for the process to take its course.
The perfect combination of the right tools, knowledge, patience, and experience ensures your wood’s longevity and aesthetics. Practicing proper wood maintenance techniques can go a long way in extending life and retaining the natural beauty of your lumber.
Utilizing Paintable Wax as a Drying Method
Firstly, many professionals gravitate towards using paintable wax when drying wood. The primary reason behind this choice is that paintable wax has a unique property that helps to prevent cracking substantially.
I highly recommend using a high-quality paintable wax as this method is cost-effective and highly efficient. You can find this material at almost any home improvement store. A reliable source for gaining in-depth knowledge about different types of waxes and their uses is Woodwork Institute.
• Varnish – An Ultimate Drying Option
Varnishing is another commonly preferred solution to the common issue of wood cracking during drying. Woodworkers often employ this technique due to the protective qualities varnish can provide besides preventing wood from breaking.
It is also worth noting that varnishing imparts an attractive, shiny finish, making it the perfect option for decorative pieces. In my experience, varnish is a highly viable option, especially when dealing with external wood applications.
• Linseed Oil – Avoid Wood Splitting Effectively
If varnishing or waxing isn’t suitable for your woodworking project, using linseed oil should not be overlooked, either. Linseed oil penetrates the wood’s surface uniquely, effectively repelling water and, in turn, preventing splitting or cracking.
Its effectiveness is widely recognized, hence its popularity among woodworkers. However, it’s worth noting that linseed oil can darken the wood, which may or may not be desirable depending on the project.
• Dry Wood Logs As Planks to Limit Cracking
Another helpful method when drying wood logs aside from painting them with wax, varnishing them, or using linseed oil is drying them as boards.
When logs are split into boards for drying, it minimizes the likelihood of cracking, warping, and other distortions. I urge every craftsman to implement this method, especially when dealing with larger logs.
• Importance of Monitoring Moisture Levels in Wood
Regardless of drying techniques, regularly monitoring moisture levels in wood is a critical step that should never be overlooked. Moisture levels often dictate the rate and quality of drying, directly correlating to the tendency of wood to crack.
Therefore, I recommend using a moisture meter to measure moisture content accurately during drying. For comprehensive guidance about monitoring moisture levels, visit the Forest Product Laboratory.
• Preventing Cracking in Specific Wood Products
Specific wood products like cookies, wood slice ornaments, and furniture need extra care to prevent potential cracks. Employing the previous methods and using sealants or saturants can drastically enhance the results of these projects.
Knowing when and what preventative measures to utilize based on the type of wood product you are working with can significantly improve your woodworking craftsmanship.
In my opinion, you should always consider each piece of wood’s specific characteristics and needs. Doing so will enable you to anticipate any issues and take the necessary preventive action to ensure beautiful, crack-free wooden creations.
• In Conclusion
Preventing wood from cracking during drying requires proficiency and knowledge about various techniques and methods.
Whether you opt for paintable wax, varnish, or linseed oil, drying your logs as planks, or keeping a vigilant eye on the moisture content, each approach offers its benefits and potential challenges.
Above all, remember that the beauty of woodworking lies in the creation and understanding and respecting the wood itself.
Your woodworking journey will be significantly more rewarding when you take the time to understand the nature of the material and experiment with the best practices for preventing cracks and preserving its natural beauty.
Remember, wood is a natural material that deserves your attention and care. As you master the craft, you’ll enjoy working with wood and creating beautiful, lasting, and crack-free pieces.
I never knew cracking in wood could be prevented with the use of stabilizing solutions, I’ve learned something new today!
Thank you, Sara! It’s great to hear that you found the information about stabilizing solutions helpful. Keep learning and experimenting with different techniques to preserve the beauty of your wood projects. Happy woodworking!
Is there a specific type of wood that is more prone to warping?
Thank you for your question, Candice! Woods with higher moisture content, like softwoods and freshly cut woods, are more prone to warping. Using stabilizing solutions and salt paste can help prevent this issue.
The instructions on using paintable wax for short-term storage were clear and easy to follow, great article!
Thank you for your kind words, Jill! I’m glad you found the instructions on using paintable wax clear and helpful for short-term storage. Happy woodworking!
Can you use natural oils instead of stabilizing solutions?
Using stabilizing solutions or sealants is recommended to prevent wood from splitting or cracking during the drying process. Natural oils may not provide the same level of protection. Consider using the suggested methods for best results.
Great tips on preventing wood warping, this was really informative!
Thank you, Jimmy! I’m glad you found the tips on preventing wood warping informative. Always happy to share knowledge on wood drying techniques. Keep woodworking!
The section on understanding the science behind wood cracking was fascinating, I enjoyed learning about the process!
Thank you, Priscilla! I’m glad you found the information on wood cracking fascinating. Keep learning and experimenting with different drying techniques to ensure your projects turn out beautifully. Happy woodworking!
Are there any environmental concerns with using stabilizing solutions?
Thank you for your insightful question, Jennifer. Using stabilizing solutions is crucial to prevent environmental damage while drying wood. Properly applied, they can protect both your wood and the environment.
The video links shared in the article were very helpful, I appreciate the additional visual aid!
Thank you, Georgia! I’m glad you found the video links helpful. Visual aids can really enhance the learning process. Enjoy your woodworking projects!
This article has inspired me to pay more attention to the wood drying process, thank you for the valuable information!
Thank you for your kind words, Nevaeh! I’m thrilled to hear that you found the article inspiring and valuable. Keep exploring the world of wood drying – it’s a fascinating journey!
What are the risks of using too much stabilizing solution on the wood?
Thank you for your inquiry, Bessie. Using too much stabilizing solution on wood can lead to oversaturation, affecting the wood’s natural characteristics and possibly causing discoloration or damage. It’s best to follow the recommended guidelines.
I appreciate the tips on using tension bands to prevent warping, I’ll definitely try that next time!
Thank you, Enrique! I’m glad you found the tips helpful. Let me know how it goes with the tension bands – happy woodworking!
How do you know when the wood is fully dried and ready for use?
Proper drying methods are crucial. Use stabilizing solutions or salt paste before drying. This prevents warping and cracking. Ensure proper storage and organization for long-term results. Explore more tips on wood maintenance in the blog.
What are the differences between air drying and using stabilizing solutions in terms of effectiveness?
It’s essential to properly treat wood with stabilizing solutions for preventing cracking. Salt paste can also be effective; experiment with both methods. Happy woodworking!
Can you reuse the stabilizing solution for multiple batches of wood?
Yes, the stabilizing solution can be reused for multiple batches as long as it remains effective. Be sure to monitor its potency and store it properly for optimal results.
Thanks for the detailed steps on using salt paste, I can’t wait to try it out on my wood projects!
Thank you, Luke! Enjoy experimenting with salt paste on your wood projects. It’s a rewarding process when done right. Happy woodworking!
Can you use the same salt paste mixture for multiple rounds of soaking?
Yes, you can reuse the same salt paste mixture for multiple rounds of soaking wood slices to dry them effectively. Just ensure it is well mixed before each use. Enjoy your woodworking journey!
I had no idea about the importance of using air circulation when drying wood, thanks for sharing!
Thanks for your interest, Dwayne! Knowing the right drying techniques is crucial for preserving the quality of wood. Keep exploring the art of wood drying for successful projects.
The suggestions on using linseed oil as a preventive measure for wood splitting were very useful, thank you for the insights!
Thank you for your kind words, Rose! I’m glad you found the suggestions on using linseed oil helpful. Happy woodworking!
How long does the process of drying wood using salt paste take?
“Typically, the process of drying wood with salt paste can take anywhere from a week to a month, depending on the thickness of the wood slices. Keep an eye on the moisture levels to ensure a successful outcome!”
Is it necessary to use a stabilizing solution or salt paste for all wood types?
Thank you for your question, Gabe! Using a stabilizing solution or salt paste is beneficial for most wood types to prevent splitting and cracking while drying. It’s a worthwhile investment in the long run.