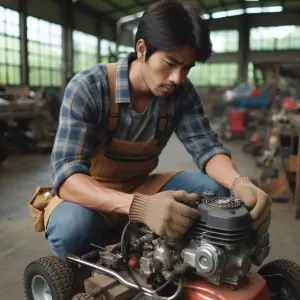
Is a faulty lawnmower disrupting your gardening routine? We have a step-by-step guide that will help you fix it. Trust us to provide the solution you need.
To fix a plastic gas tank, drain fuel, detach the tank, locate cracks, and clean the area. Melt plastic into a crack with a soldering iron or glue fiberglass over it. Let dry completely. Reattach the tank and refill the gas when fixed. Check for leaks before using it again.


Don’t stop now! We’re about to reveal the secrets of lawnmower repair. We’ve got you covered from draining the fuel to checking for leaks. So, are you ready to get your hands dirty and your lawnmower working again?
Contents
- 1 Materials Required:
- 2 ● Step 1. Remove all the fuel out of the gas tank:
- 3 ● Step 2: Detach the gas tank from the lawnmower:
- 4 ● Step 3. Locate the crack on the gas tank:
- 5 ● Step 4. Clean the area around the crack:
- 6 ● Step 5. Fill the crack:
- 7 ● Step 6. Reattach the fixed gas tank to the lawnmower:
- 8 Related Questions:
- 8.1 1. How can I tell if there is water in my lawnmower’s gas tank?
- 8.2 2. Why is my lawnmower not getting any gas?
- 8.2.1 Check for cracks:
- 8.2.2 Clogged filter:
- 8.2.3 Closed valve:
- 8.2.4 Clean the carburetor:
- 8.2.5 One common mistake I’ve observed is people not properly preparing the tank surface before applying the sealant or not allowing enough drying time. Avoiding these mistakes can make a big difference in the success of your repair.
- 9 Remarks:
Materials Required:
The following materials will be required to assist you in fixing the plastic gas tank efficiently and successfully:
- Soldering iron
- Hacksaw
- Screwdriver
- Safety goggles
- Protection gloves
- Sandpaper
● Step 1. Remove all the fuel out of the gas tank:
Step 1. Park the mower at a suitable location: Park the lawnmowers at a place that can deal with some gas spillage. When you remove the gas tank, it is always possible that some of the fuel spill on the ground.
Step 2. Remove the gas: Remove the gas tank’s cap. Empty the gas tank by disconnecting the fuel line. Another method would be to siphoning the gas from the tank. Make sure that all the gas is entirely removed from the tank.
● Step 2: Detach the gas tank from the lawnmower:
Step 1. Remove the gas tank: The gas tank is attached to the lawnmower’s body with some screws. Remove these screws with the help of a screwdriver, and detach the gas tank.
Step 2. Remove the fuel fumes from the tank: The fuel fumes must also be removed entirely from the gas tank before starting the main procedure. Take an air compressor pipe and blow air inside the gas tank. This shall remove all the fumes from the gas tank.
The gas tank’s cap should remain removed during the entire process of the tank’s fix. This is done to avoid the creation of any internal pressure inside the tank.

In my 20 years of experience, I’ve found that leaks, cracks, and blockages are the most common issues with lawnmower plastic gas tanks. It’s crucial to address these problems promptly to ensure the longevity of your equipment.”
● Step 3. Locate the crack on the gas tank:
Step 1. Fill the gas tank with water: You often spot the crack easily. But when this is not the case, close the hole at the bottom connected to the fuel line. Fill the gas tank with water, and keep filling the tank until you spot the leakage point.
If that does not work, you can try to increase the tank’s pressure with help from an air compressor. Use some cloth to decrease the air leakage near the fill cap.
Step 2. Mark the leakage point: Mark the area around the leakage point or the crack using a marker.
Step 3. Remove the water from the gas tank: Remove the water you used to find the crack from the gas tank and let it dry.
● Step 4. Clean the area around the crack:
Step 1. Position the gas tank on a flat surface: Place a wooden plank or something else below the gas tank, and position it so that the crack faces towards you.
Step 2. Polish the crack’s surface: Grab a small piece of sandpaper and polish the crack so that the crack’s surface becomes even and more visible.
Step 3. Clean the area around the crack: You need to use soldering iron on the area around the crack, so that area must be clean. Clean the area around the crack by putting some rubbing alcohol on a cotton swab.
● Step 5. Fill the crack:
There are three possible methods to fill the crack and, thus, fix the gas tank, depending on the crack’s size and the thickness of the tank’s walls. All methods will be discussed in more detail below.
– Method 1. Melt the area around the crack using a soldering iron:
This method is used when the gas tank is made from thick plastic. Make sure the plastic can be melted by first trying it on a small part. See if it indeed melts and, when dried, gets its strength back. When this looks ok, the step-by-step procedure to use this method is as follows:
Step 1. Switch on the soldering iron: Switch on it and wait until it’s heated. If the soldering iron can be set at different temperatures, start with a low temperature first.
Step 2. Melt a small trench using the soldering iron: Melt a small trench on the crack so that the soldering iron doesn’t go through the tank; instead, it only melts the surface.
Step 3. Scoop the plastic into the trench: Now, melt some plastic surrounding the trench, and use a small tool to push this melted plastic into the trench and the crack. Keep doing this until the groove is filled with melted plastic completely.
Step 4. Recheck for any leakage: Fill the fixed gas tank with gasoline and close the tank’s cap. Shake the tank and check if the leakage exists. Let us tell you something: you won’t see any leakage if you have applied this method step by step.
– Method 2. By melting a small piece of plastic into the crack:
This method can be used when your gas tank doesn’t have thick plastic walls. The step-by-step procedure to apply this method is as follows:
Step 1. Cut a tiny piece of plastic: Some gas tanks have additional plastic around the area of screw holes. Using a hacksaw, cut a small piece of plastic from this area. If extra plastic isn’t available on the gas tank, you may cut a tiny piece from anything at your home that isn’t useful to you.
Step 2. Switch on the soldering iron: Switch on it and wait until it’s heated.
Step 3. Melt the cut piece into the crack: Place the tiny plastic piece you have just cut onto the crack. Using a soldering iron, melt this piece and force the melted plastic into the crack. Keep doing this until the crack is filled with melted plastic.
Step 4. Recheck for any leakage: Fill the fixed gas tank with gasoline and close the tank’s cap. Shake the tank and check if the leakage exists. But we bet you won’t see any leakage if you have followed the abovementioned steps.
Early detection is key to maintaining your lawnmower’s plastic gas tank. Signs such as the smell of gas, visible leaks, or the lawnmower not starting or running properly indicate that your tank may need repair.
– Method 3. Use glue or fiberglass to fill the crack:
If melting plastic does not work well in your case, you can fill the crack with something else. You can try to use a glue that can cope with gas. Another material would be fiberglass. Clean the environment from the crack well, and use sandpaper to roughen the area. Then, use glue or fiberglass to repair the crack.
● Step 6. Reattach the fixed gas tank to the lawnmower:
- Since the gas tank has been fixed now, so it’s time to attach it back to the lawnmower
- Tighten the gas tank screws using a screwdriver to put the tank back in its original place
- Reconnect the fuel line to the gas tank’s nozzle
You have successfully fixed the lawnmower’s plastic gas tank and can fill in the fuel without worrying.
Related Questions:
1. How can I tell if there is water in my lawnmower’s gas tank?
- Left in the rain: The presence of water in the gas tank is one of the main reasons that halts the lawnmower from starting. It may not be because the lawnmower was left open in the rain but also because the gas in the tank condenses, thus creating moisture.
- Sudden stall: One of the water-contaminated fuel indications is that the lawnmower suddenly stalls during its operation.
- Smoke from the engine: Another indication is the emittance of a comparatively more significant amount of smoke from the lawnmower’s engine, resulting from low fuel combustion inside the piston chamber.
- Check with a flashlight: A flashlight can also check the presence of water inside the gas tank. Take the lawnmower in a shady area or indoors, and then shine the light on the tank. Heavier than fuel, water settles at the tank’s bottom and forms tiny bubbles. These bubbles can easily be spotted with the help of light.
- Drain the gas: Such contaminated gas must be drained from the gas tank immediately, as water can corrode the engine and carburetor’s metallic parts. After the drainage of water-contaminated fuel, dry the gas tank completely using compressed air.
- Keep the gas cap closed: It is also advised to keep the gas tank’s cap closed to avoid any moisture entering the tank.
2. Why is my lawnmower not getting any gas?
There might be multiple reasons that stop the supply of fuel to the lawnmower. A few significant causes, along with their solution, are mentioned below:
Check for cracks:
First, check the gas tank for any breakage or cracks. The cracks cause fuel leakage; thus, the lawnmower can run out of fuel within minutes. You need to fix the gas tank or buy a new one in this case
Clogged filter:
Another reason that may cause this issue is a clogged filter. A filter between the carburetor and the fuel tank stops any dirt or debris from entering the carburetor.
This filter may get clogged with time and eliminates the fuel supply to the lawnmower. In this case, the filter must be cleaned to continue the fuel supply to the lawnmower.
Closed valve:
Some lawnmowers have a valve that stops the fuel supply to the carburetor. It is often turned off at the end of the season or when the lawnmower needs to be repaired. Make sure that this valve is not turned off
Clean the carburetor:
Despite multiple efforts to halt the entrance of dirt into the carburetor, old gasoline can still form a film inside it, thus stopping it from working.
A malfunctioned carburetor will stop the fuel supply to the lawnmower’s engine. You need to gently open the carburetor and clean it from inside using gasoline and a brush.
One common mistake I’ve observed is people not properly preparing the tank surface before applying the sealant or not allowing enough drying time. Avoiding these mistakes can make a big difference in the success of your repair.
Remarks:
You don’t need to buy a new gas tank if the damaged area of my gasoline tank is a little cracked, thanks to the methods mentioned above that can be used to resolve your problem. Gasoline leakage drains the fuel faster and can be hazardous as it is highly flammable.
So, it’s advised to fix it as soon as possible. Also, don’t forget to wear protective gloves to protect yourself from unnecessary burns and cuts. Safety goggles must also be used to protect your eyes from toxic fumes.
All the tools used in the process, as described, are the key to a successful repair. The repair is done by applying a patch on the damaged area. It’s good to ensure that the surface to be repaired is clean.
-The Importance of Patch Material
The patch and the adhesive need to bond well with the tank material. This is where molecular bonding comes into play. The adhesive on the back of the patch and the patch material will connect with the tank material in the repair area.
The patch should be applied slowly and carefully to ensure it adheres well to the area with the crack. The patch should then cure according to the manufacturer’s instructions.
Once fixed, the patch should restore the tank to its original condition, preventing further leakage. All the tools used in the process must be kept out of children’s reach to avoid accidents
Great step-by-step guide!
Thank you, Sonia! We’re glad you found the guide helpful. If you have any more questions about lawnmower repair, feel free to reach out. Happy gardening!
What if I don’t have a soldering iron?
You can use fiberglass or glue as an alternative to a soldering iron for fixing the gas tank. Follow the steps provided and ensure your lawnmower is back in shape.
Can this method be applied to other types of plastic tanks?
Yes, this method can be applied to other types of plastic tanks as well. Follow the steps provided, and you should be able to fix them too!
What precautions should be taken when reattaching the gas tank?
To reattach the gas tank, ensure it’s completely fixed, reattach the tank securely with a screwdriver, and refill gas cautiously to check for leaks before using it again.
Can I use a different method to locate the crack?
Eduardo, try filling the gas tank with water to locate the crack. If that doesn’t work, you can increase pressure with an air compressor. Good luck fixing it!
Very detailed instructions, thank you!
Thank you for your kind words, Ramon! We’re glad you found the instructions detailed and helpful. Happy fixing your lawnmower!
I never knew fixing a lawnmower could be this easy!
Thank you, Alfred! We’re glad you found our lawnmower repair guide helpful. Keep up the good work!
How long does it take for the tank to dry after fixing the crack?
After fixing the crack on the gas tank, it is recommended to let it dry completely before reattaching it to the lawnmower. Let it dry for at least 24 hours.
How often should I check for leaks after fixing the tank?
After fixing the tank, check for leaks immediately. If there are none, check again after a few hours to be extra sure. Safety first!
Do I need to have prior experience with tools to fix the gas tank?
No, prior tool experience is not required to fix a gas tank. Our step-by-step guide will walk you through the process. Trust us, you can do it!
Thank you for explaining each step so clearly!
Thank you for your kind words, Amanda. I’m glad you found the step-by-step guide helpful. If you have any more questions or need further assistance, feel free to reach out. Happy gardening!
Is it necessary to wear safety goggles?
Yes, safety goggles are necessary to protect your eyes from toxic fumes while fixing a plastic gas tank on a lawnmower. Stay safe and good luck with the repair!
What type of glue is best for fixing the crack?
Hi Marion, for fixing cracks in a plastic gas tank, consider using a soldering iron to melt plastic or glue fiberglass over it. Make sure it’s dry before reattaching. Hope this helps!
This guide makes me feel confident about fixing my lawnmower!
“Thrilled to hear that you’re feeling confident about fixing your lawnmower, Jerry! We’re here to support you every step of the way. Happy repairing!”
I appreciate the detailed materials list, very helpful!
Thank you for the feedback, Taylor! We’re glad you found the materials list helpful. Stay tuned for more step-by-step guides to keep your lawnmower in top shape.
What if I accidentally overheat the plastic while melting it?
If you accidentally overheat the plastic while melting it, the best solution is to start with a low temperature on the soldering iron and gradually increase it. Make sure to test on a small part first.
Can I use a different material instead of fiberglass?
Todd, fiberglass is the best material to use for fixing a plastic gas tank due to its ability to withstand gasoline. Using a different material may not hold up as well.
I love how this article breaks down the repair process step by step!
Thank you, Brad! We’re glad you enjoyed the step-by-step guide on lawnmower repair. Keep an eye out for more helpful tips and tricks in the future.
This guide saved me a lot of money, thank you!
Thank you for sharing your experience, Grace! I’m glad our guide helped you save money. Keep up the great work in fixing things around your home!
Very informative article, thank you for sharing!
Thank you for your kind words, Lee! We’re glad you found the article informative. Let us know if you have any questions or need further assistance with your lawnmower.