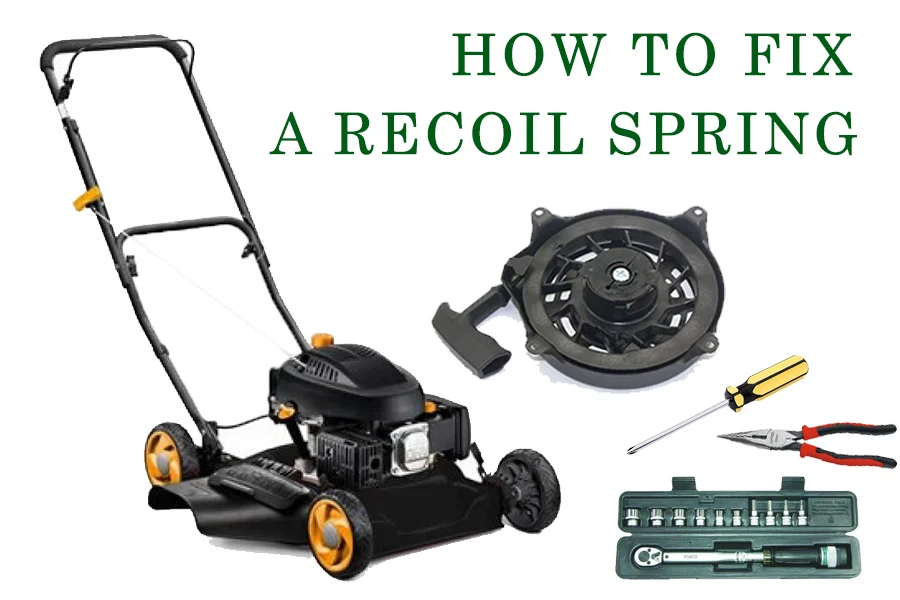
On a lovely Sunday morning, you plan to trim your lawn. You gear up and grab your lawnmower. When you were about to start the machine, you are with a problem. You had to use more force than normal to pull the cord. Then you hear strange noise, and now the cord does not go back. The lawnmower’s pull cord has gone slack. Starting the engine now has become impossible.
You might think of taking the lawnmower to a repair shop for a professional analysis. But such a case can easily be handled by you with just a screwdriver. In less than 30 minutes, you can fix or replace the recoil spring. Before jumping to the conclusion that the recoil spring needs fixing or repairing, first try cleaning and reoil the recoil mechanism. In some cases, this will fix the issue. If it still does not start, you can follow the below-mentioned steps to fix the recoil spring.
How to Fix a Recoil Spring on a Lawnmower, step by step:
- Step 1: Remove the Recoil Housing Cap
- Step 2: Untie the Rope
- Step 3: Replace Parts (If Needed)
- Step 4: Re-tension the Spring
- Step 5: Attach the Cap
- Step 6: Reinstall the Rope
- Step 7: Coil the Cord
- Step 8: Reattach the Recoil Housing Cap

Contents
Causes of a Lawnmower Recoil Spring Failure:
A recoil spring can fail due to several reasons:
- The spring slide out of its place, causing it to lose tension
- The pulley or recoil housing has worn, and the spring no longer sits in the housing correctly
Required Tools and Materials:
- A standard screwdriver
- Needle-nose pliers (optional)
How to Fix a Lawnmower Recoil Spring, step by step:
● Step 1: Remove the Recoil Housing Cap
The first step is to remove the starter from the engine’s top by detaching the recoil housing cap. Remove the screws with a screwdriver, depending on the type of bolt holding it in place. The housing cap can be removed by lessening the screws at its corners. Liftoff the housing cover to gain access to the recoil assembly.
● Step 2: Untie the Pull Rope
The next step is to remove any rope part that is still wrapped around the pulley. The easiest way is to use a small screwdriver or a pair of needle-nose pliers. We need to find the end of the rope, fish it out with the screwdriver and grab it with a plier. Once you get to the end of the cord, secure it to the pulley by inserting a screwdriver between the pulley and the starter housing. This will keep it from recoiling back. Now the rope can easily be pulled out. Cut the knotted end off, then pull the rest of the cord away from the pulley.
While pulling the rope out, you need to be careful. Pulling the cord further out puts tension on the pulley. If the pulley was to slip, it could potentially cause an injury.
● Step 3: Replace Parts (If Needed)
If the housing, spring, or pulley itself appear to be damaged, it needs to be replaced. Use a good quality replacement part. Often you can find the part numbers in the user manual.
● Step 4: Re-tension the Spring
Remove the previously inserted screwdriver, being careful not to allow it to recoil back. Go ahead and re-tension the spring until it is at the end. Normally this means turning it about six times. Then, let the pulley carefully go until the pulley’s hole for the rope lines up with the starter housing opening. Insert the screwdriver back into it, and hold it in that position.
● Step 5: Attach the Cap
Reattach the pulley cap to the recoil housing. The cap will secure the assembly but will not prevent the pulley from spinning. Keep a good grip on the pulley.
● Step 6: Reinstall the Rope
Take a new cord and feed it through the housing’s opening and the gap on the pulley. Tie a knot at the end of the rope and tuck the knot down into the little pocket in the pulley. Hold the pole with your finger and pull out the screwdriver again. This allows most of the rope to recoil back into the pulley. But do not let all the cord go back in there. Leave about two feet or 18 inches sticking out. Put the screwdriver in again to secure it. Tie a temporary knot in the line to remove the screwdriver. Now, take that starter handle and pull any rope out of it that might still be there. Insert the new cord through it and again tie it off with a knot. Pull the knot down into the opening on the top of the handle.
● Step 7: Coil the Cord
Now the starter assembly can be reinstalled onto the mower. Remove that temporary knot and thread the line back up through the eyelet on the handle. Control the rope speed as the pulley winds the rope back into the starter by applying pressure down on the spring using your thumbs while rotating it in place.
● Step 8: Reattach the Recoil Housing Cap
Pull the cord a couple of times to ensure the pulley is recoiling properly. If the engine doesn’t start, the cord may be too loosely wound around the pulley. Repeat Step 7 in that case and ensure that the cord is wound around the pulley tightly. If the engine starts properly after pulling the cord, you can safely reattach the housing cap, reassemble it and tighten the screws.
Important Notes:
- Align the V-shaped ends correctly: While repairing or replacing the recoil spring, make sure that the V-shaped ends of the recoil spring face the same way to the left. If not facing the same way, the recoil spring might not work.
- Use vise grips: If you face difficulty handling the spring due to its tension, try using a pair of vise grips.
- Grease the spring: Before replacing the Recoil Housing Cap, grease the recoil spring thoroughly. Be sure to use plastic-safe grease.
- Briggs and Straton: B&S (Briggs and Stratton) springs tighten in a counter-clockwise fashion.
Precautions:
- Safety gear: Use safety equipment gloves, apron and glasses are musts. If the spring suddenly unwinds, it can hit your eye.
- Tension: When pulling the chord out, always be careful as the pulley under tension can cause serious injuries.
- Spring: When pulling the spring out, keep your thumb above it to prevent a sudden pop out of the spring, preventing a harmful situation as it is quite sharp and dangerous for eyes and hands.
- Be careful when flipping the parts: When examining the recoil spring, especially the rotor assembly, make sure the parts do not fall off from their places when flipping it over.
- Watch moving parts: Handle moving parts with extra caution.
- Hot engine: Be careful if the engine is hot. Let the engine cool completely before touching hot parts.
Frequently asked questions:
1. How to ensure that the recoil spring is broken?
To ensure whether the recoil spring is broken or not, try moving it with the rope in the counter-clockwise direction. If it is all jammed up and it does not spring back, that is a true sign that the recoil spring has an issue and would require replacement.
2. What if the spring comes apart or collapses on you?
Do not despair in such a situation. Simply squeeze the spring with your hand and loop it around carefully. Make sure it is tight enough to fit in the recoil housing. The tighter it gets, the harder it is to handle it, so use a needle-nose plier to hold it in its place.
Another way is to grab the end of the recoil spring, insert it into the groove and then walk it around inside the recoil housing by circling it inside it. This method is a bit tricky because it keeps wanting to pop out, but it does become a little easier as you get it started.
3. What to do if you are unable to install the recoil rope back?
If you face any difficulty installing the recoil rope back, you can melt a hole in the upper part of the housing, right about an inch or two ahead of the recoil rope hole, for the rope to go in to be able to tighten up the spring.
To make a hole, you can simply heat an awl and melt the housing with it. Make sure the place is ventilated and do not breathe in the resulting smoke.
4. What is the easiest way to rewind a recoil spring?
Hold the recoil spring firmly with your fingers, with your index finger in the center of the coil, and thumb pinching the recoil spring together. Start to pull on the loose end of the recoil spring slowly now. The recoil spring should begin to tighten in diameter, with its length being wrapped around the center, being held by your index finger. Keep the coil pinched with your thumb to prevent it from unwinding. Keep rolling the loose end of the recoil spring to shorten it in its length until the coil’s diameter is small enough to fit back into the recoil spring housing.
Final Remarks
A Recoil spring is a key component of the lawnmower pull cord. It spins the flywheel and crankshaft fast enough to start internal combustion. If gone slack, the lawnmower is unable to start. Luckily a broken recoil starter can be fixed simply with a small screwdriver in less than 30 minutes. The recoil spring can be repaired or replaced depending on the problem.
Thank you for including the tools and materials required for fixing the recoil spring.
Thank you for your positive feedback, Dustin! I’m glad you found the information on fixing the recoil spring helpful. Happy mowing!
This step-by-step guide is perfect for someone like me who is not very handy!
Thank you for the positive feedback, Clyde! I’m glad you found the step-by-step guide helpful for fixing your lawnmower. Happy to help you out with any other DIY projects in the future.
Appreciate the explanation on how to re-tension the spring properly.
Thank you for your feedback! I’m glad you found the explanation helpful. Let me know if you have any other questions.
I didn’t know about aligning the V-shaped ends, very informative!
Thank you, Terra Cole! I’m glad you found the information about aligning the V-shaped ends useful. Let me know if you have any other questions or need further assistance.
I will definitely try these steps before taking my lawnmower to a repair shop.
Thank you for giving it a try, Noah! Fixing it yourself can save time and money. Good luck with the repair!
Is it common for the recoil spring to fail on lawnmowers?
Thank you for your question, Vivan. It is not common, but can happen due to various reasons. I have included a detailed guide on how to fix a recoil spring issue in the blog post for your reference.
I never knew it could be fixed with just a screwdriver, very helpful!
Thank you Sonia! I’m glad you found the information helpful. If you have any other questions or need further assistance, feel free to reach out!
Are there different types of recoil springs for different lawnmowers?
Yes, different lawnmowers require different recoil springs based on their specifications. Refer to your lawnmower’s manual to ensure you purchase the correct one for your machine.
Thank you for the detailed steps on how to fix a lawnmower recoil spring!
Thank you, Gloria! I’m glad the detailed steps were helpful in fixing your lawnmower recoil spring issue. Let me know if you have any other questions in the future.
How long does a typical recoil spring last before needing replacement?
Hi Corey, typically a recoil spring can last quite a while if properly maintained. If issues arise, following the steps outlined in the blog post can help you fix or replace it easily!
I had no idea cleaning and reoiling the recoil mechanism could solve the issue, glad I came across this article.
Thank you, Leona! I’m glad you found the article helpful in resolving your lawnmower issue. If you have any further questions, feel free to reach out.
I will make sure to follow these steps carefully when fixing my lawnmower’s recoil spring.
Thank you, Joshua! Best of luck with fixing your lawnmower’s recoil spring. Remember to follow the steps carefully for a successful repair. Let me know if you need any further assistance.
Can using a lawnmower with a faulty recoil spring cause further damage?
Yes, a faulty recoil spring on a lawnmower can cause further damage. You can try fixing it yourself with a screwdriver following these steps outlined in the post. Good luck!
I appreciate the precautions mentioned, safety first!
Thank you, Dave! Safety is always a top priority when it comes to any kind of maintenance work, and it’s great to hear you appreciate the precautions mentioned.
Do you have any tips for preventing a lawnmower recoil spring failure?
Hi Cory, here are some tips for preventing a lawnmower recoil spring failure: regularly clean and reoil the recoil mechanism, and ensure the pulley and housing are in good condition. Hope this helps!
Great advice on aligning the V-shaped ends of the recoil spring correctly.
Thank you, Clyde. I appreciate your feedback on aligning the V-shaped ends of the recoil spring. It’s a crucial step in ensuring the lawnmower’s functionality.
This article has given me the confidence to try fixing my lawnmower’s recoil spring issue on my own.
Thank you for sharing, Serenity! I’m glad you feel confident in fixing your lawnmower’s recoil spring. Good luck with the repair!
Should I wear gloves when handling the recoil spring to avoid any injuries?
Yes, it’s advisable to wear gloves when handling the recoil spring to prevent any injuries. Be cautious and follow the steps provided carefully. Stay safe while fixing the issue!
Is there a video tutorial available on how to clean and reoil the recoil mechanism before jumping to the more complex step of fixing or replacing the recoil spring?
Thank you for your interest, Gabriel. Although there isn’t a video tutorial available at the moment, I appreciate the feedback and will take it into consideration for future posts.
Great information on troubleshooting and fixing a lawnmower recoil spring issue.
Thank you, Pamela! I’m glad you found the troubleshooting tips helpful. Let me know if you have any questions or need further assistance. Happy mowing!
How often should the recoil spring be checked for maintenance?
Hi Darlene, typically the recoil spring should be checked for maintenance every 2-3 years. However, if you notice any issues like difficulty starting, it’s best to check it sooner.