As a woodworking enthusiast, you might have faced problems like wood warping or splitting. The solution? Kiln drying wood! In this blog post, I will thoroughly discuss the efficient process of kiln drying, which adds stability and prevents common flaws in wood products.
Kiln drying wood:
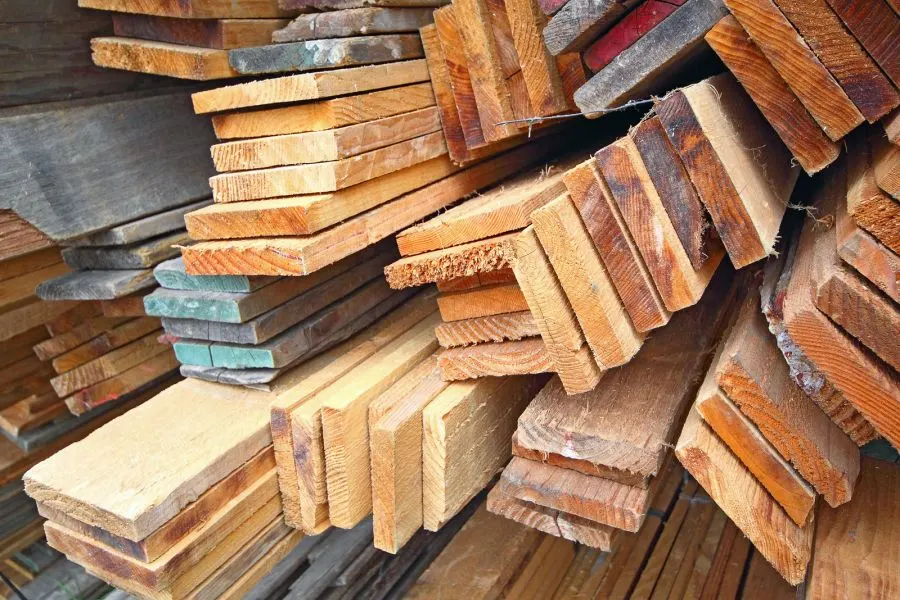
Kiln drying is a method to remove excess moisture from the wood for various applications by placing it in a chamber with controlled temperature, humidity, and airflow. The drying rate depends on factors such as temperature, humidity, wood species, and thickness. There are several types of kilns, including conventional, dehumidification, and solar kilns. Proper wood preparation and monitoring of temperature, humidity, and airflow are essential for a successful kiln drying process.

Discover the mechanics of kiln drying wood, its benefits over air drying, and the crucial factors to consider, ensuring perfectly dried lumber. Dive into a detailed guide on selecting, preparing, and monitoring timber throughout the drying process.
Contents
Kiln Drying Process for Wood
• Understanding the Kiln Drying Process
Kiln drying is a method used to remove excess moisture from wood, making it suitable for various applications. The process involves placing the wood inside a chamber with controlled temperature, humidity, and airflow.
This environment ensures the quickest, most efficient, and uniform moisture removal while minimizing the risks of warping, splitting, or other damage to the wood.
– Factors Affecting Drying Time
The rate at which wood dries depends on several factors, such as:
- Temperature: Higher temperatures speed up the drying process, as they increase the rate of moisture evaporation.
- Humidity: Lower humidity levels facilitate a faster moisture removal process.
- Wood species: Different types of wood dry at different rates, depending on their density and cellular structure.
- Wood thickness: Thicker pieces of wood take longer to dry than thinner ones.
These factors need to be adjusted and monitored accordingly to ensure a successful kiln drying process.
• Kiln Types
There are various types of kilns used in the wood industry, depending on size, fuel source, and specific drying requirements.
– Conventional Kilns
Conventional kilns, also known as batch kilns, are the most common type of kiln used for drying wood. They are typically fueled by gas, electricity, or biomass (wood waste).
In a conventional kiln, the wood is stacked in a chamber with controlled temperature and humidity, and the kiln operates until the targeted moisture content is reached.
Conventional kilns are well-suited for drying large volumes of wood and for species that require long drying times.
– Dehumidification Kilns
Dehumidification kilns use a heat pump to remove moisture from the air inside the kiln chamber. This ensures a lower humidity level, which results in a faster drying process. These kilns are energy-efficient and require minimal supervision.
Dehumidification kilns are commonly used by smaller wood mills and artisan woodworkers, as they are suitable for drying smaller batches of wood.
– Solar Kilns
Solar kilns use the sun’s energy to heat the air inside the kiln chamber. They are designed with large glass-covered surfaces to maximize sunlight exposure. The solar-heated air then circulates through the wood stacks to evaporate the moisture.
Solar kilns are an environmentally-friendly option and are a popular choice among small-scale woodworkers and hobbyists.
• Preparing Wood for Kiln Drying
Proper preparation of the wood is essential for a successful kiln drying process. Some crucial steps include:
- Cutting the wood: Cut the wood into the desired thickness and length, factoring in potential shrinkage during the drying process.
- End-sealing: Apply a moisture-resistant coating to the ends of the wood to prevent excessive moisture loss and reduce the risk of end-checking (cracks in the wood).
- Stacking: Stack the wood on spacers or stickers, ensuring adequate airflow around each piece. This promotes even drying and prevents warping or distortion.
• Monitoring the Kiln Drying Process
Proper monitoring and control of temperature, humidity, and airflow help to ensure a successful kiln drying process.
- Temperature: Regularly measure and adjust the temperature to maintain the optimal environment for the specific wood species and desired moisture content.
- Humidity: Use hygrometers or moisture meters to monitor the relative humidity inside the kiln and adjust it as needed.
- Airflow: Ensure proper ventilation and circulation to distribute heat evenly and prevent moisture buildup.
• Kiln Drying Recommendations
Based on my personal experience in the woodworking industry, I would like to share some recommendations for those considering kiln drying wood:
- Research thoroughly: Understand the specific drying requirements for the wood species you intend to dry, ensuring the most efficient and successful process.
- Invest in quality equipment: Choose a reliable and well-designed kiln that caters to your specific needs.
- Practice patience: Drying wood takes time, and rushing the process can lead to damage or lower-quality results.
- Be vigilant: Regularly monitor the kiln’s temperature, humidity, and airflow to achieve the desired moisture content and prevent potential issues.
For more information on kiln drying wood, visit the USDA Forest Service’s Forest Products Laboratory for their extensive guide on dry kiln operations.
What is the duration required for wood to dry in a kiln?
The process of drying wood in a kiln is an essential step in woodworking, which contributes to the quality and usability of the finished product.
The time required for the complete drying process varies based on different factors such as the type of wood, its moisture content, and the specific kiln used.
• Factors Influencing Wood Drying Time
– Wood Species and Density
The drying time largely depends on the type of wood being dried. Hardwoods like oak, maple, and walnut tend to take longer to dry compared to softwoods like pine, spruce, and cedar, due to their higher density. As a rule of thumb, the denser the wood, the longer it will take to dry.
– Initial Moisture Content
The initial moisture content of the wood is another critical factor. Wood with a higher moisture content will take longer to dry compared to wood with a lower moisture content.
For instance, freshly cut green wood can have a moisture content of over 50%, while air-dried wood can have moisture content between 12-20%.
– Kiln Type and Operating Conditions
There are different types of kilns, and each has its specific drying times. Traditional kilns, such as the solar kiln and the dehumidification kiln, tend to take longer to dry the wood. In contrast, more modern kilns like radio frequency and vacuum kilns, can significantly reduce the drying time.
The operating conditions of the kiln, such as the temperature, humidity, and air circulation, also play a vital role in determining the drying time. Higher temperatures can speed up the drying process, but they can also cause damage to the wood if not carefully controlled.
– Wood Thickness
The thickness of the wood is another factor that affects the drying time. Thicker boards require a longer time to dry, as the moisture needs to travel a greater distance to exit the wood.
It is recommended to cut boards to their final thickness before kiln drying to ensure a more consistent drying process.
• Average Drying Times for Different Wood Types
While there is no one-size-fits-all answer to the question of how long the wood takes to dry in a kiln, I can provide some approximate drying times for common wood species:
– Hardwoods
- Oak: 30-60 days
- Ash: 20-30 days
- Maple: 15-25 days
- Walnut: 20-30 days
- Cherry: 15-20 days
– Softwoods
- Pine: 10-20 days
- Spruce: 10-15 days
- Cedar: 10-15 days
These are general numbers and do not account for individual kilns’ specific conditions and the initial moisture content of the wood.
• Tips for Optimizing the Kiln Drying Process
Based on personal experience, here are some recommendations to ensure a more efficient and effective kiln drying process:
- Properly stack the wood: Preparing the wood for drying is a crucial step. Ensure the boards are stacked correctly with evenly spaced stickers (narrow strips of wood) between the layers, promoting uniform airflow and moisture removal.
- Monitor and adjust temperature and humidity: Closely monitor the temperature and humidity levels in the kiln and adjust them accordingly to prevent potential defects such as cracking, warping, or case-hardening.
- Take sample readings: Periodically remove a sample board from the kiln to measure its moisture content. This will help in determining the progress of the drying process and making any necessary adjustments.
- Gradually increase the temperature: Start the kiln with a lower temperature and slowly increase it over time. Rapid temperature changes can cause stress within the wood, leading to defects.
- Allow for equalizing and conditioning: Once the desired moisture content is achieved, reduce the kiln’s temperature and increase the relative humidity to equalize and condition the wood. This process helps in relieving internal stresses and ensuring a more stable final product.
For more detailed information on kiln drying wood and related topics, checking resources from educational institutions, such as Oregon State University, can be incredibly helpful.
In conclusion, understanding how long wood takes to dry in a kiln is essential for successful woodworking projects. Factors such as wood species, initial moisture content, kiln type, and wood thickness all contribute to the overall drying time.
By carefully monitoring the drying process and following the mentioned recommendations, you can ensure a successful kiln drying experience and a high-quality finished product.
Is it possible to kiln dry wood at home safely and effectively?
• Understanding Kiln Drying
Kiln drying is a process of removing moisture from green or fresh-cut lumber, therefore preventing issues such as warping, splitting, or shrinking during long-term storage or usage.
While commercial kilns may be expensive and difficult to maintain at home, there are alternative ways to create a homemade kiln for drying wood effectively.
– Benefits Of Kiln Drying Wood
Kiln drying offers several advantages compared to air drying, including:
- Faster drying time: Wood dries much faster in a kiln compared to air drying, which may take months or even years.
- Better quality: Kiln drying results in a more stable and better-quality finished product, as the process minimizes defects and distortions caused by uneven drying.
- Killing pests and fungus: The high temperatures used in kiln drying help to kill any pests or fungi present in the wood.
- Higher yield: Kiln drying significantly reduces drying-related losses, meaning you can use more of the initial lumber for your projects.
• Building A Homemade Kiln
– Kiln Design
The first step in building a homemade kiln for drying wood is to plan and design the kiln. There are a variety of kiln designs available, but the most common type is the “drying chamber” design.
Drying Chamber
This design involves constructing a well-insulated box or container, equipped with a heater and a fan to circulate warm air and vents to regulate humidity levels. Lumber is then placed on racks inside the chamber, allowing the warm air to flow around the wood and carry away moisture.
Choosing a design that meets your needs and preferences is essential, including factors such as available space, budget, and desired drying capacity.
– Kiln Materials And Construction
- Insulation: To minimize heat loss, kiln walls should be well-insulated. Common materials used for this purpose include rigid foam insulation or fiberglass batting with a reflective foil backing.
- Heating System: A variety of heating systems can be used in a homemade kiln, such as electric heaters, propane heaters, or even solar collectors. No matter the type, the system should have a thermostat to regulate temperature and achieve optimal results.
- Ventilation: Proper ventilation is crucial for effective kiln drying. This could be achieved through the use of vents or by using a dehumidifier to control humidity within the chamber.
- Racks and Shelving: To ensure that air can flow around and between the lumber, use sturdy and non-corroding materials, such as coated wire or metal shelves, to support the lumber during the drying process.
– Monitoring And Controlling Conditions
In order to achieve the best results, it is important to monitor and control conditions within your homemade kiln. These conditions include:
- Temperature: Ideal temperature for kiln drying depends on the desired drying speed and the type of wood being dried. Consult resources such as US Forest Service’s Drying Hardwood Lumber guide to determine the appropriate temperature range for your specific lumber.
- Humidity: Following the initial heating phase, a higher relative humidity (around 65-70%) should be maintained at the beginning of the drying process, gradually decreasing over time. This helps to avoid surface checking and other possible defects.
- Airflow: It is essential to maintain adequate airflow within the kiln in order to carry away moisture and maintain even drying conditions.
– Safety Precautions
When working with a homemade kiln for drying wood, be sure to take appropriate safety precautions:
- Properly ventilate the space where the kiln is located.
- Ensure that all electrical connections and heating elements meet safety standards.
- Install fire safety measures, such as fire extinguishers and smoke detectors, near the kiln.
- Do not leave the kiln unattended while in operation.
• Final Thoughts And Recommendations
Kiln drying wood at home can be a rewarding process, providing stable, high-quality lumber for your woodworking projects. With careful planning, construction, monitoring, and safety precautions, you can successfully create and operate a homemade kiln for drying wood.
If you are new to kiln drying, or if you just want a smaller-scale solution, consider starting with a solar kiln. Solar kilns are energy-efficient, environmentally friendly, and a great way to learn about the principles of kiln drying before committing to a more complex system.
No matter the type of kiln you choose, remember to consult authoritative resources, pay close attention to safety, and always keep learning to further refine your kiln drying skills.
How does the thickness of the wood affect the kiln drying process?
Hi Wendy, the thickness of the wood affects the kiln drying process by impacting the drying time. Thicker wood takes longer to dry due to the moisture having to travel a greater distance. Hope this helps!
Can over drying wood in a kiln lead to quality issues?
Overdrying wood in a kiln can lead to quality issues such as excessive brittleness, warping, and increased risk of cracking. It’s essential to monitor the process carefully to achieve optimal results.
The safety precautions mentioned for homemade kiln drying are essential to follow.
Thank you, Jackson Wade! Your awareness of following safety precautions in kiln drying is crucial for a successful woodworking venture. Stay safe and enjoy your woodworking projects!
What are the key differences between conventional and dehumidification kilns?
Hi Clinton! The key differences between conventional and dehumidification kilns lie in their drying methods. While conventional kilns use controlled temperature and humidity, dehumidification kilns rely on a heat pump for faster drying. Hope this helps!
I appreciate the step-by-step guide on preparing wood for kiln drying.
Thank you, Tina! I’m glad you found the step-by-step guide helpful for preparing wood for kiln drying. Happy woodworking!
The section on monitoring the kiln drying process is crucial for ensuring successful results.
Thank you, Krin Bradley! Monitoring the kiln drying process is indeed critical for optimal results in woodworking. Happy crafting!
Is it possible to kiln dry wood without a specialized kiln?
Hi Clinton, kiln drying wood without a specialized kiln is challenging but possible with DIY options. Consider building a homemade kiln following proper designs and safety measures for effective results.
The section on building a homemade kiln for wood drying is very interesting and informative.
Thank you, Joshua! I’m glad you found the homemade kiln section informative. Kiln drying wood can indeed prevent common flaws and add stability to your projects. Happy woodworking!
What type of wood is best suited for kiln drying?
Hi Clifton, for kiln drying wood, hardwoods like oak, ash, maple, and walnut are best suited due to their density. Factors like temperature, humidity, and thickness affect drying time. Hope this helps!
The final thoughts and recommendations for kiln drying wood at home are insightful and motivating.
Thank you, Gregory! I’m glad you found the insights on kiln drying wood helpful and motivating. Stay tuned for more woodworking tips and recommendations. Happy woodworking!
Can wood be rehydrated after kiln drying if it’s too dry?
Yes, wood can be rehydrated after kiln drying using steam or misting techniques. However, it is essential to proceed with caution to prevent over-hydration and potential damage.
How do you prevent mold growth during the kiln drying process?
To prevent mold growth during kiln drying, ensure proper ventilation, monitor humidity levels, and stack wood with adequate spacing for airflow. This will maintain a clean, mold-free drying environment.
How can I determine the moisture content of the wood before kiln drying?
To determine wood moisture content before kiln drying, you can use a moisture meter. This tool is essential for ensuring a successful drying process. Best of luck with your woodworking endeavors, Perry!
This article fails to address the potential dangers of kiln drying wood at home, such as fire hazards and inadequate drying conditions. The focus should be on safety precautions rather than DIY solutions.
Thank you for your feedback, Shawn. Safety precautions will be added to future posts on kiln drying wood to address potential hazards. Stay tuned!
The recommendations provided for kiln drying wood based on personal experience are valuable.
Thank you, Leroy! I’m glad you found the information on kiln drying wood valuable. It’s an essential process for woodworking enthusiasts like us. Happy drying!
The explanation of factors influencing drying time in a kiln is enlightening.
Thank you, Isobel! I’m glad you found the information on kiln drying enlightening. It’s a crucial process for woodworking projects, ensuring stability and quality in the finished products. Happy woodworking!
I like how the article includes average drying times for different wood types.
Thank you, Luis! Kiln drying is a game-changer for woodworkers. I appreciate your support and hope you continue to find helpful information in my blog posts.
The detailed information on the kiln drying process is very informative and helpful.
Thank you, Leslie! I’m glad you found the information on kiln drying helpful. For more woodworking tips and tricks, stay tuned for future posts!
The tips for optimizing the kiln drying process are practical and useful.
Thank you, Joshua! I’m glad you found the tips helpful for optimizing the kiln drying process. Feel free to reach out if you have any more questions about woodworking techniques.
What are the advantages of kiln drying over air drying?
Kiln drying offers faster and higher-quality results compared to air drying, reducing warping and ensuring stability in wood products. Proper preparation and monitoring are key for successful kiln drying.
Are there any environmental considerations to take into account when kiln drying wood?
Hi Tracy, environmental considerations for kiln drying wood include energy consumption, emissions, and waste management. Using energy-efficient kilns and sustainable wood sources can help minimize the environmental impact.