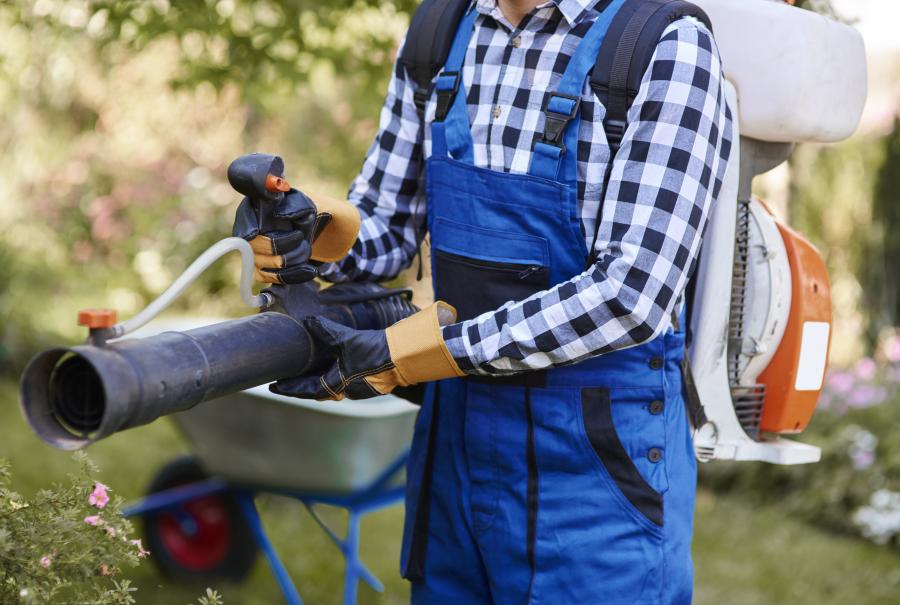
Typically, a leaf blower is a fundamental tool required for maintaining your compound or yard and keeping it clean at all times. However, to efficiently execute its task, a leaf blower depends on the proper functioning of its engine, which is typically an internal combustion engine. An engine that won’t rev may have various underlying causes, which shall be investigated in this blog post.
The most common reasons why your leaf blower won’t rev are:
- Insufficient Air Flow Into the Engine
- Insufficient Removal of Air From the Engine
- A Worn-out Spark Plug
- Clogged Carburetor
- Compression Problems
- Quality of Fuel
- Primer not Pumped
- Clogged Spark Arrestor

For the engine to run smoothly, it must have air, spark, and fuel. The moment any of these three components are deficient or cannot promote the engine’s capability, then the leaf blower will not rev.
Now let’s dive deeper into the reasons why a leaf blower won’t start or what undermines the functioning abilities of the leaf blower. Are you concerned that your leaf blower has refused to start? Do you want to know the reasons behind this? Don’t look too far. Not only will the rest of this article provide you with the necessary answers, but it will also show you ways by which you can avoid this problem or tackle it when it occurs.
Contents
- 1 Things to do When your Leaf Blower doesn’t Start
- 2 Reasons Why Your Leaf Blower Won’t Rev
- 3 How to Fix the Problem?
- 4 Final Remarks
- 5 Importance of Regular Leaf Blower Maintenance
- 5.1 • Optimal Fuel Storage for Leaf Blowers
- 5.2 • Check and Replace Fuel Filter Regularly
- 5.3 • Thorough Inspection of Engine for Leaks
- 5.4 • Priming for a Smooth Start
- 5.5 • Dealing with Carburator Issues
- 5.6 • Cleaning the Spark Arrestor
- 5.7 • Regular Air Filter Maintenance
- 5.8 • Replacing a Worn-Out Spark Plug
- 5.9 • Muffler Maintenance
- 6 • Proper Maintenance and Cleaning of the Leaf Blower Air Filter
- 6.1 • The Significance of The Fuel Filter in Leaf Blowers
- 6.2 • Understanding the Role of the Carburetor in Leaf Blowers
- 6.3 • The Necessity of Cleaning or Replacing the Spark Arrestor
- 6.4 • Professional Servicing: The Last Resort for Ongoing Leaf Blower Issues
- 6.5 • Checking the Throttle Control
- 6.6 • Testing for Air Leaks: The Spray Test Method
- 6.7 • Checking for Pinched Fuel Lines
Things to do When your Leaf Blower doesn’t Start
As said earlier, the leaf blower engine must have gas, compression, and spark to start. If these components are absent, then the leaf blower will not start. To ensure that this does not happen, first, make sure that there’s fresh gas in the tank because old gas, after some time, accumulates water and burns poorly. If the fuel is old, replace it with a fresh one. Also, when you refill the tank, add a fuel stabilizer to the gas to help keep the fuel fresh. If you are sure that the fuel is fresh, carry out preventive maintenance on the air filter of your tool to ensure that the carburetor gets enough air to mix with the fuel to start the engine. You can follow the instructions in your owner’s manual to clean and properly maintain the air filter. For some leaf blower model, you will need to coat the air filter lightly with oil so that the right amount of clean air can freely enter the carburetor.
Now, if the air filter is okay and functioning properly, then check the fuel lines for cracks. Usually, when fuel lines have cracks, the air enters the carburetor instead of the fuel. Certainly, the carburetor needs air through the filter to function. However, the carburetor does not need air flowing through the fuel lines. If you find cracks in the fuel lines, replace the fuel lines to avoid the improper flow of air. If the fuel lines are good, but the fuel doesn’t move through the lines when you press the primer bulb, then the fuel filter may be clogged and may need replacing. The fuel fillet should be replaced if covered with deposits, as these deposits do not allow fuel to flow freely to the carburetor.
If fuel flows to the carburetor freely, try to pull the spark plug to check if the plug’s tip is wet. This will indicate that the cylinder is getting fuel. If the cylinder isn’t getting enough fuel because of the clogged carburetor jet, replace the carburetor, you may also want to rebuild it. When you pull out the spark plug but notice deposits or corrosion on the electrode, replace the spark plug with a new one.
Finally, check for compression. To do this, remove the spark plug and press your thumb over the opening, then pull the starter cord. When you do this, air should push from the cylinder. If you don’t feel the air pushing from the cylinder, then the piston rings probably need to be replaced. To get an accurate compression reading, you can use a compression gauge. Also, a damaged recoil starter can prevent your leaf blower engine from starting. If you cannot pull the recoil starter rope, check the recoil starter to see if it is damaged. Replace it if needed.
Reasons Why Your Leaf Blower Won’t Rev
There are several reasons why your leaf blower won’t start, and the earlier you can detect these problems, the better. It is not unusual for a leaf blower to have problems starting, especially after spending most of the year stored away in the shed. However, the good news about this is that, in many cases, the problem is not too severe and can be easily tackled. Here are some reasons why a leaf blower won’t rev.
1. Insufficient Air Flow Into the Engine:
For a good leaf blower to function efficiently, air must flow properly into the engine. If the air does not flow well, then the leaf blower will not start. Usually, the air filter is that part of the leaf blower that ensures air gets into the engine. Now when dirt and debris collect around or inside the air filter, the normal supply of air to the engine will become restricted. Hence engine failure will occur which will also render the leaf blower ineffective. To prevent these, make sure you clean the air filter to ensure the easy flow of air into the engine.
2. Insufficient Removal of Air From the Engine:
It is ideal for air to flow into the engine of a leaf blower, but it is also important that air is removed from it. Normally, the air is removed from the leaf blower engine through what is referred to as a muffler. The muffler often comes with a metal screen whose sole purpose is to inhibit the evasion of ignited residues. Often, the metal screen becomes clogged with particles of dirt and when this occurs, it becomes difficult for air to be removed from the engine. This problem is accompanied by a gradual buildup of carbon, which eventually causes the exhaust to be blocked. Hence, the leaf blower becomes deprived of its power because the engine will not start.
3. A Worn-out Spark Plug:
Another reason why a leaf blower fails to rev is because of its worn-out spark plug. Like every other part, after a long period of usage, the durability of the spark plug might gradually deteriorate and become expired, making it prone to damage. This can be visible when you begin to notice certain symptoms in your leaf blower spark plug, such as a damaged electrode, carbon build-up around it, and a cracked insulator. If this occurs, then the spark plug needs replacement to end the leaf blower problems.
4. Clogged Carburetor:
This problem is one that often happens when old fuel is left in your leaf blower. If the fuel sits in the tank for too long, it becomes too thick and viscous, and if you try to use it like that, the viscous paste formed can block the carburetor, making it hard to start your leaf blower.
If this occurs, check the carburetor. Then, you can either clean the carburetor (that is if the problem is not too serious), rebuild the carburetor (if the problem is a little serious), or replace the carburetor completely (in the worst-case scenario). However, to avoid this problem, always make sure that you never leave fuel sitting unused in your leaf blower for a long time.
5. Compression Problems:
Often, your leaf blower may have little or no pressure coming into it. Now this lack of pressure can cause leaf blower hiccup or prevent it from starting. Usually, pressure is a vital feature for a leaf blower to ensure that all the components perform their activities. An inadequate amount of pressure can be indicated by leaks near the piston as well as the crankcase. The leaks around the piston or crankcase can be taken as a clear indication of compression problems. This problem will make it impossible for a leaf blower to rev or even function properly.
6. Quality of Fuel:
It is important to know that the engine of your leaf blower always needs plenty of supply of quality fuel for it to function properly. And the fuel that is commonly used is gasoline. Now, if the gasoline supplied is of poor quality, then the leaf blower will not start. A lot of people might be confused as to why fuel quality has become an issue. Truly, fuel can be stale, and stale fuel can prevent the engine from starting properly or even starting at all. In fact, for most leaf blowers that refuse to rev, this is a very common issue. If this is the problem you face with your leaf blower, you need to consider supplying the tank with fresh and quality fuel to replace the existing fuel, which might have become stale.
7. Primer not Pumped:
When you want to start your gas leaf blower, you need to pump the primer before pulling the starter cord. If you don’t do this, there’s a great chance that you will have trouble starting it. So before you start the tool, always make sure to pump the primer about five times, then try pulling the cord again to know if this is the problem. Also, ensure to read the user manual to make sure you know how to start your leaf blower correctly.
8. Clogged Spark Arrestor:
The spark arrestor of a leaf blower is a screen that is designed to prevent the leaf blower from emitting sparks. However, this part may become clogged with dirt, and if this happens, the machine won’t start. Always ensure to check the spark arrestor from time to time, remove it when dirty, and clean it with a brush to resolve the problem.
How to Fix the Problem?
1. Replace the leaf blower carburetor:
As stated above, the leaf blower’s carburetor is responsible for mixing air and gasoline in the proper proportions to create a combustible gas. Now, if the engine of your leaf blower starts and then sputters, or it doesn’t start at all due to lack of fuel, you may need to replace the carburetor. Usually, it is more cost-effective and quite practical to replace the carburetor instead of rebuilding it. So here are simple DIY steps on how to replace a carburetor.
- Drain the fuel tank: First, ensure that you are in a well-ventilated area, then remove the fuel cap and empty the fuel from the fuel tank into a storage container that is approved and safe for use.
- Disconnect the spark plug wire: To ensure that the leaf blower doesn’t start while you’re fixing it, disconnect the wire from the spark plug. This will prevent it from igniting suddenly during the repair process.
- Remove the air filter cover: To do this, first, remove all the screws surrounding the air filter cover, then remove the air filter cover itself to expose the carburetor.
- Remove the carburetor: First, remove the mounting screws around the carburetor. Then draw out the airbox and release it from the carburetor throttle and choke lever. It is important to note the configuration or arrangement of the small and large fuel lines on the carburetor so that you can easily reconnect them in the correct order later and then remove the fuel lines from the carburetor.
- Discard the damaged carburetor: Remove the carburetor mounting screws. Next, pull out the airbox and remove the fuel lines from the carburetor.
- Install the new carburetor: Once you have removed the old carburetor, push the fuel lines onto the proper connections on the carburetor. Then insert the new carburetor into the airbox, ensuring that the throttle and choke levers are positioned properly. Also, position the carburetor on the side of the engine and reinstall the mounting screws. Then reconnect the fuel lines and reinstall the carburetor mounting screws.
- Reinstall the air filter cover: Place the air filter cover over the carburetor and secure it with the mounting screws you previously removed. Make sure all screws are attached and secured properly.
- Connect the spark plug: After replacing the carburetor, you can reattach the spark plug wire that was removed earlier. Reattach the spark plug wire and start up the engine. Your leaf blower should rev.
2. Replace the leaf blower fuel lines:
The leaf blower’s fuel lines are responsible for carrying or transferring fuel from the fuel tank to the carburetor and from the primer bulb to the fuel system. However, after a while, the fuel lines become brittle and may even crack or break. If the fuel line is brittle or damaged, then you should replace it with new ones. But be careful enough to install the new fuel lines on the engine the same way the original fuel lines were placed. Here are steps on how to replace fuel lines.
- Drain the fuel tank as practiced in (1) above. Then disconnect the spark plug wire.
- Remove the blower tube: To do this, loosen the thumbscrew on the front of the housing and pull the blower tube off. Next, remove the air filter cover.
- Remove the carburetor as well as the fuel lines from the carburetor. Also, remove the adapter screws, the carburetor adapter, and an air dam.
- Remove the fuel tank: Next, unmount the fuel tank by removing its screws.
- Pull the fuel lines out of the tank: First, remove the fuel filter from the end of the small fuel line, then pull the small fuel line out of the tank through the mounting hole. Once done, push the large fuel line into the tank through the mounting hole and pull it out of the mouth of the tank.
- Next, install the large fuel line: Cut one end of the large fuel line at any angle. Then push the end into the tank through the mounting hole. Make sure it is far enough so that you can grab the end with needle-nose pliers. Next, tug the opposite end of the large fuel line until the grommet touches the side of the tank. Install the grommet. Tug the fuel line to position the grommet.
- Install the small fuel line: Use the same method as the large fuel line.
- Attach the fuel filter: Then reinstall the left side of the housing. Set the left side of the housing to be near the leaf blower and place the fuel lines through the hole in the housing near the carburetor.
- Install the housing and fan: Ensure the handle is properly placed before pushing the housing back together. Next, position the thumbscrew in the housing in front of the blower and turn the screw just until it catches the nut but doesn’t tighten it yet. Finally, install two other housing screws to secure the housing while you install the fan cover.
- Snap the fan cover into the housing while holding the spring in the loaded position.
- Insert all of the housing screws and tighten them firmly. Next, reinstall the guard cover as well as the fuel cap.
- Reinstall the carburetor
- Reinstall the blower tube by pushing it back on the housing front, then tightening the thumbscrew.
- Finally, connect the spark plug to start the engine.
Final Remarks
After replacing the necessary parts, your leaf blower should start. In conclusion, all the above issues are some of the common reasons why a blower won’t rev, and It is not easy to detect some of the issues in a leaf blower alone. To properly diagnosis problems, contact an expert to know the exact issue and tackle it. We hope this article has helped provide some insight into the common leaf blower problems. Good luck!
Importance of Regular Leaf Blower Maintenance
Ensuring that your leaf blower gets regular maintenance checks is an important part of its lifespan. Regular maintenance keeps your machine in tip-top shape, thereby guaranteeing optimal performance and preventing common issues such as hard starting and inconsistent revving.
• Optimal Fuel Storage for Leaf Blowers
Based on practical experience and industry best practices, I recommend storing your leaf blower with an empty or nearly empty fuel tank. This is a critical step to prevent the risk of fuel-related problems. Stale fuel can form deposits that clog the fuel system and make your leaf blower hard to start.
• Check and Replace Fuel Filter Regularly
The fuel filter is a critical component of the leaf blower, and it should be regularly checked for clogs. If necessary, replace it to ensure a smooth fuel flow. Clogged fuel filters restrict the fuel flow to the engine, leading to poor performance. You can find relevant information about this on some reliable .edu or .gov sites such as Penn State Extension.
• Thorough Inspection of Engine for Leaks
Make it a habit of inspecting the engine for piston or crankcase leaks. Leaks in these areas may cause compression problems, which could degrade the overall performance of your leaf blower.
• Priming for a Smooth Start
Before starting a gas leaf blower, it is advisable to pump the primer multiple times. This ensures that the right amount of fuel gets to the carburetor to help your machine start smoother and run efficiently.
• Dealing with Carburator Issues
A carburetor that has become clogged with old fuel will require cleaning or replacement. A clean, well-maintained carburetor ensures optimal performance and efficiency of your leaf blower.
• Cleaning the Spark Arrestor
A common issue with many leaf blowers is revving problems. Regularly cleaning the spark arrestor with soapy water and a wire brush can solve this problem. This can help remove any blockages, allowing the exhaust gases to escape smoothly.
• Regular Air Filter Maintenance
A clean air filter supports proper airflow into the engine. Regularly cleaning the air filter will improve the performance and lifespan of your leaf blower.
• Replacing a Worn-Out Spark Plug
To ensure proper ignition, a worn-out spark plug in your leaf blower should be replaced. This simple maintenance step can greatly improve the performance of your leaf blower.
• Muffler Maintenance
The muffler should be cleaned with a brush and soapy water to remove any blockages. Regular cleaning of the muffler not only improves the performance of the leaf blower but also reduces its noise.
Remember, small maintenance steps like these, when performed regularly and correctly, can significantly prolong the lifespan and ensure the optimal performance of your leaf blower.
• Proper Maintenance and Cleaning of the Leaf Blower Air Filter
Maintaining and cleaning the air filter regularly is a crucial step in keeping your leaf blower functioning at its best. A clogged air filter is similar to a lung full of dust, something we won’t expect to perform optimally. The air filter’s primary role is to filter out airborne debris before reaching the engine.
With constant use, the air filter might get clogged, leading to a decrease in functionality. Take out the air filter and clean it thoroughly after every use. Replacing it once or twice a year is an excellent idea if you use your leaf blower regularly.
A clean air filter allows for increased airflow, ensuring a better fuel and air mixture to the engine. From my own experience, neglecting the air filter quickly robs your leaf blower of its efficiency.
More detailed instructions on air filter maintenance can be found on Michigan State University’s site here.
• The Significance of The Fuel Filter in Leaf Blowers
The fuel filter is another essential part of the leaf blower that demands routine checkups and cleaning. Its role is to filter out impurities and dirt from the fuel before reaching the engine.
Over time, the fuel filter can become clogged with old fuel residue or external impurities, meaning less fuel makes its way into the engine. This reduces your leaf blower’s performance in the long term.
Always check and clean the fuel filter during your routine maintenance checks. You might need to replace it if it’s overly worn or clogged.
• Understanding the Role of the Carburetor in Leaf Blowers
The carburetor is arguably the heart of the leaf blower, playing a vital role in regulating the throttle (speed). It accomplishes this by creating the optimal air-fuel mixture for combustion. But like all working parts, it can develop issues with constant use.
If your leaf blower is struggling to start or emitting white or blue smoke, your carburetor might need attention. Regular cleaning with a commercial carburetor cleaner can enhance its lifespan. If it still develops problems, you might need to replace it entirely.
• The Necessity of Cleaning or Replacing the Spark Arrestor
Fire prevention in a leaf blower often falls on the spark arrestor. This essential component helps to prevent sparks from leaving the exhaust and causing a fire. However, due to the buildup of soot and debris with us, your spark arrestor might stall the engine.
Cleaning it from time to time can prevent this problem, but at times, it might need to be replaced. Regularly check your spark arrestor throughout the leaf-blowing season. It isn’t just an important preventive step but also one that helps to protect the environment.
More information about spark arresters and their maintenance can be found here at the USDA Forest Service’s site.
• Professional Servicing: The Last Resort for Ongoing Leaf Blower Issues
What happens when you’ve ticked all the boxes regarding maintenance, a neat air filter, a pristine fuel filter, a clean carburetor, and a sparkly spark arrestor, but your leaf blower still underperforms?
Well, at this point, you might need to consider professional servicing. Blast as it might be to tinker with your tools; sometimes leaf blowers can develop issues requiring expert repairs.
Like a trusty car mechanic, a leaf blower servicing professional will take one look (or one listen, as it were) at your leaf blower and diagnose the problem. They’re also likely to find and fix any issues you might’ve overlooked in your at-home service attempts.
Don’t let the thought of a professional repair intimidate you. Regular maintenance still saves you from frequent, costly repairs. Plus, you’ll appreciate the top-notch performance you get from your leaf blower!
Always remember, it’s better to avoid causing more damage by trying to fix a problem you don’t understand. Reach out to a professional when needed.
• Checking the Throttle Control
The first step in a comprehensive engine check-up involves assessing the throttle control for the full range of motion on the carb throttle shaft/rotor. This process is crucial to ensure that the engine is operating at maximum efficiency.
In most vehicle models, the throttle control is positioned in a readily accessible spot within the engine compartment. Locate the control and check for any initial signs of wear or damage that could impede its proper functioning.
In my experience, it’s best to manually test the throttle control functionality by simply moving it from its fully closed position to its fully opened position and vice versa. During this process, the movement should be smooth and uninhibited.
If you notice any abnormal resistance or sticking during motion, it could indicate that the throttle shaft or rotor is not functioning properly. This issue may require the attention of a professional mechanic for further examination or possible replacement.
I usually recommend the Michigan Technological University for advanced understanding and training on such mechanical aspects. They provide high-quality resources beneficial for both novices and experts.
• Testing for Air Leaks: The Spray Test Method
Air leaks in the carburetor or intake area can cause significant performance problems in any engine. This issue can be subtle and difficult to diagnose without testing.
For effective and quick testing, use a common method often referred to as the ‘spray test’. To perform this test, the engine should be idling. Then, spray carb/choke cleaner or brake cleaner around the intake area while the engine is running.
If the engine speed changes significantly during this process, it’s often an indicator of an air leak in the area where the cleaner was applied. Note that safety precautions should be strictly adhered to while spraying any cleaner substance close to the engine due to its highly flammable nature.
• Checking for Pinched Fuel Lines
Pinched fuel lines can impede fuel flow to the engine, resulting in a variety of performance problems. These problems may include, but are not limited to, engine stalling, rough idling, and loss of power.
To check for pinched fuel lines, start by visually inspecting all fuel lines in the engine compartment. Look for any obvious signs of squeezing, kinking, or bending. These irregularities could be the root cause of the issue.
In case of any ambiguity, it would be wise to have the fuel lines examined or replaced by a professional. Remember, the goal is to ensure an unhindered flow of fuel to the engine for optimal vehicular performance.
The U.S. Department of Energy provides excellent resources on understanding fuel flow in vehicles, which could be handy for any motor enthusiast.
Always remember your vehicle’s performance largely depends on these regular engine inspections. Hence, ensuring these tests are conducted with the utmost diligence and expertise is vital. An engine kept in currently maintained condition will make for a smoother and safer ride for every journey.
I will make sure to follow these steps for maintaining my leaf blower, thanks for the useful information!
Thank you, Jimmie! I’m glad you found the information useful. Remember, regular maintenance is key to keeping your leaf blower working efficiently. Happy blowing!
This article is a lifesaver, my leaf blower wouldn’t start and now I know how to fix it.
Thank you for your kind words, Pedro! I’m glad the article was helpful in getting your leaf blower running smoothly again. Happy leaf blowing!
I appreciate the emphasis on regular maintenance for leaf blowers, it’s so important for their longevity.
Thank you, Enrique! Regular maintenance is vital for leaf blowers to ensure longevity and optimal performance. Remember to check air flow, spark plug, carburetor, fuel quality, primer, and spark arrestor. Happy leaf blowing!
Great tips on how to maintain a leaf blower, very informative article!
Thank you, Connie George! I’m glad you found the tips helpful for maintaining your leaf blower. Let me know if you have any questions or need further assistance.
I had no idea that the air filter was so important, thanks for the insights!
Thank you, Gabriel! We’re glad you found the information helpful. If you have any more questions or need further assistance, feel free to reach out.
I never realized there were so many factors that could cause a leaf blower not to start, very eye-opening article.
Thank you, Clifford Kelley! I’m glad you found the article informative. Remember, proper maintenance is key to keeping your leaf blower in top condition. Happy leaf blowing!
I’m glad I stumbled upon this article, very well-explained and detailed.
Thank you, Abigail! I’m glad you found the article helpful and detailed. Let me know if you have any questions or need further information.
Super helpful guide on troubleshooting leaf blowers, thank you!
Thank you, Warren! I’m glad you found the troubleshooting guide helpful. Good luck with your leaf blower repairs!
I learned a lot about leaf blower maintenance from this article, thank you for sharing your knowledge.
Thank you for the feedback, George! I’m glad you found the information about leaf blower maintenance helpful. Let me know if you have any other questions or need further assistance.
The section on checking the throttle control was very helpful, I didn’t know that could affect the leaf blower’s performance.
Thank you for your kind words, Jeff! It’s great to hear that you found the section on checking the throttle control helpful. Let me know if you have any more questions.
I never knew clogged fuel lines could be a problem with leaf blowers, thanks for pointing that out.
Thank you, Sophia! I’m glad you found the information helpful. Feel free to reach out for more tips on leaf blower maintenance. Happy leaf blowing!
I never knew the quality of fuel mattered so much for leaf blowers, thank you for sharing!
Thank you, Julian! I’m glad you found the information helpful. Feel free to reach out if you have any more questions about maintaining your leaf blower. Happy gardening!
The video links are a great addition, makes it easier to understand the maintenance steps.
Thank you for your feedback, Sofia! The video links are indeed helpful for understanding maintenance steps. Feel free to reach out if you have any other questions or need further clarification.
Great explanation about the spark plug and its importance, I will make sure to replace mine regularly from now on.
Thank you, Chester! Regularly replacing your spark plug will definitely help keep your leaf blower running smoothly. Happy cleaning!
Thank you for the step-by-step instructions on fixing leaf blower issues, very clear and concise.
Thank you, Reginald! I’m glad the instructions were helpful. Let me know if you have any more questions or need further assistance.
I appreciate the detailed steps for replacing fuel lines in the leaf blower, very informative.
Thank you, Javier! I’m glad you found the steps helpful for replacing fuel lines in your leaf blower. If you have any other questions or need further assistance, feel free to reach out. Happy gardening!
Very comprehensive guide on troubleshooting leaf blower issues, I feel more confident in maintaining mine now.
Thank you, Tommy! I’m glad the guide helped you feel more confident in maintaining your leaf blower. If you have any other questions or need further assistance, feel free to reach out. Happy leaf blowing!
The section on replacing the carburetor was very clear and easy to follow, thanks for the guidance.
Thanks, Edith! I’m glad you found the information on replacing the carburetor helpful. Let me know if you have any other questions or need further guidance. Happy leaf blowing!
I’m so glad I found this article, it’s been really helpful in understanding leaf blower maintenance.
Thank you for your kind words, Jean! I’m glad you found the article helpful in understanding leaf blower maintenance. Let me know if you have any other questions or need further assistance.
The tips on dealing with compression problems were very useful, I will keep an eye out for that.
Thank you for your feedback, Marshall! I’m glad you found the tips on compression problems helpful. Keep your leaf blower running smoothly!