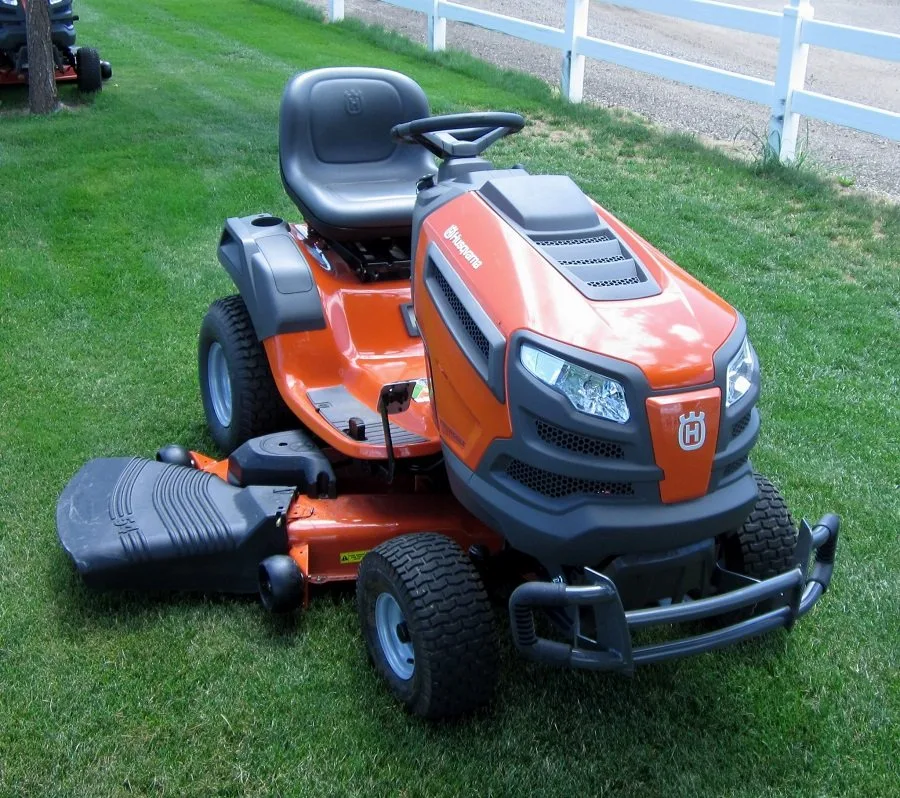
Have you ever experienced your riding lawnmower not properly mowing? Or leaving untrimmed lawn patches? The problem may be a loose drive belt. Luckily, the solution is pretty simple, and just a socket wrench is all you’ll need for the modification. If you’ve never undertaken this type of lawnmower maintenance before, don’t worry. We explain this information in a step-by-step procedure for you.
How to adjust belt tension on a riding lawnmower, step-by-step:
- Step 1: Test your current lawnmower drive belt’s tension.
- Step 2: Examine the components such as the pulleys, belt, spring, and swingarm on the mower and search for any damage.
- Step 3: Remove and pull back the clamp holding the cable to stretch the spring connected to it.
- Step 4: Start the engine and pull the blade engagement lever to monitor the belt operation after adjustment.

The drive belts connect the engine’s driveshaft to the transaxle pulley and transmit the torque and power to the cutting blades. In the case of riding lawnmowers, it lies underneath the mower deck. After prolonged use, the belt quality usually degrades. They have been known to become loose with time due to the elongation in their tensile cords. The solution is usually a replacement. However, you can always adjust the belt’s tension when the elongation is not very substantial, and we look at that in this article.
The article deals with all necessary steps to tighten the drive belt for a riding lawnmower. A quick explanation of some common questions asked about drive belts and lawnmowers is also provided. Stay tuned.
Contents
- 1 Adjusting the Belt Tension on a Riding Lawnmower, step-by-step:
- 2 Related Questions:
- 2.1 1. How to replace the drive belt on a riding lawnmower?
- 2.2 ● Step 1: Disengage the spark plug wire
- 2.3 ● Step 2: Disassemble the mower deck
- 2.4 ● Step 3: Detach the old belt
- 2.5 ● Step 4: Connect the new belt
- 2.6 ● Step 5: Reattach the mower deck
- 2.7 2. How long is the drive belt on a riding lawnmower?
- 2.8 3. Why does the belt keep falling off the lawnmower?
- 2.9 4. What are the two basic drive belt shapes used?
- 3 Final comments:
- 4 Beginning Steps: Checking the Belt
- 4.1 • Inspecting the Components
- 4.2 • Safety First: Disengaging the Blades
- 4.3 • Adjusting Tension: Loosening the Bracket Screws
- 4.4 • Ensuring Bracket Stability
- 4.5 • Engaging the Blades and Checking the Tension
- 4.6 • Understanding Loose Lawnmower Belts
- 4.7 • Safety Tips During Operation
- 4.8 • FAQs on Lawnmower Drive Belt
- 5 Maintaining Proper Belt Tension: A Recap
- 5.1 • Preparing to Adjust Mower Belt Tension
- 5.2 • Inspect the Belt Before Adjusting
- 5.3 • Locating Components of the Mower Deck
- 5.4 • Identifying the Tension Spring
- 5.5 • Adjusting the Belt Tension
- 5.6 • Checking the Impact of Adjustment
- 5.7 • A Video Guide for Visual Reference
- 5.8 • Consider Adjusting Before Replacing
- 5.9 • Troubleshooting Continuous Belt Slippage
- 5.10 • Understanding the Function of Drive Belts
- 5.11 • Deterioration of the Drive Belt
- 5.12 • Tightening the Drive Belt
- 5.13 • Consequences of Improper Drive Belt Adjustment
- 5.14 • When to Replace the Drive Belt
- 5.15 • Assessing Belt Tension
- 5.16 • Importance of Belt Twisting Tolerance
- 5.17 • Testing Belt Tension
- 5.18 • Handling Irreparable Belts
- 5.18.1 – Preparing the Mower for Belt Adjustment
- 5.18.2 – Initiating Secure Balancing Measures
- 5.18.3 – Loosening Spring Bracket Screws
- 5.18.4 – Adjusting Belt Tension
- 5.18.5 – Tightening Bracket Screws
- 5.18.6 – Double-Checking the Belt Tension
- 5.18.7 – Power Reconnection and Functioning Test
- 5.18.8 – Taking Extra Precautions
- 5.18.9 – Consulting the User Manual
- 5.18.10 – Seeking Professional Assistance
- 6 Understand Your Riding Lawnmower
Adjusting the Belt Tension on a Riding Lawnmower, step-by-step:
The steps below can help you in adjusting the tightness of a riding lawn mower drive belt.
● Step 1: Access the current belt:
Before we dig into it, we first have to see if the current drive belt is worth tightening. Most riding lawn mower models have a blade engagement lever beside the steering wheel. The lever pushes the blades in contact with the grass once the cutting deck is lowered on the ground.
To see whether your current drive belt has the right tension, start your engine and raise the throttle lever to the maximum. Next, press the lever up to engage the cutting blades. If you observe the blades cutting immediately after the lever is pushed, it means that the drive belt is tight enough. On the other hand, if a whirring sound is observed right after you push the lever, it means that the drive belt is slipping and needs to be adjusted.
● Step 2: Inspection of the mower deck:
We now know that the drive belt is slipping. To troubleshoot our problem, let us first begin inspecting the mower deck and its components. Pull the blade engagement lever and lower the mower deck as much as it can be. The following components must be assessed:
Belt: Ensure your drive belt is intact and that chunks and cracks are not to be seen. Please change it immediately when it appears damaged.
Swingarm: On the swingarm, pulleys and springs are mounted. At one end, the arm is pin connected, and at the other end, it is free to rotate. Ensure the arm rotates freely. If it doesn’t, drop some oil at its pivot and clean any debris that might be preventing it from rotating freely.
After the above components are operating correctly, press the lever again to unlock the blades.
Spring: The cable that arrives from the lever is attached to a spring. Touch the spring and see if it’s perfectly stretched or loose. Touch your belt and notice if it feels loose at the same time. If so, we can proceed to the next stage and adjust the tension of the belt.
Step 3: Tighten the belt with a cable adjustment:
After you saw a loosening belt, lock the blade lever again. You must have noted the wire coming from the blade lever connected to the springs is attached to a bracket on the deck.
On the bracket, loosen the bolts and pull the wire back towards you. Tighten the bolts and see if the string is stretched as well.
● Stage 4: Testing the tension in the new belt:
Start your lawnmower engine at full throttle after the bracket has been pulled back. Press the blade control lever up and notice the cutting activity of the blades immediately. When the blades start to cut almost instantaneously, the tension of the belt is optimal. However, if the belt remains loose enough, this technique did not add the requisite tension, and you should consider replacing the belt.
Related Questions:
1. How to replace the drive belt on a riding lawnmower?
In situations where tightening the drive belt does not make any difference, replacement is the imminent solution. The steps that should be followed for replacing the drive belt on a lawnmower are given below:
● Step 1: Disengage the spark plug wire
To start, turn the ignition switch off and remove the key. Afterward, lift the hood of your lawnmower and detach the spark plug wire. This step should be followed as a safety precaution.
● Step 2: Disassemble the mower deck
This step involves removing the mower deck from the main body.
– Step 2.1: Pull the mower deck down:
Push the blade engagement lever to lock the blades and lower the mower deck down to the ground.
– Step 2.2: Take the belt off
Take the drive belt off from the engine pulley that is connected to the drive shaft. Also, release the belt holders.
– Step 2.3: Disconnect the deck from the main body.
The mower deck needs to be detached. To do this, remove the supports connecting the deck to the mower body from both sides of the deck. This step includes removing all the retaining pins and washer supports from the suspension arms, lift links, and rear end brackets. Note that this detachment needs to be done from both sides of the deck once everything is removed. The deck comes off.
● Step 3: Detach the old belt
– Step 3.1: Take a snapshot
Note the layout of the belt passing through the pulleys and its positioning on the deck. Document the routing by taking a photograph on your phone.
– Step 3.2: Take the old belt off
Take the belt off from the three pulleys. There are two mandrel pulleys and one idler pulley that wrap the belt around them.
● Step 4: Connect the new belt
Install the new drive belt by passing it around the mandrel pulleys and the idler pulley. Make sure you also pass it through the belt keeper. Now, push the mower deck under the lawnmower to make the connections again.
● Step 5: Reattach the mower deck
To reattach the mower deck, connect all the supports, including lift links, rear-end brackets, and suspension arms on both sides of the deck. Secure the linkages using washers and retaining pins. Connect the belt to the engine pulley.
With everything fixed, raise the mower hood again to connect the spark plug. Insert the key in the ignition switch. Start your lawnmower.
2. How long is the drive belt on a riding lawnmower?
Drive belts are responsible for transmitting power from the engine shaft to movable parts in the mower, such as the blades. Most riding lawn mower models comprise primary and secondary drive belts. Both belts have a length varying from 42-55 inches based on the individual model.
3. Why does the belt keep falling off the lawnmower?
The drive belt of your lawnmower can fall off for different reasons. The exact causes depend on your machine’s model. However, some general causes result in this issue, and they are given below:
– Defective components:
If they’re not working, the driving belts and idler pulleys can affect the belt’s working. Besides, the swingarm must rotate around its pivot easily. You have to examine the adjustment of the mower deck. The front of the deck is usually lower 1/8 to 1/4 inch for normal conditions than the back. The belt begins to slip away at a pitch more significant than this.
– Buildup of debris:
The accumulation of dirt between the pulley and the bracket can also decrease the friction of the belt. Make sure the driving belt is not covered with dirt, grass, or stick. This condition is imminent under harsh operating conditions and low maintenance.
4. What are the two basic drive belt shapes used?
The drive belts can be of V-type or synchronous design. V-belts have a cross-section in wedge-shaped form. The only force that holds the belt together is friction. On the other hand, synchronous belts have a notched profile identical to the gears along their inner circumference. They are generally attached to gears and are typically used in timing operations.
Final comments:
Maintenance of the lawnmower belt would be one of the most common cases, mainly if it were not adequately maintained in the past. We recommend that you clean your lawnmower from time to time and check the deck components thoroughly to see if they are operating correctly. Besides, when making the belt replacement, you should always check the manual of the manufacturer. It is better to take precautions when making these changes so that your lawnmower does not start accidentally.
Beginning Steps: Checking the Belt
Before diving into adjusting the belt tension on a lawnmower, it’s essential to check the condition of the belt first. An impaired or damaged belt will not hold tension well, reducing the effectiveness of any subsequent adjustments.
It would be more beneficial to replace a damaged belt entirely than to adjust its tension. Therefore, do not stress yourself over tension adjustments on a weak or damaged belt.
You can check this informative link from Oregon State University ([1]) for more information on regular maintenance checks, including the belt condition.
• Inspecting the Components
A crucial aspect of the tension adjustment process is to identify and inspect the lawnmower’s vital components, specifically the spring, bracket, and other pertinent parts.
Damage to these components could impact the overall tension of the belt negatively, so ensure they are in good condition before moving on to adjust the tension.
• Safety First: Disengaging the Blades
Before you begin, I recommend highly that you disengage the blades. This step will make the process easier and safer for you, as working with engaged blades can be hazardous.
Disengaging the blades helps to decrease the tension on the belt, allowing you to adjust the tension more easily. Remember, safety always comes first in tool maintenance.
• Adjusting Tension: Loosening the Bracket Screws
To adjust the tension, the main action involves the bracket and the screws. Begin by loosening the bracket screws. Then, gently pull the bracket away from the spring step will increase the belt tension.
Be mindful when loosening the screws. Hasty actions may inadvertently damage them or impact the bracket’s overall structure.
• Ensuring Bracket Stability
After increasing the tension, it is imperative to tighten the screws properly to ensure the bracket maintains its stability. When not tightened correctly, the bracket can become susceptible to the pressure exerted by the belt, which could damage it over time.
Tightened screws will prevent unnecessary damage and ensure the bracket’s longevity, helping to maintain the tension in the long term.
• Engaging the Blades and Checking the Tension
Once you have tightened your screws properly, engage the blades and check the tension of the belt. Properly adjusted tension should allow the lawnmower to operate smoothly with no slippage or hitches.
However, if the belt is still loose even after these adjustments, you should repeat the process until you achieve the desired tension.
• Understanding Loose Lawnmower Belts
Loose lawnmower belts are a common issue and can be caused by various factors such as wear and tear, stretching, usage of the wrong belt size, or buildup of debris. Regular maintenance checks can help you recognize these issues early and take corrective action.
• Safety Tips During Operation
Safety should always be observed when operating a lawnmower. Always read and understand your owner’s manual thoroughly before operating your machine. Regular maintenance checks should also be part of your routine.
While performing maintenance or repairs, ensure to turn off the engine. Keep children and pets away from the area, as accidental activation of the mower can lead to severe injuries.
• FAQs on Lawnmower Drive Belt
Replacing the drive belt on a lawnmower can seem daunting, especially when determining the length of the new drive belt. Expert resources like this one from the University of Virginia ([2]) can provide detailed instructions and answer any frequently asked questions on belt replacement.
Maintaining Proper Belt Tension: A Recap
In summary, maintaining the proper belt tension on your riding lawnmower is critical for optimal performance. By checking the condition of the belt, inspecting the spring, bracket, and other components, and following precise adjustment steps, you can effectively maintain your lawnmower.
Always remember safety comes first. Always disengage your blades before making adjustments and always engage them afterward to check the tension. Finally, repeat the process as needed until the desired tension is achieved.
• Preparing to Adjust Mower Belt Tension
Before you make any adjustments to your mower’s belt tension, there are some vital steps to adhere to. An important factor to note is ensuring to park the mower on a level surface.
This initial step is crucial as it keeps your mower stable during the adjustment process, and it provides an accurate baseline for the adjustments you’re about to make.
• Inspect the Belt Before Adjusting
Before adjusting, I highly recommend inspecting the condition of the belt. A severely damaged or worn-out belt is not worth adjusting and should just be replaced. Therefore, it’s essential to ensure the belt is in good condition before proceeding.
Here’s a guide by the University of Minnesota Extension that helps you understand the lawn mower’s basics, including the belt.
• Locating Components of the Mower Deck
To gain access to the belt and other essential components, you should lower the mower deck to its lowest setting. Here, you’ll locate the belt, pulleys, and swing arm. The swingarm is especially important as it’s part of the system that maintains correct belt tension.
• Identifying the Tension Spring
The tension spring works in tandem with the swing arm to keep the belt firm and functional. One end of the spring is attached to a bracket, with the other end connected to the swing arm. This mechanism allows for the belt’s efficient movement in delivering power from the engine to the blades.
• Adjusting the Belt Tension
To effectively adjust the belt tension, focus on the screws at the base of the aforementioned bracket. Start by loosening these screws before pulling the bracket towards the end. Pull the bracket as far as it can go. Once the bracket is pulled to the maximum, retighten the screws.
• Checking the Impact of Adjustment
Engage the blades of the mower to test the effectiveness of the tension adjustment. A properly tightened belt should deliver power smoothly from the engine to the blades. This step is crucial in verifying whether the new tension setting is functional.
• A Video Guide for Visual Reference
If this process sounds complex, don’t fret. I recommend Steve’s Small Engine Saloon’s video guide to assist. The guide gives a comprehensive visual demonstration of the process, which can be beneficial for most people, especially visual learners.
• Consider Adjusting Before Replacing
If you feel that your mower’s belt is loose, your first instinct might be to replace it. However, I suggest first attempting to adjust the belt tension. This approach might save you time and money, especially if the belt isn’t at its lifecycle’s end.
• Troubleshooting Continuous Belt Slippage
Should your mower continue to experience belt slippage after adjustment, it’s time to consider that the tension might not be correctly set. In these instances, using a belt deflection tool can help. This instrument precisely measures the belt’s deflection, allowing you to fine-tune the tension accurately.
By following these steps, you should be able to locate crucial components, correctly adjust your mower’s belt tension, and troubleshoot if any problems arise.
Remember always to prioritize safety in all these processes by handling tools with care, wearing appropriate protective attire, and keeping a level-headed approach to troubleshooting.
• Understanding the Function of Drive Belts
In any engine-powered lawnmower, the component commonly known as the drive belt plays a critical role. This belt is responsible for connecting the engine’s driveshaft to the transaxle pulley.
However, its function goes beyond just connectivity. It is pivotal in transmitting torque and power from the engine to the lawnmower’s cutting blades. This transmission of power is key in enabling the lawnmower to cut grass effectively.
• Deterioration of the Drive Belt
Like many mechanical parts, the drive belt is not immune to wear and tear. With prolonged use, the tensile cords within the belt can elongate. This elongation results in the loosening of the drive belt.
It’s essential to understand that this process is less about design flaws and more about the natural degradation of the belt due to continual use and quality deterioration over time.
• Tightening the Drive Belt
When we discuss the topic of tightening the drive belt, it seems fairly straightforward. However, the steps involved in tightening the belt go beyond just turning some nuts and bolts. Each step undertaken has a specific purpose and plays an integral part in ensuring the effective functioning of the lawnmower.
• Consequences of Improper Drive Belt Adjustment
Ensuring the drive belt is properly adjusted is not a task to take lightly. If the belt is not adjusted correctly, it can slip and wear out prematurely. Reduction in cutting efficiency and potential damage to the mower are potential repercussions of an improperly adjusted drive belt.
• When to Replace the Drive Belt
Knowing when to replace the drive belt is as important as knowing how to replace it. While many guides provide steps for replacing the belt, it is vital for the operator to understand when replacement is necessary or how to determine if the belt needs changing.
• Assessing Belt Tension
When adjusting the belt, a crucial factor to consider is tension. While guidelines are often provided on how tight the belt should be after adjustment, it remains essential to understand how to measure the initial tension of the belt and how to assess if it’s too loose or too tight.
• Importance of Belt Twisting Tolerance
Many articles state that a deck belt should not be able to twist more than a quarter turn by hand when the mower is turned off. This specific measurement is crucial to the proper function of the mower. Overstepping this limit may lead to malfunctioning or damage to the machine.
• Testing Belt Tension
To test the tension of the belt, one common guidance is to turn on the mower and flip the deck engagement lever. But it’s important to understand how to interpret the behavior of the blades to ascertain if the belt is too loose or too tight.
• Handling Irreparable Belts
There might be situations where the deck belt cannot be tightened properly and might need replacement. Understanding the potential causes behind this difficulty and knowing what course of action to take is essential to any lawnmower operator.
For further understanding of drive belts in machinery, the MIT Mechanical Engineering Department provides comprehensive resources on similar mechanical topics.
– Preparing the Mower for Belt Adjustment
Before you begin adjusting the belt tension of your mower, it’s important to create a stable and safe environment. Anchor the mower on a stable, flat surface.
A garage or driveway is an ideal platform. To prevent any unforeseen movements, activate the parking brake. It’s a small step but highly crucial for your safety as well as maintaining the accuracy of the belt adjustment.
– Initiating Secure Balancing Measures
To ensure you are protected from any potential electrical mishaps, disconnect the power cable from the battery before you start the process. This small step can save you from any accidental shocks. It’s better to be safe and disconnect it before commencing work.
– Loosening Spring Bracket Screws
Identify the screws that connect the mower’s spring bracket to its body. These screws regulate the belt’s tension. To adjust them, take a wrench or pliers and carefully loosen the screws. Use slow and steady movements, as abrupt ones can lead to mishaps or incorrect resetting.
– Adjusting Belt Tension
Now, for the main step: adjusting the belt’s tension. This can be done by maneuvering the loosened bracket back and forth. The aim here is to make sure the belt is properly tightened and not sagging or overly taut.
– Tightening Bracket Screws
After confirming the belt tension is just right, use your wrench to tighten the screws again. Follow a clockwise direction for effective tightening. This is to ensure the adjusted settings remain stable.
– Double-Checking the Belt Tension
Before reattaching the mower’s deck, if it has been removed, double-check the belt tension. This cross-checking helps avoid any last-minute hitches and ensures the mower functions effectively.
– Power Reconnection and Functioning Test
Upon confirming the belt’s sufficient tension, you can reconnect the power cable to the battery. Then, power on the mower to verify its functioning. Always conduct this small test-run to ensure your adjustment was successful and the mower is running smoothly.
– Taking Extra Precautions
Remember – a mower packs a punch with its cutting blades located near the belt. Exercising maximum caution while working around this area can prevent any possible accidents.
– Consulting the User Manual
No matter how often you’ve fixed equipment, it’s always beneficial to refer to the user manual. It can serve as a valuable resource, providing essential maintenance tips and safety guidelines. Try the University of Maine’s publication on how to maintain and repair your lawn mower safely.
– Seeking Professional Assistance
Last but certainly not least, always be open to calling in an expert if you’re uncertain about the belt tension. Even after adjusting, if your mower isn’t functioning properly or you’re not confident about the belt’s condition, it’s best to consult an expert.
Don’t hesitate to let professionals intervene when needed. Sometimes, they can identify and rectify issues you may not.
Your mower plays a significant role in maintaining the aesthetics of your garden or lawn. Make sure you treat it with due care and respect, and it will reward you with an efficient performance. Happy gardening!
Understand Your Riding Lawnmower
Before we delve into adjusting the tension belt on your riding lawnmower, it’s crucial that we begin by identifying the key components.
The tension belt, commonly referred to as the drive belt, is a loop made out of rubber and metal wires, which helps transmit power from the lawnmower’s engine to the drive train and wheels.
With usage and over time, this belt may stretch or loosen, affecting your lawnmower’s performance. Accurate adjustment of the belt tension can improve performance and extend the lawnmower’s lifespan.
• Safety Precautions
Operating on the tension belt requires some safety precautions. Before proceeding to adjust the belt tension, it’s recommended to disconnect the spark plug wire to prevent accidental starting. Make certain that the lawnmower is on a flat, level surface to prevent it from moving.
Wear proper protective clothing, including work gloves and safety glasses, to protect your hands and eyes. Always refer to your lawnmower’s user manual for specific safety guidelines.
• Access the Riding Lawnmower’s Belt
Adjusting the tension on a riding lawnmower belt begins with gaining access to it. The exact process can vary based on the model of your lawnmower, but generally, you need to remove the mower deck.
This can be achieved by locating and removing the attachment pins before sliding the deck out from under the mower.
• Inspect the Belt
Before making any adjustments, inspect the belt for any signs of wear or damage. It’s recommended to replace the belt if you find any cracks, splits, rot, or severe wear, as these conditions will affect the lawnmower’s performance. If the belt is in good condition, then you can proceed to adjust the tension.
• Identifying the Belt Tensioner
The belt tensioner, generally placed somewhere on the lawnmower deck, is the key component that allows for adjustments to the belt’s tension. It’s usually a pulley mounted on a spring-loaded arm. When the tension on the belt is adjusted, this pulley moves up or down, providing more or less tension on the belt.
• Adjusting the Belt Tension
To adjust the belt tension, you need to loosen the bolt holding the tensioner in place. Once loosened, you can easily slide the tensioner along the slotted hole in which it resides.
To increase the tension on the belt, move the tensioner towards the front of the mower. Conversely, slide it towards the rear of the mower to decrease the tension.
While carrying out these adjustments, it’s important to ensure that you aren’t over-tightening the belt, as it can cause damage or premature wear.
Similarly, if the belt is too loose, it might slip and affect performance. A properly adjusted belt should have a slight amount of give but not be able to be pushed down easily.
• Securing the Tensioner
After the correct tension has been achieved, make sure to tighten the bolt to secure the tensioner in its new position. A wrench or a socket set will be required to tighten this bolt effectively.
• Replace the Mower Deck
Once you have successfully adjusted the tension and secured the tensioner, it’s time to replace the mower deck, slide it back under the mower, and reattach it using the attachment pins you previously removed. Make sure all the components are securely fastened.
• Final Checks
As a final measure, reconnect the spark plug wire and start your lawnmower. Test out your adjustments by engaging the blades and feeling for any vibrations. If heavy vibrations or slippages occur, there may be a need for further adjustments.
• Useful Learning Resources
To further your understanding and knowledge about adjusting the belt tension on riding lawnmowers, visit the U.S. Department of Agriculture’s olin.edu for excellent educational resources on riding lawnmowers and their maintenance.
• Professional Tips
Getting comfortable with adjustments and handling these machines can take time. Making small adjustments and testing it each time can lead to the best results.
Remember, the key to successful maintenance lies in regular checks and prompt replacements when necessary. Your lawnmower will repay your attention with effective and efficient service.
Are there any safety precautions when working on the lawnmower?
step, it’s important to double-check the tension on the belt by engaging the blades and observing their operation. If everything seems to be functioning smoothly without any slippage, then you have successfully adjusted the tension on your riding lawnmower belt. Happy mowing!
What are some signs that the tensioner needs to be replaced?
“Inspect the drive belt for signs of wear or damage before adjusting. Loosen the bolt on the tensioner to adjust tension carefully. Secure the tensioner in place and reattach the mower deck. Safety first!”
Is it necessary to adjust the belt tension often?
step, start the lawnmower and engage the blades to ensure that the belt is functioning correctly and without any issues. If everything sounds and looks good, you have successfully adjusted the tension belt on your riding lawnmower. Happy mowing!
What tools are required to adjust the belt tension?
step, start the lawnmower and observe its performance. Engage the blades to ensure that they are functioning smoothly and without any slipping. If everything is working correctly, then you have successfully adjusted the belt tension on your riding lawnmower. Happy mowing!
The safety tips provided are essential for beginners.
“Thank you, Roberta! We appreciate your feedback on the safety tips for beginners. Stay tuned for more helpful information on lawnmower maintenance on our blog.”
Can a drive belt affect the mower’s speed?
The drive belt can definitely affect your mower’s speed. Make sure to check the belt tension and adjust if needed. It’s a simple fix that can make a big difference!
How often should maintenance on the drive belt be done?
Maintenance should be done at the beginning of each mowing season to ensure optimal functionality. Thank you for reaching out!
Very informative article on lawnmower maintenance.
Thank you, Peggy! I’m glad you found the article informative. Let me know if you have any questions about maintaining your lawnmower’s drive belt tension.
How do you know if the belt needs replacing?
Freddie Boyd, to know if the belt needs replacing, check for cracks, splits, or severe wear. If the belt is intact, adjust the tension using the steps provided in the article. Hope this helps!
Thank you for explaining the process in simple steps.
Thank you for your feedback, Greg! I’m glad the process was easy to follow. Let me know if you have any more questions or need further assistance. Happy mowing!