Drying wood to a reasonable moisture level is an important process, especially if you will be using the lumber for woodwork or as firewood for heating. Naturally, wood is filled with a lot of moisture, and the moisture must be completely removed to improve the wood’s efficiency, durability, and ability to withstand pests and mold infestation. Particularly, firewood must be properly dried and seasoned for it to burn well and to prevent ashes and creosote from forming. If you’ll be using the lumber you’re the woodwork projects you can use a conventional oven to dry wood. This simply involves heating the wood in an oven at a lower temperature for one hour or more. If you want to dry large quantities or large pieces of wood, using an oven is not a good idea.
How to Dry Wood in an Oven:
- Step 1: Prepare Your Oven
- Step 2: Set the Temperature and Preheat the Oven
- Step 3: Measure Your Wood’s Moisture Level
- Step 4: Spread Your Wood Pieces Out On the Center Rack
- Step 5: Double-Check the Temperature and Placement of the Wood
- Step 6: Bake the Wood for One Hour
- Step 7: Check Your Wood after an Hour
- Step 8: Put Your Wood on Wire Cooling Racks to Let It Cool
- Step 9: Inspect the Wood for Cracks or Drying Defects

Drying wood in an oven is the most accurate and reliable method of determining the moisture content of wood at any moisture level. This is what makes it the main method against which other methods are compared. Do you want to know how to dry wood yourself using an oven? No? Then you’ve come to the right place. This article will guide you through the ways by which ovens can be used to dry wood.
Contents
- 1 Can You Use Your Household Oven For Small Pieces Of Wood?
- 2 How to Dry Wood in an Oven
- 2.1 ● Step 1: Prepare Your Oven
- 2.2 ● Step 2: Set the Temperature and Preheat the Oven
- 2.3 ● Step 3: Measure Your Wood’s Moisture Level before Adding It to the Oven
- 2.4 ● Step 4: Spread Your Wood Pieces Out On the Center Rack
- 2.5 ● Step 5: Double-Check the Temperature and Placement of the Wood
- 2.6 ● Step 6: Bake the Wood for One Hour
- 2.7 ● Step 7: Check Your Wood after an Hour of Heating
- 2.8 ● Step 8: Put Your Wood on Wire Cooling Racks to Let It Cool
- 2.9 ● Step 9: Inspect the Wood for Cracks or Drying Defects After It Cools
- 3 Final remarks
Can You Use Your Household Oven For Small Pieces Of Wood?
A conventional kitchen model microwave oven may be used to remove moisture to shorten the drying time. This kind of oven is best used in combination with an electrically heated forced circulation oven to achieve better results. Simply use the microwave to remove the moisture present in moisture sections of green wood (fresh wood), you can then move the wood to the electric oven to remove the remaining moisture using a more controlled condition. If you’ll be using a microwave oven, it is recommended that the oven has the following features;
- Carousel tray: It must have a carousel tray
- Low setting: It must feature a controlled setting that runs on medium-low (360 watts) to low (200 watts) power
How to Dry Wood in an Oven
As stated earlier, the most accurate method of measuring the moisture content of wood is the oven-drying method by the use of a conventional oven which is also known to wood processors as a domestic oven. An example includes electric convection or fan-assisted models. Drying wood in an oven is quite simple. Just get a sample of wood and place it in the oven at a temperature of 210 – 215 degrees Fahrenheit (99 – 100 degrees Celsius), then weigh the sample at intervals until you can no longer measure any weight loss. This simply indicates that the sample is ‘oven-dry’.
An alternative method which involves using a common or domestic garden microwave oven also produces good results, if the process is carried out carefully. Oven drying with a microwave oven takes about 20 to 45 minutes per sample and an average of 30 minutes. This method of drying generally takes less time, saving a great deal of time when compared to drying with a conventional oven. Just like how you use your conventional oven, the microwave oven drying method also requires special attention and detailed care. Any mistake in the procedure can easily lead to a series of problems and an eventual failure of the process. Below is a detailed guide on how to dry wood in an oven:
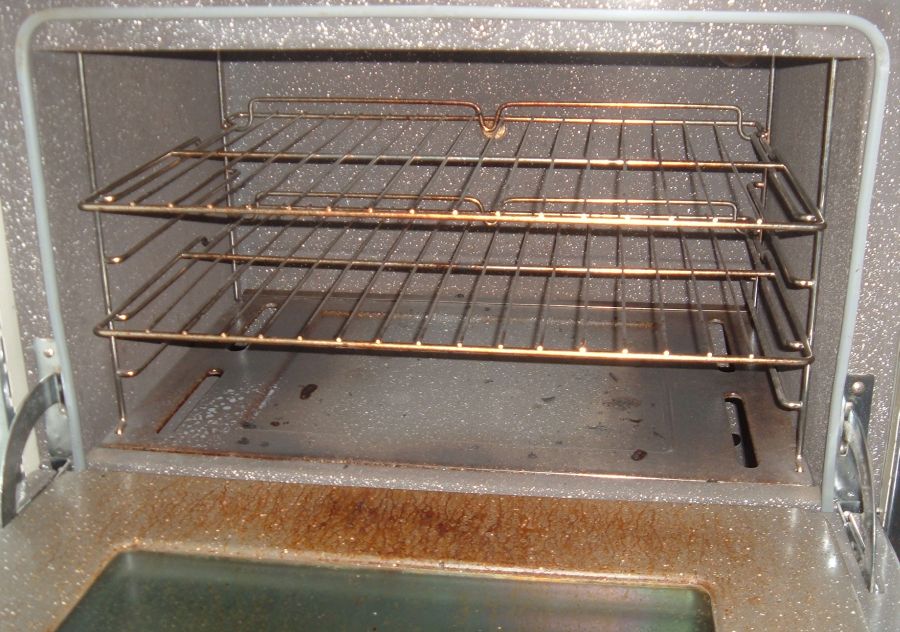
● Step 1: Prepare Your Oven
Take out your racks and reposition them so that one is at the bottom and the other one is in the center. Since you want all sides of the wood to dry evenly, you’ll be making use of the center rack. Carefully place a large sheet pan on top of the bottom rack, as this would serve as a safety precaution to catch any smaller pieces that may slip through the wire. While most ovens come with a built-in thermometer, you may decide to add an extra thermometer to the center rack to get a more accurate reading and to prevent excess loss of moisture. However, be sure to use one that is an oven-safe cooking thermometer.
● Step 2: Set the Temperature and Preheat the Oven
The next thing is to set the temperature of your oven to be closer to 218 degrees Fahrenheit (103 °C). If you’re using an analog oven, then you should first try to heat the oven between 200 degrees Fahrenheit (93 °C) and 225 degrees Fahrenheit (107 °C). You should avoid using higher temperatures as wood ignites at 500 degrees Fahrenheit. If your oven has a convection fan, turn it on to ensure circulation. Then check the thermometer after 15 minutes, and continue adjusting the settings until the internal temperature of the oven is between 210 and 225 degrees Fahrenheit.
● Step 3: Measure Your Wood’s Moisture Level before Adding It to the Oven
The best way to check for the moisture content of a piece of wood is to use a moisture meter. To get a better idea of how long you need to dry the wood for, you can write the moisture content down and carefully monitor it. Turn on your electric moisture meter, and press the two metal probe into the side of the wood with just a little pressure. It’s not necessary to insert the probes into the wood, and you also don’t need to apply extreme force. A moisture content level between 15-20% is suitable for firewood. If you do not have a moisture meter, then you can just weigh the wood before you start drying and weigh again after drying to note how much loss in weight. Note that the drier the wood is, the less the weight.
● Step 4: Spread Your Wood Pieces Out On the Center Rack
It’s better if none of your wood pieces touch one another; this will ensure that the heat reaches all parts of the wood. So you should spread them out across the center rack, placing smaller pieces of wood perpendicular to the rungs of the rack to prevent them from slipping through into the sheet pan at the bottom.
● Step 5: Double-Check the Temperature and Placement of the Wood
You must double-check all the factors before closing the oven. Check the temperature and ensure that it isn’t higher than 225 degrees Fahrenheit- this will prevent drying defects such as warping or cracking. Double-check how each piece of wood is placed to ensure that none is touching the another. Your wood may not dry evenly if any of them is touching another.
● Step 6: Bake the Wood for One Hour
Allow the wood to bake in the oven for an hour, you can set a timer for accuracy. The oven should not be left unsupervised while the wood is drying as wood always has a chance of igniting when heated. Hence you should also keep a fire extinguisher close in case of a fire outbreak.
● Step 7: Check Your Wood after an Hour of Heating
After one hour, you must check the moisture content of your wood by using your moisture meter. Use your moisture meter the same way you did before you started drying your wood. Simply press the metal probes into the wood by applying a minimum amount of pressure. After taking note of the moisture content, continue to heat your wood for the next fifteen minutes (if your wood requires additional drying). If you don’t have a moisture meter, you can try the method mentioned above. Simply take a sample of the wood and wait for it to cool on the cooling racks before weighing it.
● Step 8: Put Your Wood on Wire Cooling Racks to Let It Cool
Make sure you’re wearing thick oven mitts before you attempt to lift each piece of wood out of the oven. You can also use a large pair of tongs. Carefully place the heated wood on your wire cooling rack. Then spread them out so that each piece cools evenly. Try to avoid touching the wood to prevent injury.
● Step 9: Inspect the Wood for Cracks or Drying Defects After It Cools
Overheating of wood can cause drying defects such as cracks or warp. Carefully inspect your wood to check for defects. If you find a small crack, you can still repair it by filling it with wood glue or epoxy. To unwarp wood, wrap it in a damp cloth and iron it continuously to straighten it. However, if you’ll be using the wood as firewood, then you don’t necessarily need to worry about cracks or defects.
Final remarks
This common kitchen equipment can go a long way by transforming into a useful tool for drying wood quickly. This will provide excellent results and save you a great deal of time if done properly. It will also save you the initial cost of building or purchasing a kiln. Finally, it will also leave you with more time to do the things you want.
Does the size of the wood affect the drying time in the oven?
Hi Irma, yes, the size of the wood can affect drying time in the oven. Smaller pieces dry quicker and more evenly than larger ones due to better air circulation.
The step-by-step guide is very helpful for someone like me who has never attempted to dry wood before. Thank you for the clear instructions.
Thank you for the positive feedback, Beverly! I’m glad you found the step-by-step guide helpful for drying wood. Good luck with your future wood projects!
I wonder if there are any other household items that can be repurposed for drying wood, like the oven method. Do you know of any?
Hi Michelle, you can use a microwave oven for smaller wood pieces, but a conventional oven like a domestic oven is best for larger pieces. Check out the details in the blog post for more information.
I appreciate the safety tips included in the article, such as using oven mitts and having a fire extinguisher nearby. Safety first!
Thank you, Sherry! Safety is always a priority, and proper drying methods ensure quality wood. Enjoy the DIY projects!
I’m excited to try drying wood in the oven myself after reading this article. It seems like a simple and effective method.
Tracy, I’m glad you found the article helpful for drying wood in the oven. It’s a simple and effective method for improving wood quality. Enjoy trying it out!
Can you dry all types of wood in an oven, or are there certain kinds that shouldn’t be dried this way?
Yes, you can dry all types of wood in an oven, but for large quantities or pieces, a conventional oven is not recommended. Be sure to monitor moisture levels for best results.
This method seems easy to follow and effective for drying wood. Thank you for the detailed instructions.
Thank you for your kind words, Darryl! I’m glad you found the method easy to follow. Happy woodworking!
Thank you for explaining the importance of drying wood properly. It’s a crucial step in woodworking projects that shouldn’t be overlooked.
Thank you, Ramon! Properly drying wood is indeed crucial for woodworking projects. I’m glad you found the information helpful. Happy woodworking!
It’s fascinating to learn about the different methods of drying wood. The oven method seems convenient and efficient.
Thank you, Earl! The oven method is definitely an efficient way to dry wood while also being accurate in determining the moisture content. I’m glad you found it fascinating.
The article fails to mention the potential dangers of drying wood in an oven, including fire hazards and health risks. It also overlooks the fact that using an oven for this purpose may void the warranty or damage the appliance.
Thank you for your input, Maureen. I appreciate your concerns regarding potential hazards and risks when drying wood in an oven. It’s important to take safety precautions and consider all factors before attempting this method.
The tips on inspecting the wood for cracks or defects after drying are very useful. It’s important to ensure the wood is in good condition before using it.
Thank you, Emily! I’m glad you found the tips on inspecting dried wood useful. It’s crucial to ensure the wood is in prime condition before using it for any project.
Does drying wood in an oven affect the quality of the wood for woodworking projects?
Thank you for your comment, Cindy! Drying wood in an oven can affect the quality of the wood for woodworking projects if not done properly. Be sure to monitor the process carefully to achieve the desired results.
What are some signs that the wood is completely dried and ready to be used?
Hi Marvin, signs that wood is completely dried include a decrease in weight, a hollow sound when tapped, and no visible moisture on the surface. Let me know if you need more information.
Can you stack multiple pieces of wood on top of each other in the oven for drying, or must they be spread out?
Hi Marsha, it’s best to spread wood pieces out when drying in the oven to ensure even drying. Stacking may cause uneven moisture levels. Hope this helps!
I had no idea that the moisture content of wood was so important for its durability and efficiency. This article was very informative.
I’m glad you found the article informative, Sara! If you ever decide to dry wood in an oven yourself, feel free to reach out for more tips.
I never knew you could dry wood in an oven! This is a great alternative for those who don’t have access to a kiln.
Reginald, I’m glad you found the information helpful! Drying wood in an oven can be a great alternative to a kiln. Thank you for reading the blog post.
How long does it take for the wood to cool down after being in the oven?
Hi Felecia, after removing the wood from the oven, it’s best to let it cool for about an hour before handling it. This will prevent any risk of burns or injuries.
Can you reuse the same wood multiple times for drying in the oven?
Yes, you can reuse the same wood multiple times for drying in the oven as long as it has not been damaged or altered in any way.
Is it safe to leave the wood in the oven unsupervised for the entire hour?
Yes, it is safe to leave the wood in the oven unsupervised for the entire hour as long as you monitor the temperature closely to prevent any ignition risk.
Do you need any special equipment or tools to dry wood in the oven, or can you just use the oven itself?
Hi Ian, you can simply use your household oven for small pieces of wood, no special equipment needed. Just follow the steps in the blog post to properly dry the wood. Hope this helps!
What temperature is too high to dry the wood in the oven without causing damage?
Hi Austin, temperatures above 225 degrees Fahrenheit can cause damage when drying wood in the oven. Stick to 210-225 degrees Fahrenheit for best results. Happy woodworking!