Need to know ‘Where to spray a carb cleaner on a lawnmower?’ Our 7-step guide is the solution. We offer clear, concise instructions to ensure your lawnmower maintenance is successful. With our guide, you can tackle this task confidently and efficiently, ensuring your lawnmower’s longevity.
To clean a lawnmower carburetor without removing it, spray the carb cleaner directly into the exposed carburetor’s center after removing the air filter cover. Let soak for 15 minutes, scrub with brush. Replace housing, reattach fuel line & air filter. Check performance before mowing—clean yearly or if struggles.

Are you curious how to clean a lawnmower’s carburetor without removing it? It may seem daunting, but with the proper guidance, it’s simpler. Don’t stop now! Our guide will show you how step by step.
Contents
- 1 How to Use Carburetor Cleaner: Spraying Carb Cleaner on a Lawnmower, Step by Step
- 2 Frequently asked questions:
- 3 Things to consider when buying a lawn mower carburetor cleaner
- 3.1 ● Dip versus spray carburetor cleaner:
- 3.2 ● Odorless or minimum odor:
- 3.3 ● Compatibility with rubber and painted surfaces:
- 3.4 ● Storability of Carburetor Cleaner:
- 3.5 ● Efficiency of the Carburetor Cleaner:
- 3.6 ● Do I need a Non-chlorinated product?
- 3.7 ● Ensure you have enough carb cleaner
- 3.8 ● Protect yourself:
- 4 Remarks:
- 5 Choosing the Right Carburetor Cleaner
- 5.1 • Optimal Duration for Cleaning a Mower Carburetor
- 5.2 • Effective Lawn Mower Carburetor Cleaning Techniques
- 5.3 • Potential Risks of Using Carburetor Cleaner
- 5.4 • Lawn Mower Carburetor Cleaning Frequency
- 5.5 • Alternative Methods or Products for Cleaning Lawn Mower Carburetors
- 5.6 • Potential Issues During Carburetor Cleaning
- 5.7 • Safe Handling and Storage of Carburetor Cleaner
- 5.8 • Gain Additional Knowledge in Cleaning a Lawn Mower Carburetor
- 5.8.1 – Understanding the Role of a Lawnmower Carburetor
- 5.8.2 – Varieties of Lawnmowers
- 5.8.3 – Identifying Signs of a Faulty Carburetor
- 5.8.4 – The Need for Tools and Skills
- 5.8.5 – Essential Tools for Cleaning the Carburetor
- 5.8.6 – How to Clean The Carburetor Without Removal
- 5.8.7 – The Importance of Regular Carburetor Cleaning
- 5.8.8 – Making the Right Choices For Your Lawnmower
How to Use Carburetor Cleaner: Spraying Carb Cleaner on a Lawnmower, Step by Step
Before starting with the carburetor cleaner, there are some preliminary steps you should look at:
Step 1: Prepare the lawnmower
Before repairing any mechanical or electrical machinery, turn off its engine. In this case, turn off your mower’s engine if you were already mowing and allow it to cool down. Wait for a few minutes before attempting to clean the carburetor. This is an essential step in your lawn care routine.
Step 2: Removing the air filter
After shutting off your mower’s engine, you need to remove the air filter on the engine. Air filters are used in lawnmowers to remove dirt and debris from the air supplied to the engine for combustion.
It prevents dirt from entering the carburetor. This step is crucial to understand the process of cleaning a carburetor.
Before removing it, clean the area around the air filter housing. Remove the dust and debris and prevent them from going inside the engine. A protective housing covers the air filter. Remove the housing from the air filter assembly by using a screwdriver. Now, remove the air filter.
Check the following video for some hands-on demo:
Step 3: Exposing the carburetor’s interior
After you remove the air filter cover and the filter, the carburetor shall be exposed to you. You shall see the carburetor’s connections and the linkage. We cannot expose the carburetor’s interior parts without removing these components.
So, remove the fuel line connections and carburetor’s linkage. This step will provide a clear view of the carburetor’s interior.


In my 20 years of experience, I’ve found that difficulty starting, irregular idle, stalling, and poor performance are common signs that a lawnmower carburetor needs cleaning. It’s crucial to recognize these signs early to maintain the longevity of your lawnmower.
Step 4: Spraying with carb cleaner
To clean the carburetor without removing it, you need the right carburetor cleaner. There are many different types and qualities of carburetor cleaners. Purchase some commercial lawn mower carburetor cleaner. Make sure it is of the best quality. The steps below can be followed for efficient spraying:
- Step 1: Spray the carb cleaner directly on the carburetor to clean it. Make sure the spray reaches the interior jets of the carburetor. This is how to use carburetor cleaner effectively.
- Step 2: The spraying direction should be appropriately followed. Place the tip of your carb cleaner in the center of your carburetor. Start spraying it thoroughly.
- Step 3: Start from the center and move your hands around and over the carburetor.
- Step 4: Remember that your carburetor and engine should run while spraying to dislodge the deposits more efficiently.
- Step 5: Only spray the carburetor. Don’t use the carb cleaner on any other part of the engine.
- Step 6: It should penetrate the carburetor’s throat for effective cleaning. This is how you use carburetor cleaner on a lawnmower.
While cleaning, if you encounter any problem in following the steps, you can check the following video for further guidance:
Step 5: Removing the deposits
While cleaning, some dirt and fuel deposits get stuck at the lower throttle of your mower’s carburetor. These dirt and fuel deposits should be removed properly. After that, spray the carb cleaner on the choke shaft and the base of the carburetor’s throat to remove debris.
Now shut off the engine and keep spraying on the carburetor center to remove extra buildup. This step is crucial in allowing the lawnmower to function correctly.
Step 6: Reattach the cover and linkage
After cleaning the carburetor, you now need to reassemble its parts correctly. Reattach the cover and the linkage. Place the air filter in its original place. Use a screwdriver to tighten the parts of the air filter assembly properly. Make sure everything is secured around your carburetor.
Step 7: Inspecting the carburetor
It is better to inspect the carburetor after cleaning to see the improvements. While cleaning, you might have opened some linkages crucial for the engine’s working. Take a flashlight and inspect all the components that were removed thoroughly.
Check whether they are adequately attached or not. If not, you should fix them. Now start the mower and check its sound. Your engine should have a smoother start than before. This is a crucial part of landscaping maintenance.
Following the abovementioned steps will help you clean your mower’s carburetor more efficiently. Typically, I recommend cleaning the carburetor once per season.
Understanding the function of a carburetor is key to maintaining your lawnmower. The carburetor’s job is to mix air and fuel in the correct ratio for combustion, which is essential for the lawnmower’s operation
It helps the lawnmower to work without developing issues. Regular use of carburetor cleaner on your lawnmower can prolong its life and improve its performance.
So, start today and give your lawnmower the care it deserves. Remember, a well-maintained lawnmower is vital to a beautiful lawn. Happy mowing with Chorbie!
Some preventive measures:
Safety is essential for every person. While repairing any mechanical or electrical machine, you need to take care of some safety measures. While cleaning the carburetor, you should also keep in mind the following safety measures:
- Use Gloves: Your hands must be covered with gloves to avoid getting them all oily or greasy. Also, you do not want to get burns if some parts are hot. Time and again, it’s been proven that gloves can prevent many injuries.
- Remove the plug: Unplug the spark plug wire because you do not want to get an electric shock while fixing your lawnmowers. This is especially important if your new mower has a powerful engine that could lead to severe injuries.
- Careful Handling: Be cautious with the types of equipment you use. You should get help from a professional if you do not know how to use some equipment. Remember, Chorbie is a company that offers professional help for such tasks.
- Check the guards: Make sure guards are in place and secured. Doing this lets you fix the carburetor without damaging other parts of your machine. The guards’ ability to protect the filter and other sensitive parts from the grime is crucial.
- Use first aid box: You should keep the first aid box with you to treat any injury timely instead of rushing here and there at the moment of need.
Frequently asked questions:
1. Which lawnmower carb cleaner is best?
Carb cleaner is a spray used to clean the carburetor without the need to remove it from the engine. A good quality carb cleaner should be used to clean the carburetor. This ensures it does not cause further issues and works effectively for longer.
Choke Cleaner is known for its best quality as one of the best carburetor cleaners. Therefore, you should prefer to use choke cleaner to clean your carburetor.
2. The lawn mower carburetor is still not working well after cleaning; what should we do?
If you have thoroughly cleaned your mower’s carburetor by completely following the abovementioned steps, the machine is still not working correctly. Then, you have no other option other than calling a professional.
The specialists have extensive experience managing these small vehicles and complete knowledge of handling such extreme cases. A lawn’s carburetor is an essential component in the operation of a lawnmower, and it is essential to maintain a regular check on it.
Please spend some time on its regular maintenance to work effectively for a more extended period without causing any issues.
3. Is it harmful if the carb cleaner is accidentally sprayed on other parts of the lawnmower engine?
Carb cleaner is used to clean the carburetor. It removes dirt and oil deposits from the carburetor. If you have accidentally sprayed the carb cleaner on other parts of the engine, there is no need to worry. It is not harmful to your machine as it is built to dislodge any form of sludge on metal parts.
Things to consider when buying a lawn mower carburetor cleaner
Here are the eight most important things you should consider when purchasing lawn mower carburetor cleaner:
● Dip versus spray carburetor cleaner:
If your carburetor is not very dirty, I recommend using a spray can. It works much faster, and you often do not need to remove the carburetor. The spray can easily reach most components.
Dip cans need a little more time than spray cans but can be cleaned more thoroughly. You need to disassemble the carburetor and let it soak in the liquid. Most products mention leaving the parts to soak for 30 to 60 minutes, but I often leave them overnight.
The advantage is that the product has more time to clean than the carburetor cleaner spray. If you have a dirty carburetor, I recommend using a dip can.
● Odorless or minimum odor:
If you are allergic to chemical fumes and cannot resist them, use a proper mask and gloves to prevent health issues. Remember, the larger the volatile organic compounds in carburetor cleaners, the worse they smell. So read the ingredients and go for the options with minimum odor.
● Compatibility with rubber and painted surfaces:
Most carburetors have rubber seals or small nonmetal components. Ensure that the carb cleaner does not damage them. Similar to painted parts close to your carburetor, you do not want to hurt them.
● Storability of Carburetor Cleaner:
Check the expiry date of the carburetor cleaner. If you purchase a giant spray can or a lot of dip fluid, you probably do not use it all and want to store it for another year. Check the can on how to keep it best.
● Efficiency of the Carburetor Cleaner:
Not all products are the same; some products are stronger than others. I recommend using a stronger carburetor cleaner if you have a dirty carburetor. It should be capable of removing all kinds of thick contaminants. Often, a dip carburetor cleaner is a better choice.
● Do I need a Non-chlorinated product?
Some states of the US, including Florida, have banned the use of chlorinated chemicals, so make sure you go for the less toxic, non-chlorinated carb cleaners if you live in those states. These are safer to use with plastic parts as they cause no apparent damage to them but will dry later and are flammable.
● Ensure you have enough carb cleaner
Carburetor spray cans are generally much cheaper than dip cans. They typically contain enough fluid to clean your carburetor multiple times.
This is important as you might need to spray multiple times.
Dip cans are more expensive and require fluid to soak the carburetor thoroughly. Ensure that the can is big enough to soap your carburetor fully.
If you have a large carburetor, you might need to use a bucket and add water to the carburetor cleaner to soak it thoroughly. Check the product on how to do this.
● Protect yourself:
Some carburetor cleaners can be nasty. Ensure you wear gloves to avoid getting the effect on your hands. And wear a mask, mainly if you use a spray can
Remarks:
To conclude, we can say carburetor cleaning is essential for an engine. If the carburetor is not maintained well from season to season, it may develop further problems. And your lawnmower performance may decrease. You can clean the carburetor of our mower without removing it with the help of a carb cleaner.
This article has a step-by-step process for cleaning the carburetor with a carb cleaner’s help. Considering the instructions and safety measures, we can easily clean a carburetor with a carb cleaner’s help.
Don’t forget to perform maintenance of other lawnmower parts, such as filters, spindles, and blades.
Choosing the Right Carburetor Cleaner
When maintaining your lawn mower, selecting the right carburetor cleaner is crucial. While the article didn’t specify the type of cleaner recommended, based on my experience, a cleaner using a combination of solvents is often effective for carburetor maintenance.
Products offering a high-pressure nozzle can also aid in dislodging tough deposits.
• Optimal Duration for Cleaning a Mower Carburetor
The duration that the carburetor cleaner should rest on the lawn mower carburetor is another aspect that wasn’t clarified in the article. However, I suggest leaving the cleaner on for at least 15-20 minutes for best results. This allows the solvents sufficient time to break down any grime or deposits.
• Effective Lawn Mower Carburetor Cleaning Techniques
An effective cleaning technique is paramount for carburetor maintenance. Unfortunately, this was not delineated in the article. But from my practice, using a stiff, small brush to scrub away the loosened deposits after applying the cleaner can be beneficial.
Common mistakes I’ve seen people make when cleaning a carburetor include not removing the carburetor, not cleaning all parts, and not allowing it to dry completely. Avoiding these mistakes can ensure a more effective cleaning process.
• Potential Risks of Using Carburetor Cleaner
Understanding the potential risks and hazards of using carburetor cleaners is critical for safe usage. These cleaners often contain flammable materials and may be toxic. Always use in a well-ventilated area, and wear gloves and eye protection.
• Lawn Mower Carburetor Cleaning Frequency
The article didn’t mention the frequency of cleaning your lawn mower carburetor. But as a rule of thumb, clean it at least once every mowing season. If your mower is experiencing issues like a hard start or poor performance, it could indicate that a carburetor cleaning is overdue.
• Alternative Methods or Products for Cleaning Lawn Mower Carburetors
Though not mentioned in the article, other viable methods for cleaning lawn mower carburetors exist. Home remedies might include solutions such as vinegar or a mixture of lemon juice and salt. Commercial alternatives include ultrasonic cleaners, which can give more comprehensive cleaning.
• Potential Issues During Carburetor Cleaning
There are potential issues that one might encounter during carburetor cleaning. For example, a common problem is the misplacement of tiny parts. I recommend taking a few pictures of the carburetor before disassembling it for cleaning to avoid any complications.
• Safe Handling and Storage of Carburetor Cleaner
The article does not address carburetor cleaners’ safe handling and proper disposal. Always store carburetor cleaner in a cool, dry place, away from open flames.
Proper disposal is also necessary for environmental compliance. For more information, visit the EPA’s resource on hazardous waste disposal here.
• Gain Additional Knowledge in Cleaning a Lawn Mower Carburetor
For comprehensive tips and further knowledge in cleaning a lawn mower carburetor, relying on trusted resources is a good step. These may include trusted mechanics, trusted websites from manufacturers, or University extension sites offering guidance on lawn mower maintenance.
– Understanding the Role of a Lawnmower Carburetor
The carburetor in a lawnmower is a crucial part of the internal combustion engine. Its primary role is to mix air and fuel in the correct proportions for efficient combustion. The power generated from this combustion process propels the rotating blades of the mower, effectively cutting grass.
– Varieties of Lawnmowers
There are different types of lawnmowers, each suited for specific lawn requirements. These categories include push-reel lawnmowers for smaller spaces, walk-behind lawnmowers for medium-sized lawns, and ride-on lawnmowers for sprawling lawns.
– Identifying Signs of a Faulty Carburetor
A malfunctioning carburetor will impact the overall performance of your lawnmower. Some common signs of carburetor trouble include weakened engine power, the emission of black smoke, overheating, unpredictable shutdowns, and starting difficulties.
Recognizing these symptoms promptly can help prevent further damage or costly repairs.
– The Need for Tools and Skills
Maintenance and troubleshooting of your lawnmower carburetor require the correct tools and technical expertise. Gathering all the necessary tools and familiarizing yourself with the lawnmower’s mechanics before attempting any repairs or cleanings is essential.
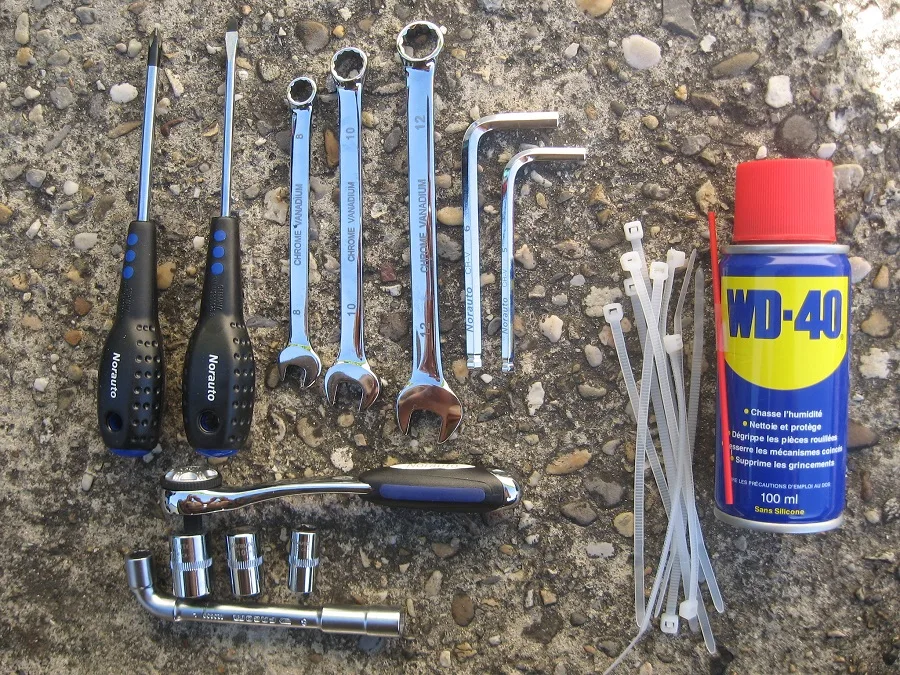
– Essential Tools for Cleaning the Carburetor
Cleaning a carburetor doesn’t always require you to delete it. With some standby tools like a screwdriver, rags, flashlight or headlamp, aerosol cleaner, and an air-compressor gun, you can effectively clean the carburetor in place.
– How to Clean The Carburetor Without Removal
Follow these steps to clean your lawnmower’s carburetor without removing it:
- Turn off the lawnmower and unplug it if necessary.
- Conduct an initial check to identify any visible issues.
- Carefully remove and clean the lawnmower’s air filter.
- Inspect the interior of the carburetor and examine connecting wires.
- Use the air compressor gun to blow away any dirt or deposits.
- Apply aerosol cleaner as directed on the product packaging.
- Manually remove any stubborn deposits.
- After cleaning, inspect the carburetor once again before reassembling.
– The Importance of Regular Carburetor Cleaning
Cleanliness dramatically impacts the effectiveness of your lawnmower. Regularly cleaning the carburetor can enhance its performance and lifespan.
– Making the Right Choices For Your Lawnmower
Ensure you understand the problem’s source before running to a repair shop. Not all issues require professional fixes and can sometimes be resolved through simple cleaning. I also recommend using high-quality aerosol cleaners. Selecting the correct cleaner is crucial for effective and safe cleanup.
For more detailed information on this topic, The University of Connecticut Home and Garden Education Center provides a comprehensive guide on lawnmower maintenance.
I’ve always been confused about cleaning the carburetor, this cleared things up for me.
I’m glad to hear our guide on cleaning a lawnmower carburetor without removing it was helpful for you, Jimmie. Don’t hesitate to reach out if you have any more questions. Happy mowing!
Can I use homemade solutions like vinegar for cleaning the carburetor?
Yes, it’s not recommended to use homemade solutions like vinegar to clean the carburetor. Stick to commercial carb cleaner for best results. Check our guide for detailed steps.
What are the signs that indicate my lawnmower’s carburetor needs cleaning?
For signs of a dirty carburetor, look for engine stalling, poor performance, and difficulty starting. Regular cleaning helps prolong your lawnmower’s lifespan.
I’ll be sure to clean my carburetor regularly to avoid issues, thanks for the reminder.
Thank you, Jose! Regular carburetor cleaning is key to a well-functioning lawn mower. If you have any questions or need further guidance, feel free to ask. Happy mowing!
Which carb cleaner brand do you recommend for the best results?
For best results, I recommend using Choke Cleaner for cleaning your lawnmower’s carburetor. It is known for its quality and effectiveness. Happy mowing!
I appreciate the comprehensive information provided in the article, very helpful. Thank you!
Thank you for your kind words, Alexander Scott! I’m glad you found the information helpful. Feel free to reach out if you have any more questions or need further assistance. Happy mowing!
How often should I clean the carburetor to maintain optimal performance?
To maintain optimal performance, cleaning the carburetor yearly or if issues arise is ideal. Give your lawnmower the care it deserves for longevity and efficiency.
I appreciate the step-by-step instructions, makes it easy to follow along.
Thank you, Salvador! I’m glad you found the step-by-step instructions helpful. Happy mowing!
Great video resources provided to complement the instructions, very helpful.
Thank you for the positive feedback, Barry! We’re glad you found the video resources helpful in complementing our instructions for carburetor cleaning. Let us know if you have any other questions.
Is it okay to clean the carburetor if I’m not very mechanically inclined?
Yes, you can clean the carburetor without removing it. Follow our guide step by step for efficient cleaning. With the right instructions, you can maintain your lawnmower easily and confidently.
This guide is so helpful, thank you!
Thank you for your kind words, Christina! I’m glad you found the guide helpful. If you ever have any more questions or need assistance, feel free to reach out. Happy mowing!
I never knew it was this easy to clean a carburetor, thanks for breaking it down.
I’m glad you found the guide helpful! Cleaning a carburetor can seem daunting, but with clear steps, it becomes easier. Keep your lawnmower in top shape for a beautiful lawn. Happy mowing!
How can I tell if the carburetor has been cleaned thoroughly enough?
To ensure thorough cleaning of your lawnmower’s carburetor, scrub with a brush after spraying carb cleaner into the exposed center. Follow the steps provided in our guide for best results. Happy mowing!
Safety tips were a great addition, always important to stay safe while working on machines.
Thank you, Noah! Safety is paramount. Happy mowing and remember to follow our detailed guide for efficient lawnmower maintenance. Your safety tips are appreciated!
I’ve never been confident in cleaning my lawnmower, but this guide helps a lot.
I’m glad our guide helped boost your lawnmower cleaning confidence, Felecia! Keep up the great work in maintaining your equipment for optimal performance.
What should I do if I accidentally dislodge small parts while cleaning the carburetor?
Hi Clyde Welch, If you accidentally dislodge small parts while cleaning the carburetor, try to identify where they came from and reattach them carefully. It’s best to work on a clean, flat surface to prevent further mishaps. Good luck!
Is it possible to damage the carburetor while cleaning it without removing it?
To Jacqueline Price: Yes, it is possible to damage the carburetor while cleaning it without removing it. It’s crucial to follow proper steps to prevent any harm.
Are there any specific environmental considerations when disposing of carburetor cleaner?
When disposing of carb cleaner, look for disposal instructions on the product label or the manufacturer’s website. Consider recycling it if possible to minimize environmental impact.
Very informative article, I feel more confident in maintaining my lawnmower now.
Thank you, Albert Ray! Your confidence in maintaining your lawnmower increases our joy in providing helpful information. Keep up the good work, and happy mowing!
Cleaning the carburetor without removing it seems less daunting now, thanks for the tips.
Thank you, Nathan! We’re glad you found the tips helpful. Happy mowing!